- "Terrorhurtz is all about the axe... which is this brutal axe on wheels. Elegantly simple and strong... Terrorhurtz's strategy is usually just get stuck in and go for it!"
- — John Reid
Terrorhurtz was a robot from Oxford which competed in Series 5-10 of Robot Wars, as well as the second series of Robot Wars Extreme. The second entry from Team Hurtz and the direct successor to Killerhurtz, Terrorhurtz was notable for its powerful axe weapon, which was among the most powerful in Robot Wars.
Terrorhurtz had a brief but successful career towards the end of the original series, far eclipsing its predecessor by finishing fourth overall in Series 6. This run to the Grand Final was punctuated by a series of brutal knockout wins, including those on long-time veterans Panic Attack, Spawn Again and Bigger Brother. It also triumphed in a Challenge Belt tournament in Extreme 2 after defeating Dantomkia, but failed to win the belt from Tornado in the climatic Challenge bout. An improved Terrorhurtz was then created for Series 7, but arrived at the studio unfinished, and was disqualified in spite of being the competition's third seed. Notable moments from Terrorhurtz's televised career include its controversial first battle with Ming 3 in Series 5, its violent Series 6 campaign, and its bludgeoning defeat of S.M.I.D.S.Y. in Extreme 2.
Following a successful spell at live events - twice emerging as the FRA UK Heavyweight Champion[1] - Terrorhurtz proved competitive throughout all three of its Revival Series campaigns. This brought its total Robot Wars appearances up to six, making Team Hurtz second only to Team Make Robotics in the number of series entered.
Terrorhurtz itself was confounded by a malfunctioning axe in Series 8, though it was able to defeat Carbide by knockout in its Heat - a feat which no other robot would achieve. Series 9 saw a slightly diminished performance marked by defeats against Sabretooth and Aftershock, but Terrorhurtz was able to collect a string of wins in Series 10 to reach the Heat Final and, in turn, secure a place in the 10 Robot Rumble. It would also contribute to the victory of Team UK in Robot Wars: World Series, immobilising Diotoir and pitting TMHWK to secure their triumph in Episode 1.
Design[]

Terrorhurtz in Series 5
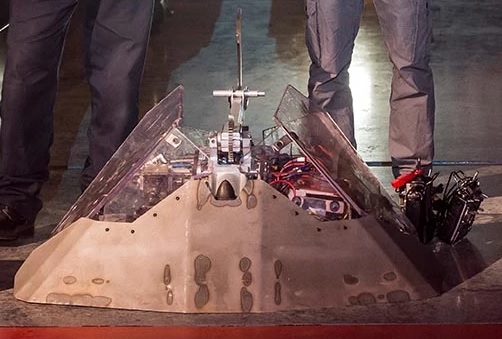
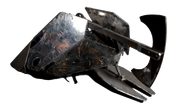
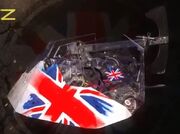
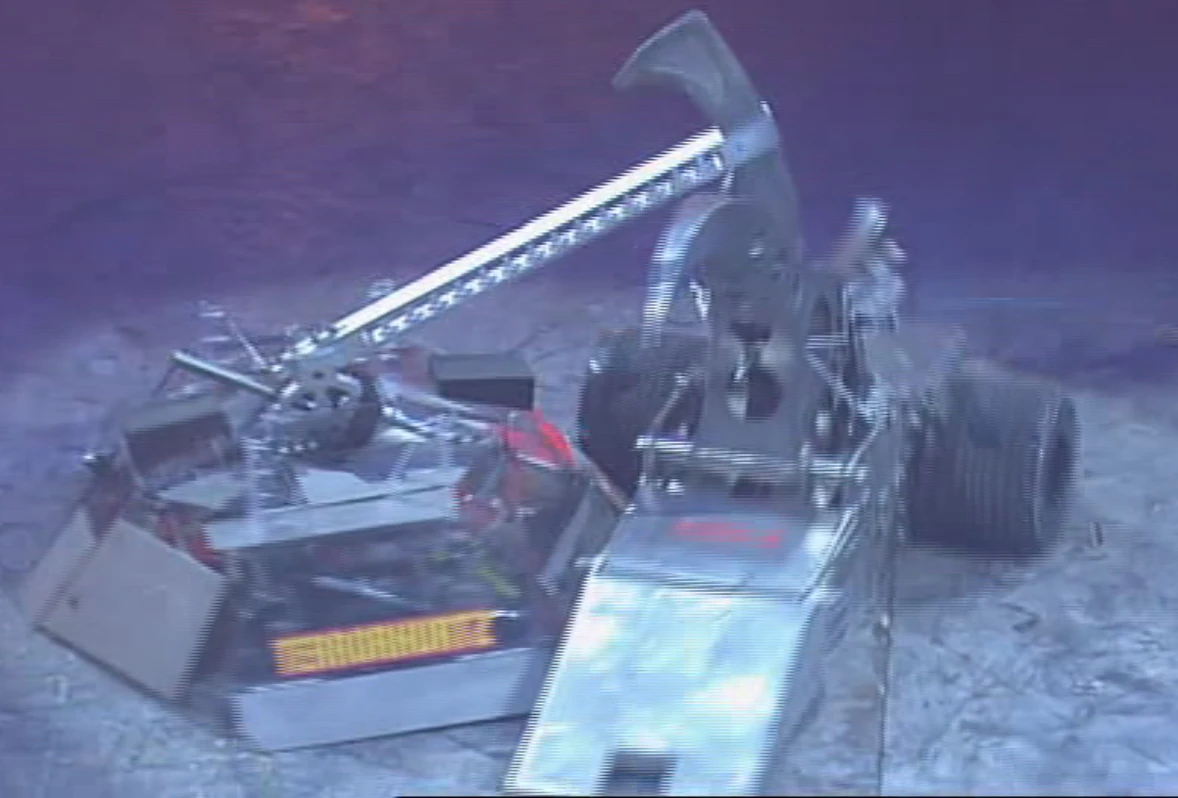
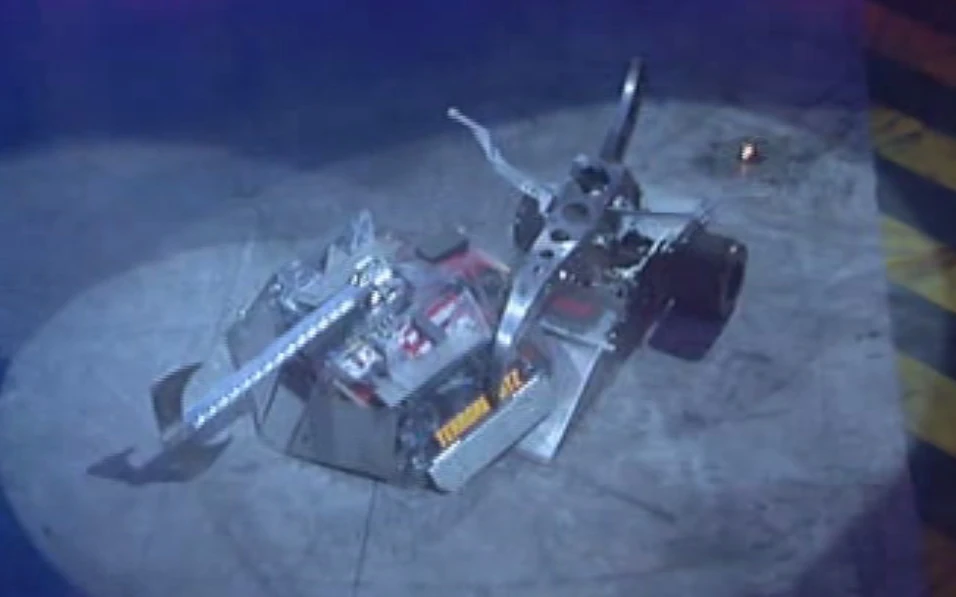
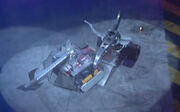
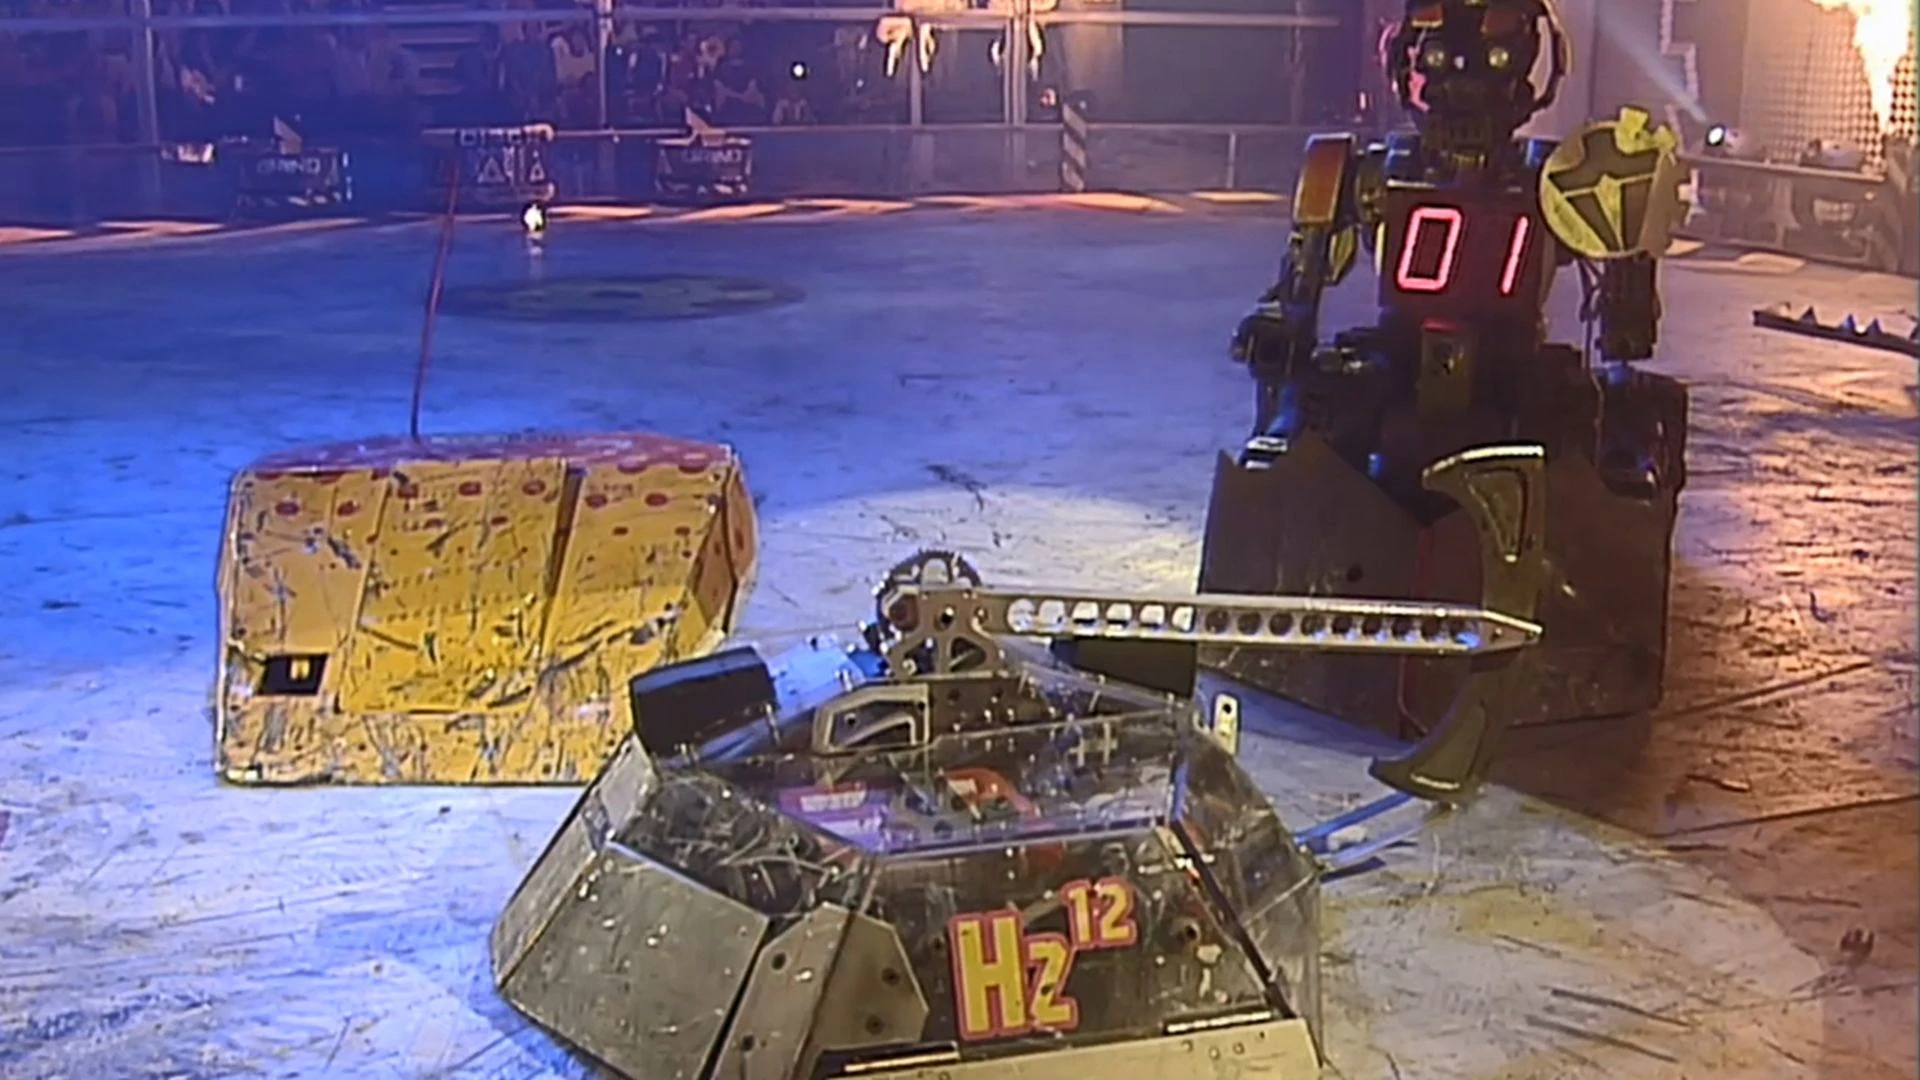
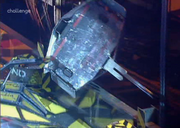
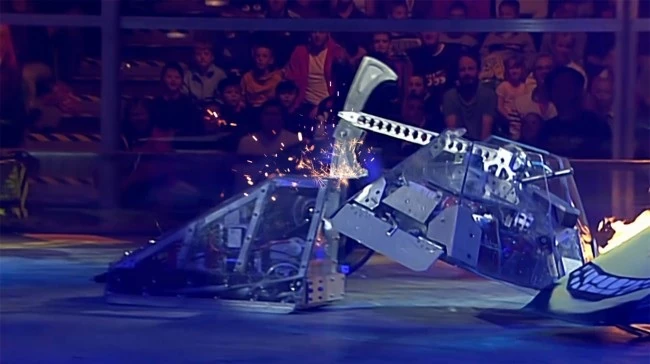
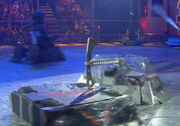
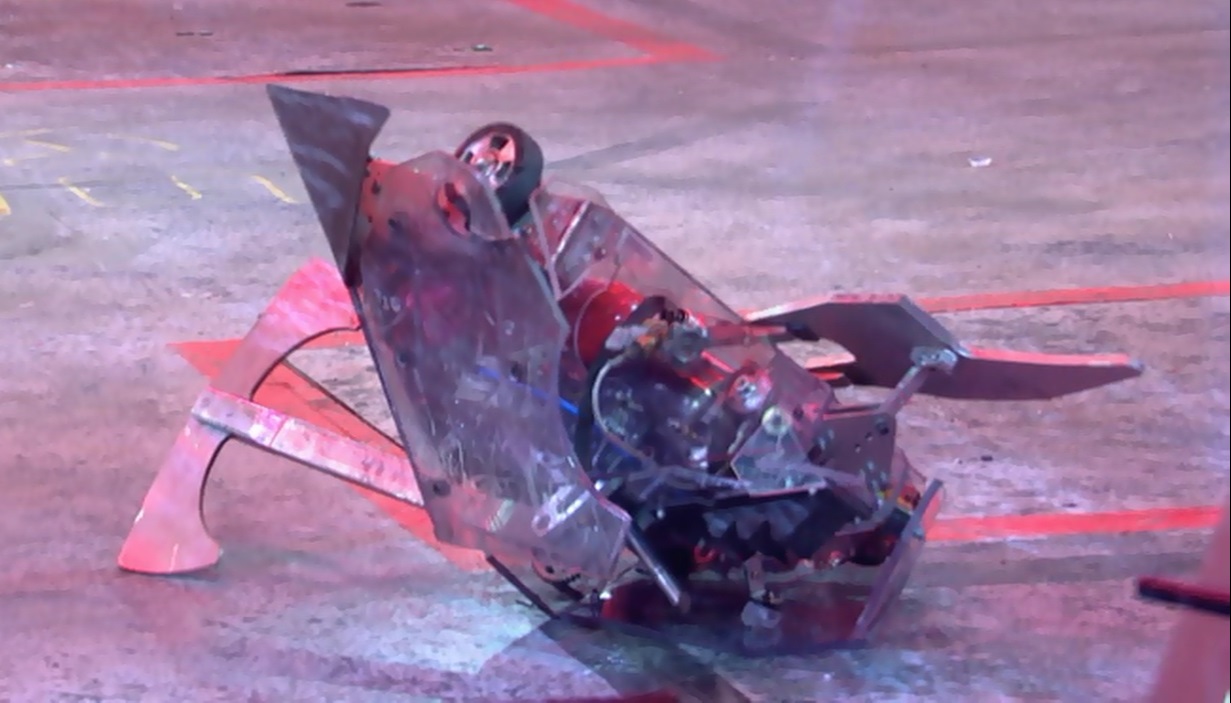
Terrorhurtz was a roughly octagonal-shaped robot with thick polycarbonate and steel armour, two-wheel drive and a double-headed 'headman's style' axe. The axe was attached to a rack-and-pinion system driven by a single pneumatic ram, which was initially powered by a buffer tank feeding in from numerous CO2 canisters. Terrorhurtz's axe was designed to attack from both the robot's front and back with equal efficiency, also serving as the robot's srimech on multiple occasions. The weapon proved so powerful that it could lift the entire robot's chassis off the arena floor, a characteristic Terrorhurtz would occasionally display in both televised runs. While allowing it to perform a 'victory dance' - as showcased in Series 10 - the latter lead to its weakness being listed as 'Unpredictable Spasms' in Series 6 and Extreme 2. Terrorhurtz also featured a low ground clearance due to its side skirts, and a top speed of 12mph, later 11mph.

Terrorhurtz in Series 6
Terrorhurtz as it looked for Extreme 2
In Series 6, a pair of wheelie bars were added to the rear of Terrorhurtz in an attempt to stabilise the robot when the axe fired. Terrorhurtz was also given revised steel plates and skirts to offer greater protection around the front, back and sides of the machine. The armour plating was extended further upwards from Extreme 2 to further protect the robot, and Terrorhurtz's name and symbol, featured on the sides in Series 5-6, were removed for this and all subsequent series.

The only televised shot of Terrorhurtz in Series 7, showing its axe with safety protection

Terrorhurtz as it appeared in Series 7
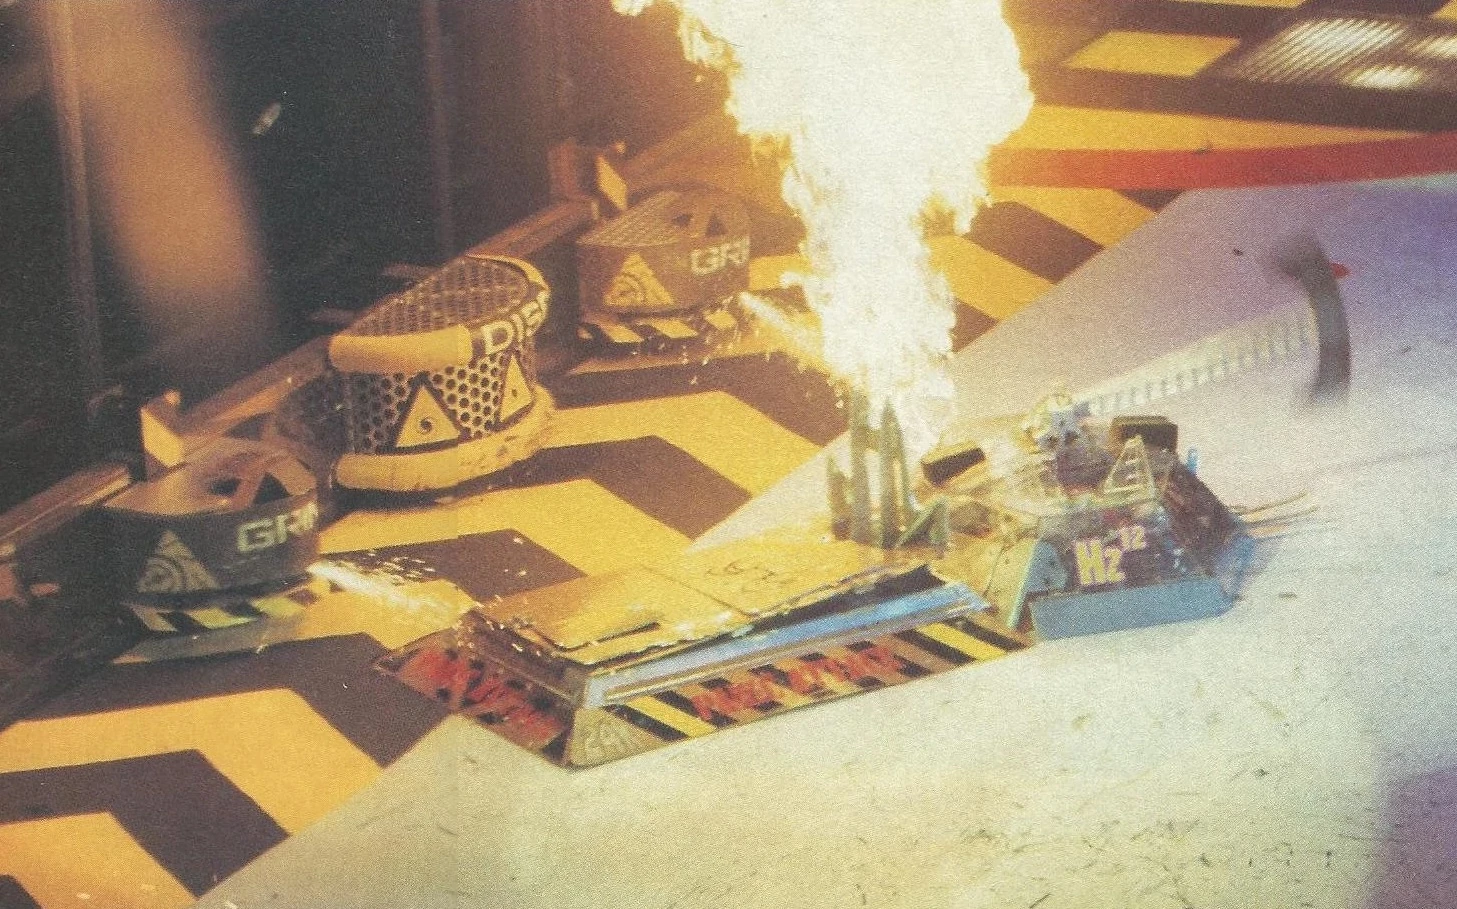
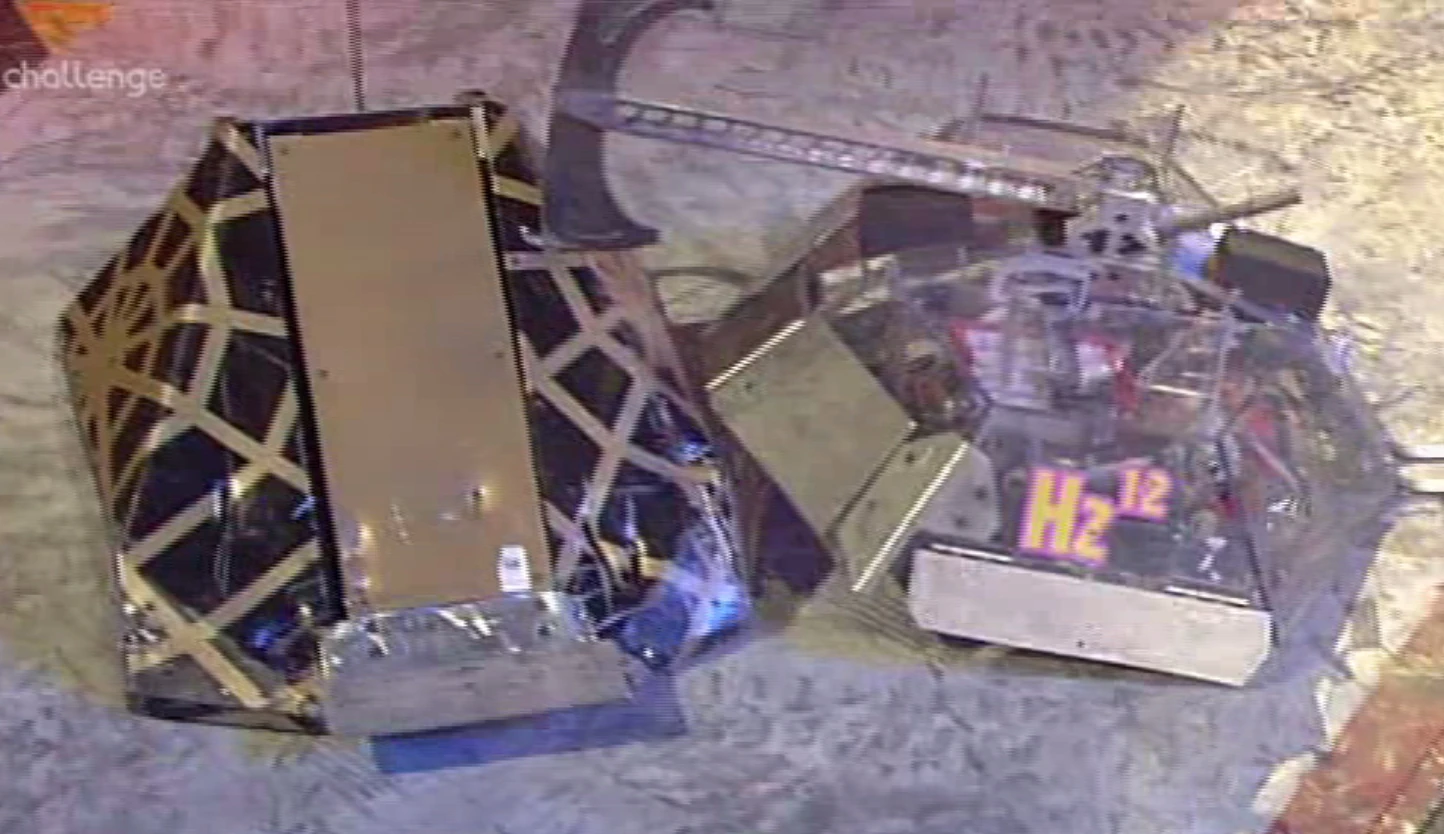
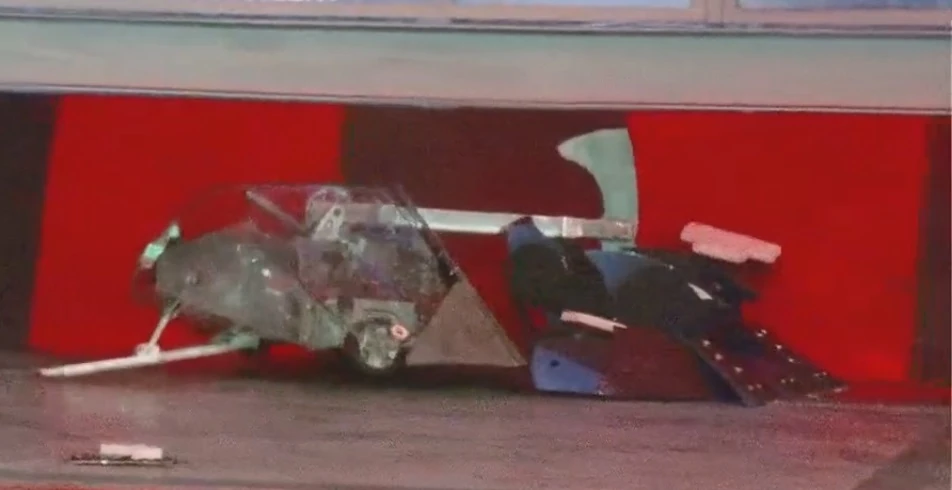
For Series 7, Terrorhurtz underwent a significant redesign, sporting thicker armour, a longer and narrower rear section and a pneumatic tail to prevent the robot from leaping off the ground when the axe fired. Additionally, the axe and pneumatics systems received substantial revisions, most notably the use of a single buffer tank and two large fire extinguishers instead of the numerous smaller canisters previously used. However, this evolution of Terrorhurtz would not be seen in televised combat, as it was disqualified from Series 7 after arriving at the studio unfinished.
- "TERRORHURTZ's polycarbonate armour is made from the same materials as the arena walls. It has the biggest axe weapon in the competition. At 90cm long, the blunt titanium axe fires at 100mph and is designed to bring maximum trauma to opponents' interior workings."
- — Robot Wars: Build Your Own Robot on Terrorhurtz in Series 8

Terrorhurtz in Series 8

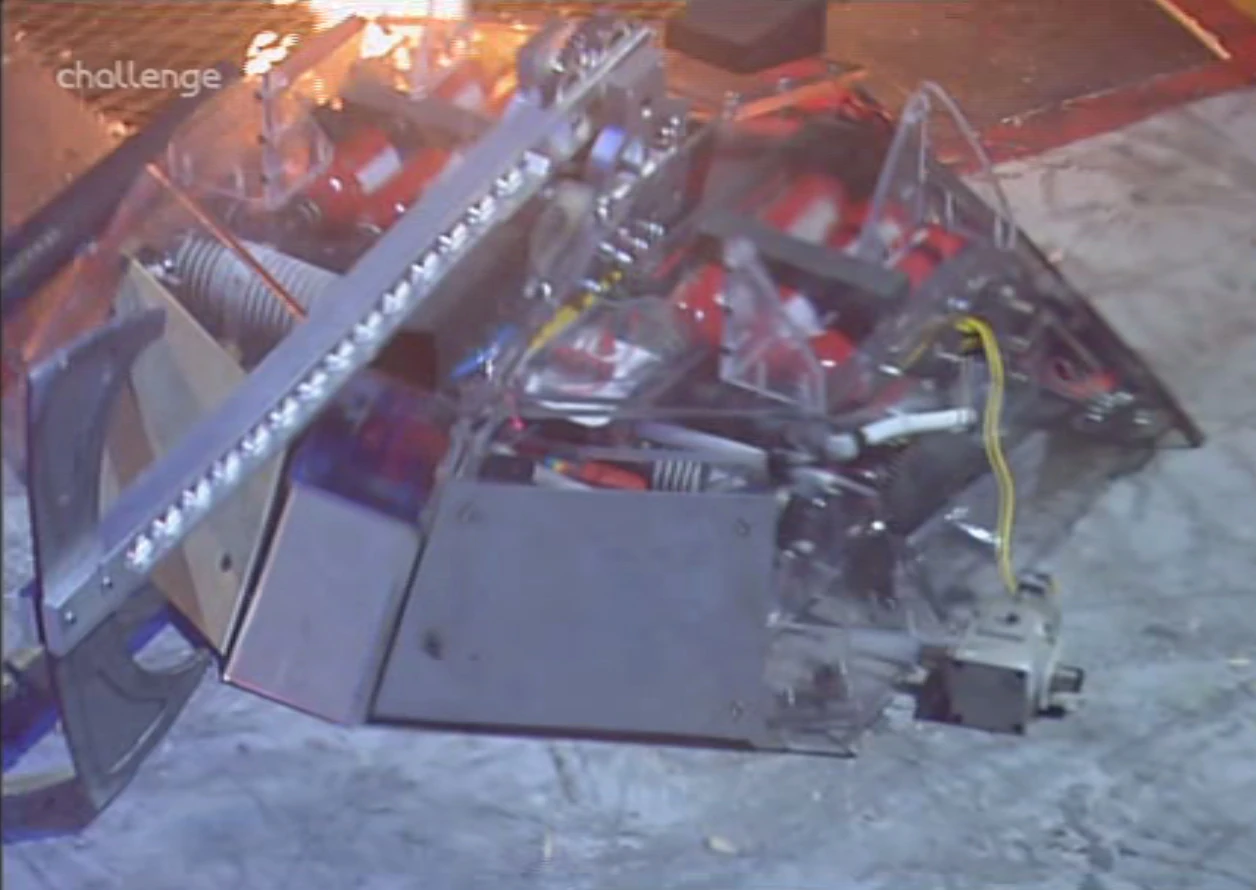
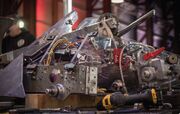
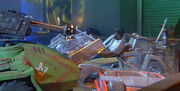
Terrorhurtz disassembled in Series 8
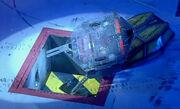
In 2016, Terrorhurtz was rebuilt for Series 8 following a long and successful career on the live circuit. Weighing 107kg (106kg in Series 9), this incarnation incorporated key strengths of the live circuit version, such as lithium polymer batteries, along with thicker steel and polycarbonate armour plating. A new axe was created with a titanium head, and was modified to fire at speeds of 100mph - with a tonne of force upon impact. Terrorhurtz's front scoop was also redesigned with a generally broader surface - including wraparound corners - and a shallower angle than previous incarnations. The latter gave it additional resistance against modern spinners, especially horizontal variants, although its internals and wheels were more exposed to overhead attacks than the previous versions seen in televised combat.
- "For Series 9 TERRORHURTZ returned with the team working on reliability issues that caused a disappointing performance in Series 8. The largest axe weapon in the series delivers a tonne of force on impact."
- — Robot Wars: Build Your Own Robot on Terrorhurtz in Series 9

Rear view of the Series 9 Terrorhurtz

Terrorhurtz on the turntable in Series 9
A largely unchanged version of Terrorhurtz returned for Series 9, featuring a new front wedge and extra internal padding. The transmission system which powered the robot's axe was also reworked for greater efficiency. By November 2016 - one month prior to the series' filming block - Terrorhurtz's chassis was publicly stated to comprise of 12mm polycarbonate bulkheads and a 6mm polycarbonate baseplate; all held together with 2mm stainless steel brackets and a series of M8 and M6-type screws. The latter change was to increase long-term durability; Team Hurtz's previous method of drilling and tapping through the polycarbonate itself had lead to the material fracturing over time.[2]
- "We had this ridiculously complicated system, we had two transmitters cabled together. It was just not very good, so we've completely changed that, we've got two independent systems now."
- — John Reid on the primary change to Terrorhurtz between Series 8 and 9 - its axe transmission system

Terrorhurtz in Series 10 after fighting Vulture for the second time
Terrorhurtz in the World Series
In Series 10, Terrorhurtz's front wedge was once again remanufactured, this time out of 6mm ARMOX 500. Additionally, its axe rest was refined to a pointed design to make it harder for spinners to make contact, while the robot's drive system was upgraded to feature 52V Bosch GPA 400 motors for increased pushing power. Terrorhurtz's overall weight was also further reduced to 103.6kg total.
- "After the damage caused by Aftershock in Series 9, TERRORHURTZ rebuilt their chassis, refined the pneumatic system and added brand new armour for Series 10."
- — Robot Wars: Build Your Own Robot on Terrorhurtz in Series 10
Etymology[]

The Terrorhurtz logo
The name Terrorhurtz was a pun on the SI unit of frequency, "hertz", with the prefix "tera". This made the name Terrorhurtz a natural successor to the team's previous robot Killerhurtz, as the 'kilohertz' SI frequency (103 Hz) is of lower value than terahertz (1012 Hz). These values also inspired the design of the Terrorhurtz logo.
In Robot Wars: Build Your Own Robot, written by personal friends and teammates of Team Hurtz, Robo Challenge, Terrorhurtz is consistently capitalised as TERRORHURTZ. This all-capitals spelling was never used in any other official Robot Wars media.
The Team[]
- Main article: Team Hurtz
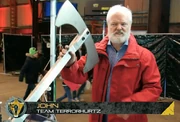
Terrorhurtz was designed and built by the captain of Team Hurtz, 58-year old Oxford-based freelance design engineer John Reid, who also drove Terrorhurtz in all of its battles. In Series 5 and 6, John Reid was joined by his Killerhurtz teammate Dominic Parkinson who operated Terrorhurtz's axe, with Dominic's wife Iona also appearing in Series 5, and a single battle of the Sixth Wars.
")
")
")
")
")
For Extreme 2, John Reid welcomed new members to Team Hurtz. Having previously received an email from amateur rocket physicist Nick Lynch, who offered feedback on how to improve Terrorhurtz, John Reid invited Nick, alongside his brother James Lynch, onto the team for Extreme 2 and Series 7. Nick Lynch operated Terrorhurtz's axe from Extreme 2 onwards, and remained John Reid's sole teammate throughout the three reboot series. John Reid took his captain role very seriously, and would give strict instructions to Nick Lynch on when to fire Terrorhurtz's axe in reboot battles, having previously been very active in firing the axe during the original run of the show.
Qualification[]
To secure a place in Series 5, Terrorhurtz was required to attend the qualifiers, as it was an as-yet unproven machine compared to the preceding Killerhurtz. Its first-ever battle was against Tetanus; however, this proved a difficult start to Terrorhurtz's career, as it was quickly scooped up by its opponent, since the robot had yet to be fitted with its front wedge plates. Tetanus demonstrated dominance by lifting and carrying Terrorhurtz over to the inactive pit multiple times. A further attack resulted in Tetanus piercing Terrorhurtz's gas canister, causing the entire robot to become immobilised.
- "Tetanus had its first ever fight against Terrorhurtz. It was Terrorhurtz' first ever fight...although they would have been automatically through to the show with Killerhurtz as a seed, they had to do the qualifiers as it was an unproven new robot. Imagine the arena completely bare...no house robots, no grinders on, no flames etc and the pit button wasn't active. As luck had it the design of Tetanus was perfect against Terrorhurtz. They fit perfectly into our lifter/crusher. This was before Terrorhurtz had that metal scoop/wedge at the front. So he drove at us and we scooped him up, while lifted he was immobile and we could carry him around easily. We would back up and drive into the pit release tyre (just to show we had control) then we would drop him over the pit square (even though the pit didn't drop, to show we could have won). We did this a number of times while taking no damage for his axe. Then the last time we picked him up we really squeezed hard and twisted him up, about to make the regulator for his axe break and his CO2 bottle burst and Terrorhurtz was frozen up inside his polycarbonate body and instantly stopped working. We undeniably won hands down. …No other robot wanted to fight Terrorhurtz. Lots of them were changing batteries and doing pointless work in their bots so they could say they weren't ready and could dodge fighting Terrorhurtz. We always liked a challenge!"
- — Conrad Snook in 2019[3] (edited)
Even with this, Terrorhurtz would secure a discretionary place in the televised Fifth Wars alongside its victorious opponent, its weapon power leaving other series hopefuls especially fearful about fighting it.
Terrorhurtz then qualified for Series 6 under currently unknown circumstances, and qualified directly for Series 7 as the third seed. Terrorhurtz was granted a place in Series 8, 9 and 10 through open applications.
Robot History[]
Series 5[]
- "A compact machine featuring a large double-headed headsman's style axe. It sucks itself down for zero ground clearance. The team has fought in three previous wars, but this is a new machine - is it reliable?"
- — Jonathan Pearce introducing Terrorhurtz
Terrorhurtz's first appearance came in Heat L of the Fifth Wars, where it was drawn up against another experienced robot, Ming 3, in the first round. For this battle, an angled slab of armour was present on one side of Terrorhurtz's axe - presumably in an attempt to defend against Ming 3's crushing beak.

Terrorhurtz axes Ming 3
Terrorhurtz drove wide of Ming 3 at the start of the battle, before avoiding its opponent's crushing beak and then coming down with two axe blows on top of Ming 3's weapon. Terrorhurtz then moved into the centre of the arena, where it missed with its next swing. Terrorhurtz's next axe attack connected with a hit to the top of Ming 3's wedge, and this was followed up with three hits to Ming 3's crushing arm in quick succession.
- "They were represented by Killerhurtz before. Not greatly successful; they needed more potency, and they've got it with that axe - slamming down on Ming 3."
- — Jonathan Pearce as Terrorhurtz starts strong
Terrorhurtz is pinched by Ming 3
Ming 3 then managed to breach Terrorhurtz's ground clearance as it swerved in on the turn, but it got under Terrorhurtz at an angle which meant that its beak was in the wrong position to crush down on the top of Terrorhurtz. Ming 3 still adapted to the situation though, as it brought its crusher down onto one of Terrorhurtz's side skirts and dragged it backwards. Suddenly though, Matilda hurtled out of her CPZ and clattered into the back of Ming 3, which mangled Ming 3's rear armour and left it immobilised over a flame jet. Terrorhurtz was also unable to retreat, as it was balanced on Ming 3's wedge, which left its wheels suspended above the arena floor. Refbot and Dead Metal then came over to separate the two, with Terrorhurtz finally moving away after untangling itself from Dead Metal. With the battle approaching a judges' decision, Matilda came in with one more attack, adding further damage to the already mutilated back armour of Ming 3. Finally, cease was called, with the judges called to make a decision. However, due to Matilda's unfair interference, the judges only took into account what happened in the battle up until the House Robot damaged Ming 3. This wasn't enough to help Ming 3 avenge the damage inflicted by Matilda though, as the judges went in favour of Terrorhurtz, which progressed to the second round as a result.
- Craig Charles: "Your axe is powerful."
- John Reid: "Yeah, it's nice - giving Dominic a chance to hit people with the axe."
- Craig Charles: "It just keeps going and going, doesn't it?"
- Dominic Parkinson: "Yeah, well we hadn't tested it before, so it was good to see that it worked first time. John's brilliant design, and it worked well."
- — Terrorhurtz passes its first test

Terrorhurtz fitted with the "Fluffy launch device"
In the second round of the heat, Terrorhurtz was drawn up against newcomer to the main competition Fluffy, which inflicted severe damage on the twenty-third seed 101 to reach this stage. In an attempt to deflect Fluffy's attack, Terrorhurtz was attached with a "Fluffy Launch device" to the side - a long pole with a cardboard triangle on the end and also had the side skirts removed.
- Philippa Forrester: "How does it work?"
- John Reid: "The theory, its' purely theory, [Fluffy] hits this [Fluffy launch device], right up the ramp and it does all horrible things when it gets launched into the air."
- Philippa Forrester: "Yes, not very scientific is it?"
- John Reid: "We'll see!"
- — Team Hurtz explain Terrorhurtz's strange attachment
Terrorhurtz starts quickly against Fluffy
Terrorhurtz parked itself in a notably close position to Fluffy before the battle began in an attempt to drive at Fluffy straight away and keep the speed of its weapon down. When activate was called, Terrorhurtz immediately came onto the attack, and axed the top of Fluffy multiple times. Fluffy then went on the retreat, dodging further axe attacks from the pursuing Terrorhurtz in the process. Suddenly, Fluffy turned around and crashed into the side of Terrorhurtz that didn't have the "Fluffy launch device". One large blow from Fluffy's spinning axe ripped off Terrorhurtz's side plate and cracked open its gas valve. Terrorhurtz was left crippled and unable to move freely, which allowed Fluffy to come in with further attacks.
- "I am so impressed by Fluffy, their first time in [the UK Championship of] Robot Wars, and Terrorhurtz are discombobulated! Something has been ripped away from the inside, and they're facing, here, oblivion, from that very strong Fluffy team."
- — Jonathan Pearce as Terrorhurtz suffers vital damage

Terrorhurtz ends up being ripped open
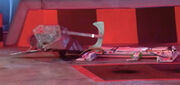
Finally, Refbot came over and counted Terrorhurtz out, before Sir Killalot took Terrorhurtz over to the floor flipper, where it was thrown through the air. Shunt then pierced the underside of Terrorhurtz and lifted it up with his scoop, before placing it into the Pit of Oblivion. Embarrassingly for the House Robot, Shunt's axe was still impaled on Terrorhurtz as he pitted it, and because he was unable to wriggle his weapon free from the beaten machine, he ended up driving himself into the pit with Terrorhurtz. After this, cease was called, and Terrorhurtz exited the competition.
Shunt pits Terrorhurtz and then himself
- "Well, they tricked us. We thought they were fluffy - they're not."
- — Dominic Parkinson after the match
At the end of the series. Terrorhurtz was nominated for the Best Design Award, but lost out to previous two-time winner Razer.
Series 6[]
- "Back for a fifth tilt at the title."
- — Jonathan Pearce as Terrorhurtz enters the arena for its first battle in Series 6
Terrorhurtz returned for the Sixth Wars, and featured in Heat I, where it was drawn against Reptirron the Second, a heavyweight version of A-Kill and Sabretooth in the first round.
- "The double-headed axe has always promised much but in four attempts, they've never really gone beyond the heats. Highly aggressive, hyper active, unpredictable."
- — Jonathan Pearce

Terrorhurtz attacks the back of Sabretooth
Terrorhurtz began the battle by driving at A-Kill straight away, subjecting it to numerous axe blows, with the constant attacks eventually knocking off one of A-Kill's wheel hubs. Terrorhurtz next focused its attention on Sabretooth, and split one of the support beams on top of its opponent, before sending further shrapnel flying as it continued to axe the back of Sabretooth. With Sabretooth showing little sign of life, Terrorhurtz then went over towards Reptirron the Second, slamming a small front panel inwards and then tearing a large gash into the front of it. Terrorhurtz kept its axe impaled in Reptirron the Second and used the purchase to drag its opponent across the arena floor before leaving it to fry on the flame pit. Terrorhurtz held Reptirron the Second over the flame pit for a considerable amount of time before the two robots moved away - although Reptirron the Second quickly ground to a halt in the centre of the arena.

Reptirron the Second is dragged onto the flame pit


Terrorhurtz keeps its axe stuck on Reptirron the Second
- "Look at that axe of Terrorhurtz! When they get things going it can be so deadly."
- — Jonathan Pearce
Meanwhile, Sabretooth was the first robot to fall, as it was counted out by Refbot. Terrorhurtz then went back to attack A-Kill, before it had the immobile Sabretooth thrown onto its back by the floor flipper. Terrorhurtz carried out further punishment to Sabretooth, while Reptirron the Second saw its Sixth Wars campaign come to an early end as it was counted out by Refbot. Shunt then pitted Sabretooth, and cease was called, sealing Terrorhurtz's path through to the second round, with A-Kill progressing as well.
- "A-Kill didn't do much, but along with the big-hitting Terrorhurtz, it lives to fight another day."
- — Craig Charles
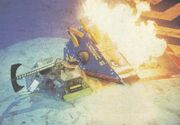
In the second round Terrorhurtz faced Kronic 2, which saw off threats from Corkscrew and R.O.C.S. in its opening battle.
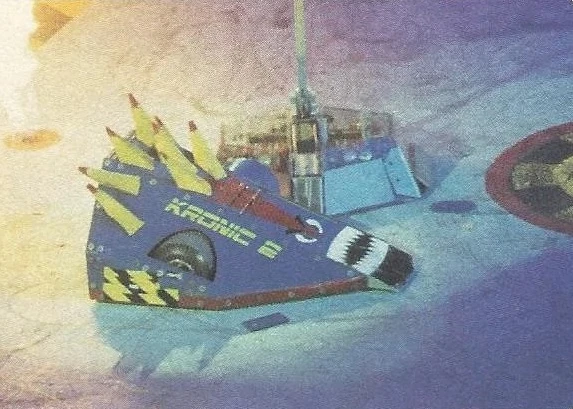

Terrorhurtz lines up an axe blow on Kronic 2
Terrorhurtz started on the front foot, as it rained axe blows down onto Kronic 2, causing damage in the process. Kronic 2 activated its flipper twice as it desperately tried to defend itself from Terrorhurtz, but Kronic 2 saw its armour dented and warped further before it was pushed into Sgt. Bash's CPZ.
- "Looks like a very good machine, here, Terrorhurtz. I think they'll give Panic Attack a run for their money in the Heat Final if they get there - and from the evidence of the opening seconds of this battle, they'll get there."
- — Jonathan Pearce

Terrorhurtz puts Kronic 2 under immediate pressure
Kronic 2 managed to get away from trouble, with the two competing robots then jostling for positions in the centre of the arena. Terrorhurtz's axe appeared to have stopped, but that didn't stop it being the aggressor, as it drove Kronic 2 across the arena floor, over the flame pit and against the arena wall. Kronic 2's spines then caught fire, and although its flipper was functioning fine, Kronic 2 itself had stopped moving. Refbot then nudged Kronic 2 away from the flame pit and over a CO2 jet, which sparked Kronic 2 back into life on one side. Kronic 2 came under pressure from Growler, and sent its spines flying as it used its flipper, before it managed to moved away from the CPZ. Kronic 2 then spun around on the spot, with a strong Terrorhurtz drive sending it into the arena wall once more. Next, Terrorhurtz reversed into the pit release bumper, while Growler came in to renew its tussle with Kronic 2. Sgt. Bash then came across as well, with Terrorhurtz deciding to ram into the rear of the House Robot while it had its attention on Kronic 2, which had come to a stop once more.

Terrorhurtz shoves Kronic onto the flame pit

Sgt. Bash's back panel comes loose after an attack from Terrorhurtz
- "No-no-no, John Reid and Dominic Parkinson, you're not Mr. Psycho...or are you?! You're some sort of nutter to have a go at Sgt. Bash in there!"
- — Jonathan Pearce
Terrorhurtz's drive saw Sgt. Bash's back armour drop backwards. Kronic 2 was then counted out by Refbot, and Terrorhurtz spun in celebration, as its place in the Heat Final was confirmed.
- "We don't normally go around squashing hedgehogs, but in this case!"
- — John Reid post battle
In the Heat Final, Terrorhurtz faced former champion, and eighth seed Panic Attack.
- "So old Kronic the Wedgehog goes out and Terrorhurtz are through to the Heat Final where they'll meet the number eight seeds and former UK champions Panic Attack."
- — Jonathan Pearce

Terrorhurtz axes Panic Attack
Terrorhurtz drove past Panic Attack before swerving around and attacking the top panel of Panic Attack, inflicting notable dents. Terrorhurtz continued to damage Panic Attack, and started to buckle its armour with further impacts from its axe. Panic Attack attempted to retreat, but Terrorhurtz kept up its pressure and repeatedly attacked the back of Panic Attack's panel. Terrorhurtz then attacked the front of Panic Attack, which tried to prevent further axe blows by raising its lifting forks up as a barrier. Terrorhurtz continued to charge though, and drove Panic Attack against an angle grinder.
- "Look at this - it's systematic. Oh. They are battering Panic Attack into submission! One blow after another raining down, and Kim (Davies) cannot do anything about this whatsoever."
- — Jonathan Pearce as Terrorhurtz's axe rhythmically slams down onto Panic Attack

Terrorhurtz pushes Panic Attack towards an angle grinder

Matilda rips off Panic Attack's top panel which Terrorhurtz landed its axe blows on
Another powerful drive from Terrorhurtz then backed Panic Attack into a CPZ. Terrorhurtz then moved away to allow Shunt to use his axe on Kim Davies' machine, before Shunt passed responsibilities over to Matilda, who lined up her flywheel before reversing into Panic Attack, with the contact ripping the entire top panel of Panic Attack away and out of the arena. Finally, the seeded machine was counted out by Refbot, and after Shunt subjected Panic Attack to a flip from the floor flipper and a washing machine from the Drop Zone, cease was called, confirming Terrorhurtz as the heat winner.
- "What a turn up for the books. Panic Attack, the eighth seed, they go out. Terrorhurtz are through to the series semi-finals!"
- — Craig Charles
In the first round of the Semi-Finals, Terrorhurtz was drawn up against the number ten seed Spawn Again, which had reached this stage after edging its way past Short Circuit, Tiberius 3, Spam and Supernova.


Terrorhurtz spirals out of control around Spawn Again
Terrorhurtz attacks Spawn Again
Spawn Again came under immediate pressure as Terrorhurtz slammed into the front of it with a drive before twice axing down onto Spawn Again's flipper. Terrorhurtz then missed with its next two attacks, with the second unbalancing it and sending it temporarily spiraling out of control. Terrorhurtz regained its composure though, and began to warp and slash away at Spawn Again's shell. Terrorhurtz then edged the sluggish Spawn Again into the clutches of Dead Metal, which brought his circular saw into play.
- "And I think that repeated axe blow technique of Terrorhurtz, once again, has caused immeasurable damage. Spawn Again simply never got going."
- — Jonathan Pearce
Dead Metal then placed Spawn Again next to an angle grinder, where it showed no signs of mobility. Terrorhurtz continued to push and axe Spawn Again as Refbot counted Spawn Again out, before Mr. Psycho paraded Spawn Again around the arena and then placed it on the pit's edge, where Dead Metal pushed it in.
- "Imagine him as your uncle. Imagine him as your teacher. Imagine him as the boy next door. Mr. Psycho. Terrorhurtz, well done."
- — Jonathan Pearce
Next, Terrorhurtz came up against number two seed Bigger Brother, which earned its place in the second round of the Semi-Finals by beating Hypno-Disc and Spawn Again in the Losers' Melee.

Terrorhurtz batters Bigger Brother
Terrorhurtz tried to keep up its fast starts in battles by driving head-on at Bigger Brother straight away. Terrorhurtz connected with a glancing blow with its first use of the axe, while a second attack not only hit part of Bigger Brother's flipper, but also sent one of its own axe buffers flying off. This only proved a minor mishap for Terrorhurtz though, as it continued to pound away at Bigger Brother, buckling its flipper and then driving it up against the arena wall. Terrorhurtz then drifted onto the flame pit while still flailing away at Bigger Brother, which had come to a stop.
- "Brilliant attack from Terrorhurtz! The improved weaponry has made such a difference, and Bigger Brother is rocking and reeling!"
- — Jonathan Pearce
Terrorhurtz punishes Bigger Brother in the CPZ
Refbot and Terrorhurtz then prodded and poked Bigger Brother, and suddenly it came back to life. Terrorhurtz tried to shut down the revived Bigger Brother as quickly as possible, ramming it into a CPZ. Shunt and Sgt. Bash then swarmed around the two competing machines, while Terrorhurtz continued to slam down onto Bigger Brother. With Bigger Brother seemingly dormant again, Terrorhurtz backed away and pressed the pit release bumper. Refbot then counted Bigger Brother out, and it was subjected to being thrown by the floor flipper before being dumped into the Pit of Oblivion.
- "Hats off to Terrorhurtz. They have axed the number two seeds."
- — Jonathan Pearce
Cease was called, and Terrorhurtz had confirmed its place in the Grand Final.
- "Into the final for the first time, and about to get a shock."
- — Jonathan Pearce
In the first round of the Grand Final Terrorhurtz faced reigning champion Razer.
Razer pierces Terrorhurtz
Both machines met head-on in the opening moments, with Terrorhurtz missing with an attack of its axe. This allowed Razer to edge Terrorhurtz back towards the arena wall with its wedge as Terrorhurtz's axe fired manically. Razer then repositioned and pressed down with its claw, crumpling Terrorhurtz's polycarbonate armour on top.
- "And look at Razer; already crumpling, already ripping, and tearing through that polycarbonate armour, and straight into the heart of John Reid's machine."
- — Jonathan Pearce

Terrorhurtz is pitted by Razer
Terrorhurtz continued to use its axe in an attempt to loosen Razer's grip, and although it dropped down onto the arena floor as Razer attempted to lift it up, Terrorhurtz was then axed by Shunt after it was forced into the House Robot's CPZ. Terrorhurtz moved away and lined up a long drive on Razer, but narrowly missed again with an axe attack as Razer closed in. Razer was then able to resume its hold on Terrorhurtz, and this time it reversed into the pit release trigger before swiftly dumping the flailing Terrorhurtz into the pit of oblivion. It was later seen trying to use its axe to get out of the pit, but not succeeding.
- "So close to another title now. "You had to go down, John Reid" they said, and he did."
- — Jonathan Pearce
In the Third Place Playoff, Terrorhurtz faced twice previous third place finisher and number three seed Firestorm 4.

Terrorhurtz strikes Firestorm 4
Both robots slammed into each other on their first engagement. Firestorm 4 then drove around, looking for a gap to exploit, before forcing Terrorhurtz backwards, which fired its axe in retaliation. Firestorm 4's drive saw it swerve off into Shunt's CPZ, and while Firestorm 4 activated its flipper to fend off the House Robot, Terrorhurtz used the opportunity to ram into the back of it before subjecting Firestorm 4 to repetitive axe attacks. Firestorm 4 then spun on the spot to try to avoid further punishment, and although Terrorhurtz had taken out Firestorm 4's forwards and backwards drive, it still managed to edge itself away from the axe-wielding machine, which had stopped moving.
- "Well the axe is working, but apart from that - no. I don't think John Reid's machine is going anywhere."
- — Jonathan Pearce
Terrorhurtz has to make do with fourth place as it is counted out by Refbot
Terrorhurtz's axe continued to move forwards and backwards in an attempt to get going again, but it was unable to regain any mobility, and Refbot counted it out. Terrorhurtz tried to defend itself with its weapon as Dead Metal and Shunt closed in, but that couldn't prevent Terrorhurtz being flipped by the floor flipper and then being dumped into the pit. As a result, Terrorhurtz finished fourth - Team Hurtz's best placing yet.
- "The pit, a welcome release. And a welcome relief, for the Terrorhurtz team. Cheerio for now, I hope."
- — Jonathan Pearce
Extreme 2[]
- "This creates Terror...and Hurts!"
- — Jonathan Pearce
Terrorhurtz appeared in two competitions in Robot Wars Extreme: Series 2. It first competed in the All-Stars, where it was drawn against Dantomkia and reigning UK champion Tornado in the first round.

Terrorhurtz is ganged up on
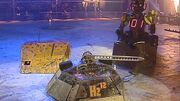
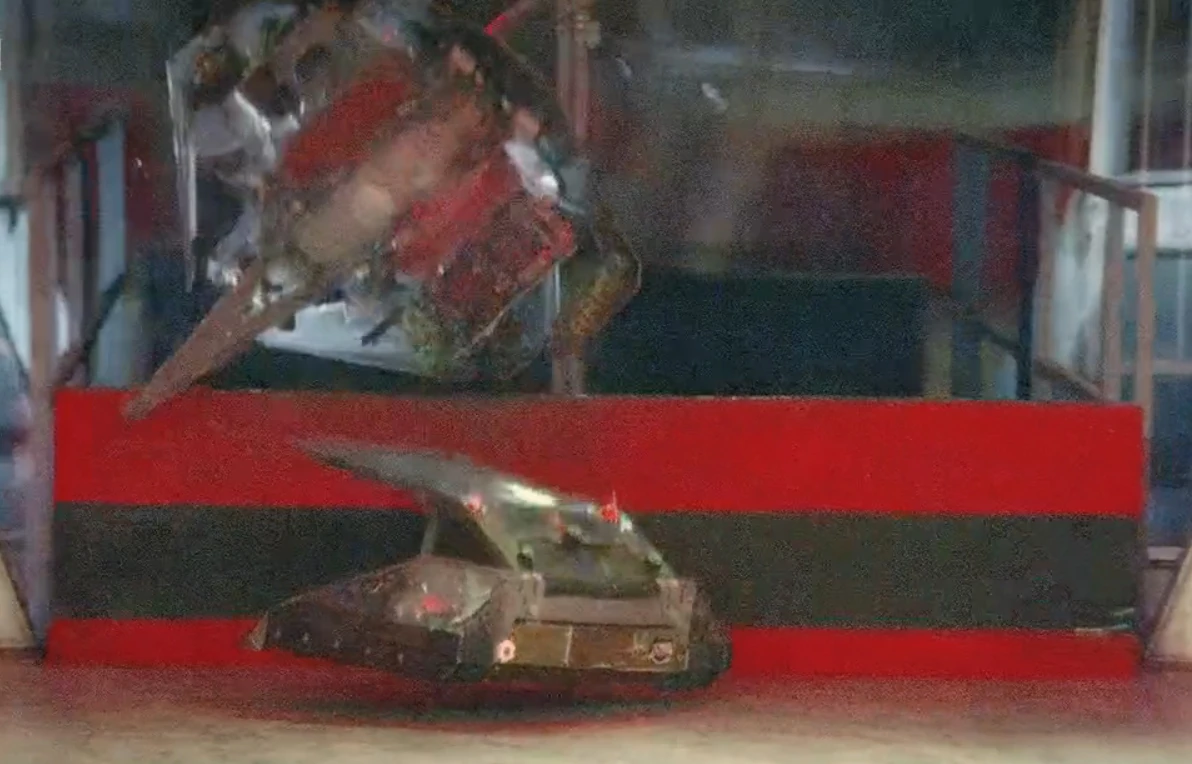
Terrorhurtz tried to axe Tornado straight away, but it missed with its attack. Tornado then drove Terrorhurtz across the arena floor and into the disc of doom tyre, which allowed Dantomkia to slip underneath Terrorhurtz and flip it, but Terrorhurtz landed back on its wheels. Dantomkia then shoved Terrorhurtz to the other side of the arena and flipped it against the arena wall, before using its weapon again and nearly flipping Terrorhurtz out of the arena, which just about balanced on top of the arena barrier before falling back onto the arena floor.
- "97.7 kilos, then, of Terrorhurtz machinery was left hanging in the balance!"
- — Jonathan Pearce as Terrorhurtz narrowly avoids being flipped out of the arena
Dantomkia comes close to flipping Terrorhurtz out of the arena
Tornado and Dantomkia continued their joint attacks on Terrorhurtz, pressing it against the angle grinder, before Shunt came across and pulled Dantomkia aside. Tornado and Terrorhurtz continued to tussle though, with the former continuing to drive Terrorhurtz around, while the latter continued to use its axe. Dantomkia then descended the pit, before another two-pronged attack saw Dantomkia nearly flip Terrorhurtz again. Tornado rammed Terrorhurtz into the arena wall again before Terrorhurtz was pressed by the other two competing machines in Shunt's CPZ. Sgt. Bash came in as well, gripping Tornado, while Shunt lifted Terrorhurtz out of the CPZ with his scoop and left Terrorhurtz on its back.

Shunt lifts Terrorhurtz up while Sgt. Bash grips Tornado

An immobile Terrorhurtz is pitted
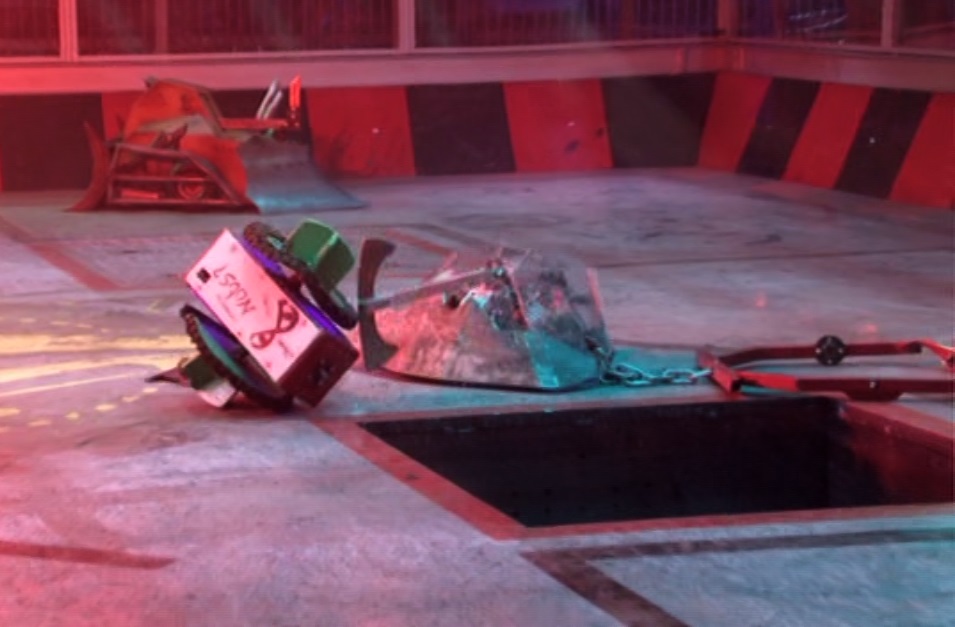
With Terrorhurtz unable to self-right after consistent use of its axe, Dantomkia came in and pushed Terrorhurtz down into the pit of oblivion, which meant that Terrorhurtz's All-Stars run came to an early end.
- "Gutted, moreso, disappointed!"
- — John Reid post battle
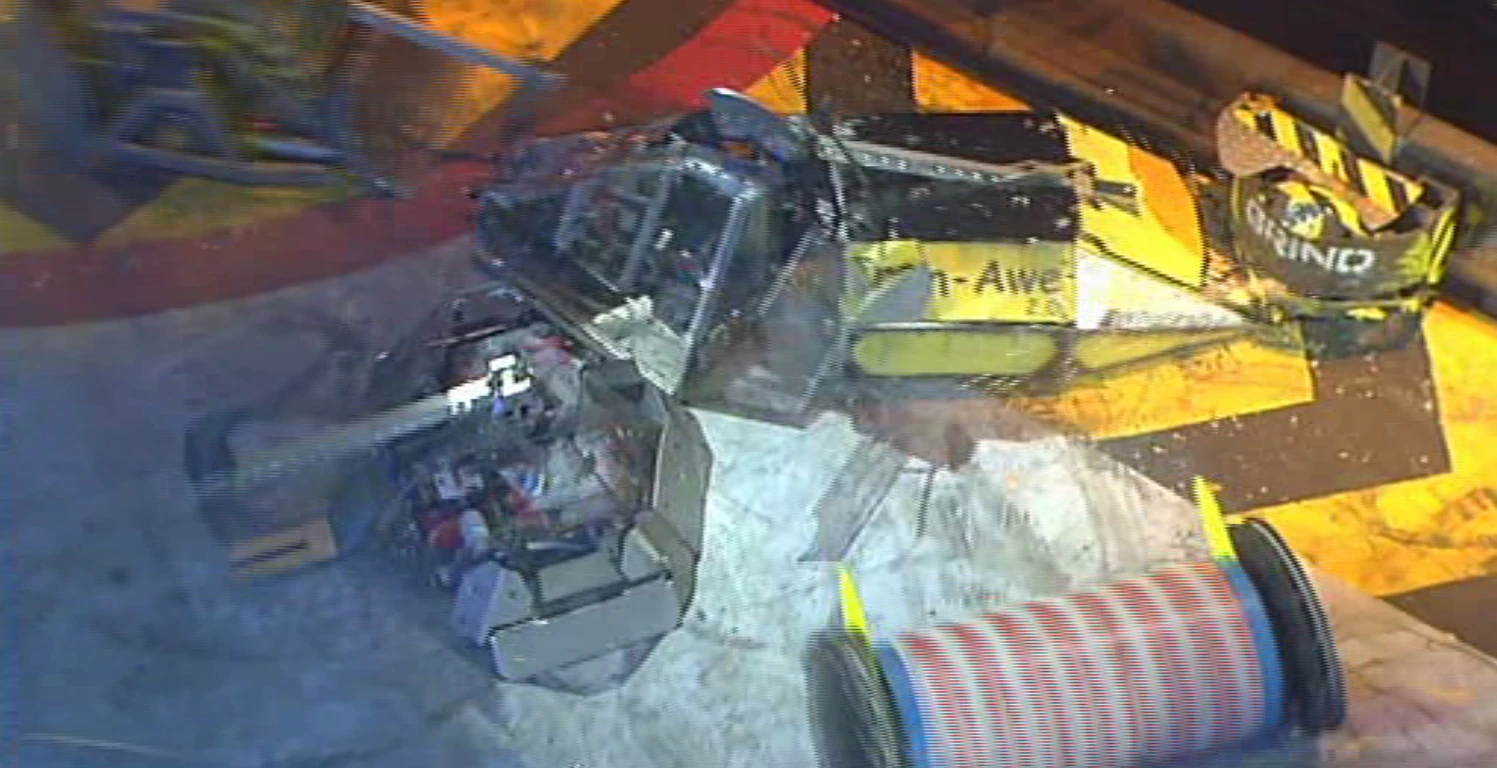
Terrorhurtz also competed in the Challenge Belt for the right to fight Tornado, where it was put up against Iron-Awe 2, Barber-Ous 2 and Vader in the first round.
- "If you have to ask me, this is the stronger heat, because it's got Terrorhurtz out there with that mighty axe."
- — Jonathan Pearce

Terrorhurtz attacks Vader early on

Terrorhurtz takes the lead in the mayhem
Terrorhurtz focused on Vader from the off and cracked down with its axe twice in quick succession. Iron-Awe 2 then took advantage of the occupied Terrorhurtz and flicked it up onto its side, but Terrorhurtz dropped safely back onto the arena floor. Terrorhurtz refocused itself and continued to attack Vader, which was also being axed by Shunt, and with the two axe robots firing away, Vader was unable to withstand the punishment, and came to a stop. Terrorhurtz then attacked Barber-Ous 2 temporarily, before activating the pit release button.
- "Terrorhurtz has been formidable, I think."
- — Jonathan Pearce

Terrorhurtz pits Barber-Ous 2
Suddenly, while Vader was being counted out, Iron-Awe 2 had pierced Barber-Ous 2 and then flipped itself over. With Vader being crashed out of the arena by Matilda's flywheel after being counted out and Iron-Awe 2 and Barber-Ous 2 sitting immobile, Terrorhurtz was the only competing machine that was still mobile. Terrorhurtz then tried to decide the outcome of the battle as it pushed Barber-Ous 2 across the arena, before rolling it down into the pit. A Judges' decision was still deemed necessary to decide the outcome of the battle, as Iron-Awe 2 and Barber-Ous 2 were both immobile, but Terrorhurtz safely qualified alongside Iron-Awe 2.
- "Definitely through, Terrorhurtz. We know that. That's all we know!"
- — Jonathan Pearce at the end of the battle
Next, Terrorhurtz faced S.M.I.D.S.Y. in the second round, after it got past Sir Chromalot and Hypno-Disc in its first round battle.

Terrorhurtz lands another axe blow on S.M.I.D.S.Y.
After an aggressive first drive from Terrorhurtz, S.M.I.D.S.Y. darted across the arena and activated the pit. S.M.I.D.S.Y. tried to force Terrorhurtz backwards with a reverse drive, but Terrorhurtz began to cause visible damage in and around one of S.M.I.D.S.Y.'s back tyres. S.M.I.D.S.Y. desperately attempted to move away from Terrorhurtz and into space, but couldn't avoid Terrorhurtz's relentless pressure, as it mutilated S.M.I.D.S.Y.'s top armour.
- "Basically, S.M.I.D.S.Y., you need the arena floor to collapse, and Terrorhurtz to go down a very, very big, black, and endless hole for you to stand any chance."
- — Jonathan Pearce as Terrorhurtz continuously punishes S.M.I.D.S.Y.

Terrorhurtz batters the immobile S.M.I.D.S.Y.
S.M.I.D.S.Y. limped around next to the angle grinder in an attempt to stay alive, but another rally of axe attacks from Terrorhurtz finally immobilised S.M.I.D.S.Y. altogether. Terrorhurtz then moved aside, and Refbot moved in to count out S.M.I.D.S.Y. - which was then flung by the floor flipper and pitted by Sir Killalot.
With its victory over S.M.I.D.S.Y. secured, Terrorhurtz progressed to the final qualification round, where it faced Dantomkia - a second meeting between the robots in that series of Extreme.

Dantomkia flips Terrorhurtz over and then drives it into Shunt's CPZ

Terrorhurtz smashes Dantomkia into submission

Terrorhurtz pushes Dantomkia into the pit
Terrorhurtz began by attacking Dantomkia and connecting with several axe blows as Dantomkia struggled to breach Terrorhurtz's ground clearance, inflicting a visible gash as well as dents to its opponent. Dantomkia then pushed it backwards before finally stopping the barrage of early Terrorhurtz attacks by flipping it over. Dantomkia followed its attack up with another flip, as it threw Terrorhurtz deep into Shunt's CPZ, before Terrorhurtz righted itself. Terrorhurtz then reasserted itself, with a combination of attacks, as it repeatedly slammed down onto the front and top of Dantomkia, and immobilised it. After another round of hits from Terrorhurtz, it decided to activate the pit before pushing Dantomkia into the pit.
Terrorhurtz had won the right for the final challenge, and went through to face the Challenge Belt holder Tornado - another rematch between Terrorhurtz and a robot which defeated it in the All-Stars.
- Philippa Forrester: "Do you really, really, really think you could do this?"
- John Reid: "I don't know. It's a very tough machine - it's going to take a lot of stopping."
- — The interview before Terrorhurtz's challenge for the belt

Terrorhurtz is pushed into the arena wall

Terrorhurtz is pitted
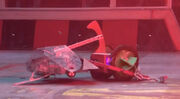
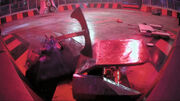
Tornado got underneath Terrorhurtz instantly, and drove it into the arena wall, missing Terrorhurtz's axe in the process. Terrorhurtz's next attack then fell short of Tornado's front scoop, before the Challenge Belt holders drove away and activated the pit release button. Terrorhurtz chased Tornado, but suddenly found itself between the pit of oblivion and Tornado, and a punctual drive from Tornado submerged Terrorhurtz in the pit within only nineteen seconds. Tornado's quick thinking meant that it had outright won its second Challenge Belt, and Terrorhurtz's challenge ended in defeat.
- "You can chop all day, but you can't change your fate."
- — Jonathan Pearce
Series 7[]
- "Hugely experienced, the number three se...Hang on a minute. Where are they? Hello?"
- — Jonathan Pearce before acknowledging Terrorhurtz's absence
Terrorhurtz was seeded third for Series 7, and was due to fight Killerkat, Jackson Wallop and newcomer Gyrobot in its first-round battle in Heat B. However, when Team Hurtz arrived at the studio with an unfinished Terrorhurtz, they were barred entry to the building on a "robots must be complete" clause.
- "I thought if we had another day or so there we might have been able to get something running. But they didn't let us into the building citing the 'robots must be complete' clause... Rather different from BattleBots where almost all the robots turn up unfinished and you have three or four days to get them ready."
- — Team Terrorhurtz on the Seventh Wars disqualification[4]
Jayne Middlemiss, Derek Foxwell and John Reid stage the disqualification
As an explanation as to why the third seed was not entered, the show filmed the events as if they were happening at the same time, with Stuart McDonald announcing Terrorhurtz's name, the location it was from and seed, and Jonathan Pearce sounding confused by its absence from the arena. A camera crew followed Jayne Middlemiss from Terrorhurtz's empty bench to the outdoor area where Derek Foxwell was breaking the news to John Reid. Terrorhurtz was effectively disqualified from the Seventh Wars without entering the studio at all, and the first round battle went ahead without it.
- "Oh dear, and then there were three..."
- — Jonathan Pearce
Series 8[]

Terrorhurtz misses its axe blown on Nuts
Following a comprehensive rebuild, Terrorhurtz returned for the revived Robot Wars series in 2016, appearing in the first Heat of Series 8. Before its return to combat, Team Hurtz invited Angela Scanlon to hit their machine with a spanner as hard as she could. This caused no damage to Terrorhurtz itself, demonstrating the improvements made to its armour since its last appearance in the Classic Series. In the first-ever Group Battle of the Revival run, Terrorhurtz was drawn against newcomer Nuts; a new robot from former Grand Finalist team Cold Fusion, Kill-E-Crank-E, and the robot which eliminated Terrorhurtz from Series 6, Razer.
Terrorhurtz shoves Nuts on the flame pit
Despite the opportunity being presented to set up a 'grudge match' between Razer and Terrorhurtz, the two Classic Series All-Stars focused their attention on their other opponents, with Terrorhurtz in particular targeting Nuts. Terrorhurtz's first blow missed Nuts near the flame pit, causing Terrorhurtz to jump into the air. Continued pushes on Nuts caused it to tumble over, and allowed Terrorhurtz to land another axe blow. Nuts spun in circles in defense, landing a glancing blow on Terrorhurtz, which struck Nuts's wheel. Terrorhurtz then pushed Nuts over the flame pit and into the CPZ, but it was at this point that Razer and Kill-E-Crank-E both fell into the pit. This double-pitting put Terrorhurtz through with Nuts, in effect allowing it to avenge its Series 6 loss over the former UK and World Champion.

Terrorhurtz's scoop deflects Carbide
Terrorhurtz weathers a blow from the bar spinner
In the Head-to-Head stage, Terrorhurtz was first drawn against Carbide - a powerful bar spinner. Recognising the danger of the spinner, having previously lost to this weapon type against Fluffy, Terrorhurtz charged in immediately, its scoop clashing with Carbide's bar. The recoil of this attack threw Carbide over, although it was already becoming clear that Terrorhurtz's axe was broken, and was unable to be fired in this match. To Terrorhurtz's favour, however, was that Team Carbide had added a layer of 7075 aluminium to the top of their machine, which was now propping Carbide's wheels off the floor and hindering its movements. As a result, Terrorhurtz relied on pushing Carbide around, successfully ramming Carbide into an empty CPZ, the arena wall, beyond Sir Killalot, and into the pit release tyre.
- "This is terrific control early on, here, from Terrorhurtz."
- — Jonathan Pearce
Terrorhurtz presses Carbide against Sir Killalot
Terrorhurtz pushes Carbide into the pit
Sparks flew as Carbide's spinner continued to clash with Terrorhurtz, but Terrorhurtz was unharmed, and pushed Carbide onto the flame pit, from which it could not escape without House Robot assistance. Terrorhurtz pushed Carbide into the wall again, allowing Terrorhurtz to get behind Carbide and to push it over the lip of the pit, where it laid dormant. Avoiding the bar spinner, Terrorhurtz successfully pushed Carbide down, awarding it three points without even requiring its weapon.

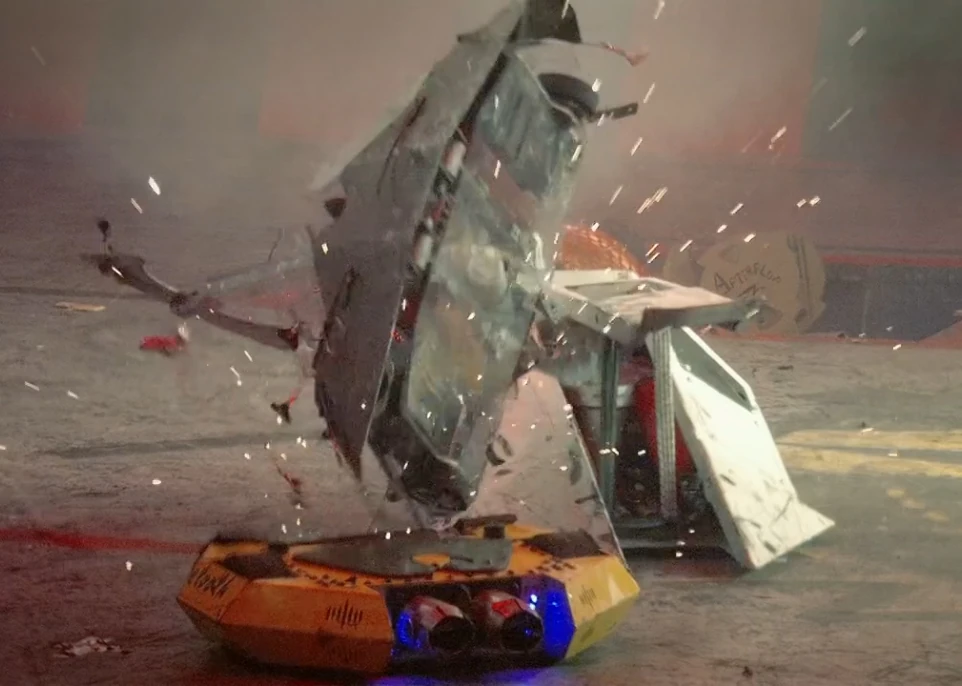
Behemoth flips Terrorhurtz over
Terrorhurtz is cut into by Dead Metal
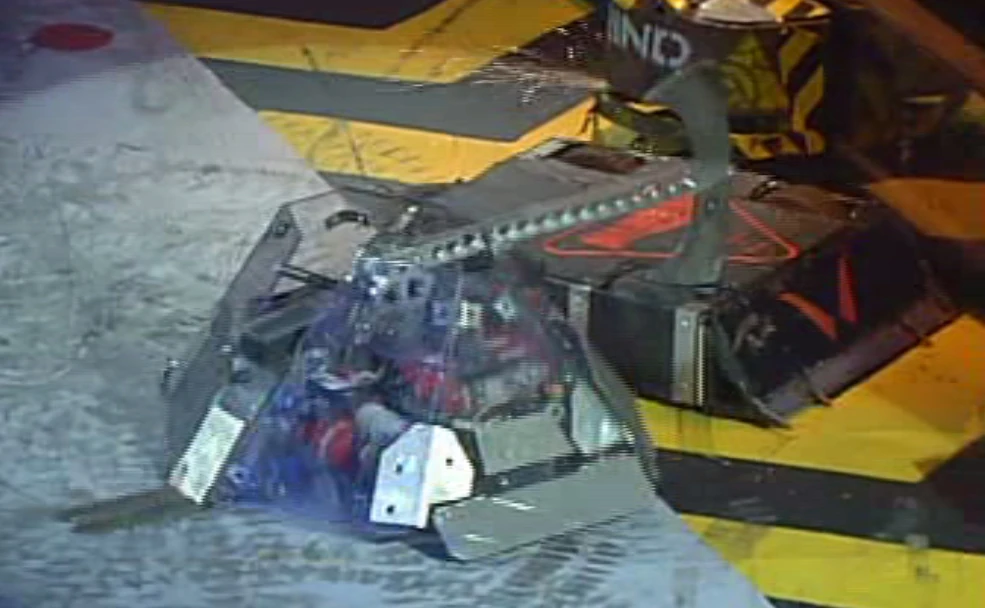
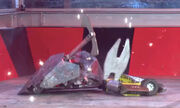
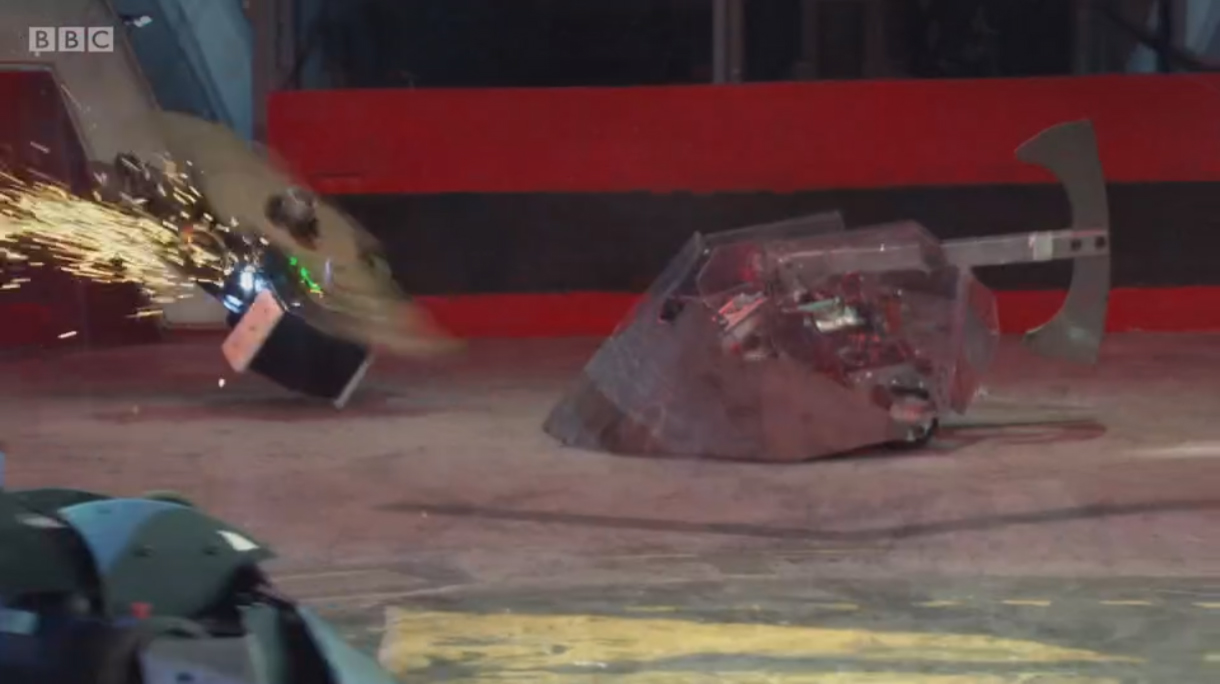
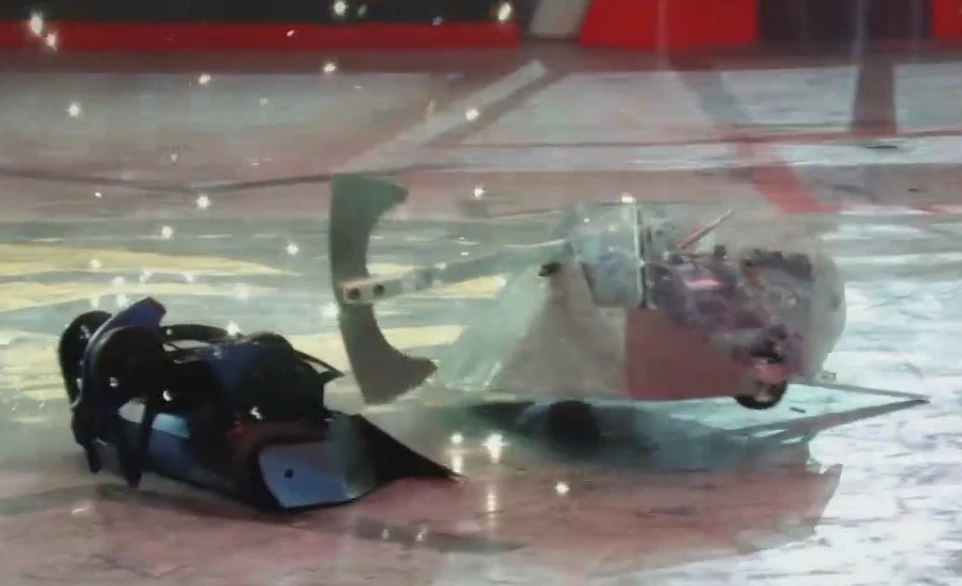
Next up for Terrorhurtz was Behemoth. Terrorhurtz started strong as it evaded a lift from Behemoth before forcing it into Dead Metal's CPZ. Behemoth then came in with another attempted flip, but missed once more, which allowed Terrorhurtz to carry Behemoth back into the CPZ for a second time. Terrorhurtz continued its pressure as it pinned Behemoth up against the arena wall, but with Behemoth in the prime position to be hit and with Terrorhurtz failing to strike its opponent, it was evident that Terrorhurtz's axe was out of commission once again. Terrorhurtz finally moved away after pressure from Dead Metal, and after one last push on Behemoth, Terrorhurtz left itself exposed, and was flipped over. Dead Metal cut through the base of Terrorhurtz with its saw, severing its gas pipe, and without a working weapon, Terrorhurtz could not self-right, and lost the battle.
- "We need to get our axe working, don't we, hahaha! I told you to test the axe!"
- — John Reid

Terrorhurtz removes Nuts' rim

Terrorhurtz becomes stuck on the loose rim of Nuts
Terrorhurtz still had the opportunity to make the Heat Final, but only if it could defeat Nuts via knockout. Terrorhurtz's axe was finally repaired, though it started by pushing Nuts into Shunt. Nuts spun around, and its chain flail became stuck in a small circular opening in Terrorhurtz's armour, above its wheels. When Terrorhurtz struck Nuts with its axe, it held its grip on Nuts's outer ring, and pulled the whole thing off, still staying attached to Terrorhurtz, which used its axe to attack Nuts with its own outer ring. Terrorhurtz even replicated Nuts' main tactic, spinning on the spot with the chain flails still attached. Terrorhurtz continued to push and strike Nuts with its axe, pushing it to the very edge of the pit, but could not secure the victory at that moment.
- "What a mess! There's no dignity here!"
- — John Reid as the battle is waged

Terrorhurtz pushes Nuts near the pit
Terrorhurtz tripped Nuts onto its side with a slam, and pushed it into Shunt with another, but sustained an axe blow itself. Terrorhurtz's last effort was to try and destroy the Nuts minibot that was stuck underneath it, but it was unable to make contact with any of the swings of its axe.
Although Terrorhurtz was given the victory by unanimous judges' decision, this meant the victory was only worth two points, leaving Terrorhurtz with five points overall, equal with Behemoth. Because Terrorhurtz had previously lost to Behemoth, Terrorhurtz was not put through to the Heat Final, eliminating it in third place within the heat.
Series 9[]
Like in Series 8, Terrorhurtz competed in Heat A, with another recurrence happening as it faced Nuts 2 in its Group Battle for a second time. Terrorhurtz was also matched up with newcomer Rapid and Dave Lawrie's new machine Jellyfish.
- Dara Ó Briain: "Here we are with Terrorhurtz - but improved Terrorhurtz. More terror, more hurting. How will it inflict terror and hurt?"
- John Reid: "Its big axe - it's all about the big axe. Hopefully it will work this year!"
- — The pre-battle interview

Terrorhurtz axes Jellyfish
Terrorhurtz immediately went after Rapid, which had charged across the arena itself to throw Jellyfish into the air. Terrorhurtz then drove at Rapid broadside on and pushed it across the arena, before pressing Jellyfish against the arena wall. Terrorhurtz fired its axe, which pushed Jellyfish up onto its side before it fell back down onto the arena floor. One of Nuts 2's minibots then made itself a nuisance, as it slid underneath Terrorhurtz's front wedge. Terrorhurtz fired its axe but missed, although the minibot in question still came loose, and Terrorhurtz comfortably moved it aside. Terrorhurtz then refocused its attacks on Jellyfish, with an axe attack to the right arm of the machine.
- "Mighty blow from Terrorhurtz."
- — Jonathan Pearce as Terrorhurtz axes Jellyfish

Terrorhurtz traps Rapid in the CPZ
After this, Terrorhurtz slalomed up and down the arena floor for a period, as it visibly hunted down Rapid once more. Suddenly, Nuts 2 was sent flying out of the arena after an attack from Matilda's flywheel, leaving the three remaining robots to compete with one another. Terrorhurtz continued to chase Rapid - which was pushing Jellyfish around - and then missed with an attack of the axe. A flip from Rapid on Jellyfish next to the arena wall then allowed Terrorhurtz to charge in and axe Rapid twice in a row. Rapid moved away, with Terrorhurtz in hot pursuit, but it became evident that Jellyfish was struggling for movement after Rapid's flip. Terrorhurtz forced Rapid over the flame pit before cease was called - which confirmed Jellyfish's immobilisation, and sent Terrorhurtz and Rapid through to the Head-to-Heads.
- Dara Ó Briain: "You did very, very well there!"
- John Reid: "Nice little driving test, that was."
- Dara Ó Briain: "Were you happy with how the axe is doing?"
- John Reid: "No. It was down on power - very limited. It's not happy at all, so we'll have to look at that."
- — John Reid's thoughts post battle

John Reid experiments with the resistance on Terrorhurtz's axe
Through to the Head-to-Heads, Terrorhurtz's first opponent was Sabretooth, a robot it fought in Series 6, with John Reid eager for the axe to be working at its full potential for the fight.
- "We've had a look at the problem. It's so stiff, so we just squirted some lube in the cylinder, and it's...it's...better. It's not as good as it should be, but it's a lot better."
- — John Reid before Terrorhurtz's first Head-to-Head battle
Terrorhurtz sustains telling damage from Sabretooth's drum
Terrorhurtz charged at Sabretooth, which was spinning its drum up to speed. It then drove Sabretooth backwards, but got caught on the pit panel in doing so. Terrorhurtz then pressed Sabretooth up against the arena wall before striking down with the axe in two successive blows. Suddenly, Sabretooth managed to get into enough space to get its weapon up to speed, and in trying to drive Sabretooth backwards again, Terrorhurtz overshot its drive, which exposed its rear to an attack. Sabretooth's subsequent assault sent the rear tail of Terrorhurtz flying, before it flipped Terrorhurtz up and then shattered one of its rear polycarbonate panels.
- "Oh! And off goes the aluminium tail - and that is absolutely crucial for the weaponry to work properly!"
- — Jonathan Pearce as Sabretooth inflicts major damage to Terrorhurtz

Terrorhurtz falls on top of Sabretooth
With its tail gone, Terrorhurtz was unbalanced, and consistently reared up from this point on. Terrorhurtz decided to move into space before trying to drive at Sabretooth again, but once more, Terrorhurtz's front was sent upwards from a hit by Sabretooth. Terrorhurtz freed itself from Sabretooth by firing its axe after it landed on top of its opponent, while Sabretooth began to emit smoke, which saw its spinning drum cease to function. Suddenly, as Terrorhurtz tried to put pressure on Sabretooth, its left-hand wheel locked up. Without its weapon, Sabretooth tried to push Terrorhurtz, with John Reid using Sabretooth's close-quarters style to try to land an axe blow while on the turn.
- "Wait for it, wait for it, wait for it! Wait for a good hit."
- — John Reid gives Nick Lynch instructions on when to fire the axe

Terrorhurtz is attacked by the Rogue Shunt
Terrorhurtz missed with three of its attempted axe swings, but hit with another, denting Sabretooth's top armour. Sabretooth then decided to pull away from Terrorhurtz and pressed the arena tyre, which activated Rogue House Robot mode. As a result, Shunt charged Terrorhurtz into the arena wall and axed down into it, punching a hole in Terrorhurtz's firing ram. After this, Terrorhurtz continued to hobble around on the spot, and was finally deemed immobile. Cease was called, and Terrorhurtz had lost its first Head-to-Head fight by KO.
- Dara Ó Briain: "What happened?"
- John Reid: "Just bad driving. For some reason I exposed my bot to his."
- — John Reid blames his driving after losing to Sabretooth
In its second Head-to-Head battle Terrorhurtz was up against Jellyfish, which was reinstated after Rapid was unable to be repaired from the damage it sustained against Aftershock.

Terrorhurtz knocks out Jellyfish
Terrorhurtz slid underneath Jellyfish with its first drive and brought its axe down onto Jellyfish. After driving Jellyfish back against the arena wall, it became evident that Jellyfish was no longer moving, with Terrorhurtz's axe blow causing the damage.
- "Oh no - he's not dead already, is he?"
- — John Reid after Terrorhurtz's first attack
Terrorhurtz came in for one more attack on the rear of Jellyfish, before the count was complete and Jellyfish was counted out. Terrorhurtz spun around in the centre of the arena while firing its axe in delight, and its first victory in the Head-to-Heads was confirmed, with it gaining 3 points for the knockout victory.


Terrorhurtz with its googley eye
In its final Head-to-Head, Terrorhurtz faced league leaders Aftershock, which had already recorded knockout victories against both Rapid and Sabretooth. For this fight, Terrorhurtz was attached with a souvenir in the form of a googley eye, which the team received after they beat Jellyfish in their last battle.
- "So, the last one we've got to fight is Aftershock - that is a beast of a machine. But we've got this amazing front armour - that's what it's designed for. So as long as I keep my calm and keep the nose at them, we should be okay."
- — John Reid before Terrorhurtz's third and final Head-to-Head battle

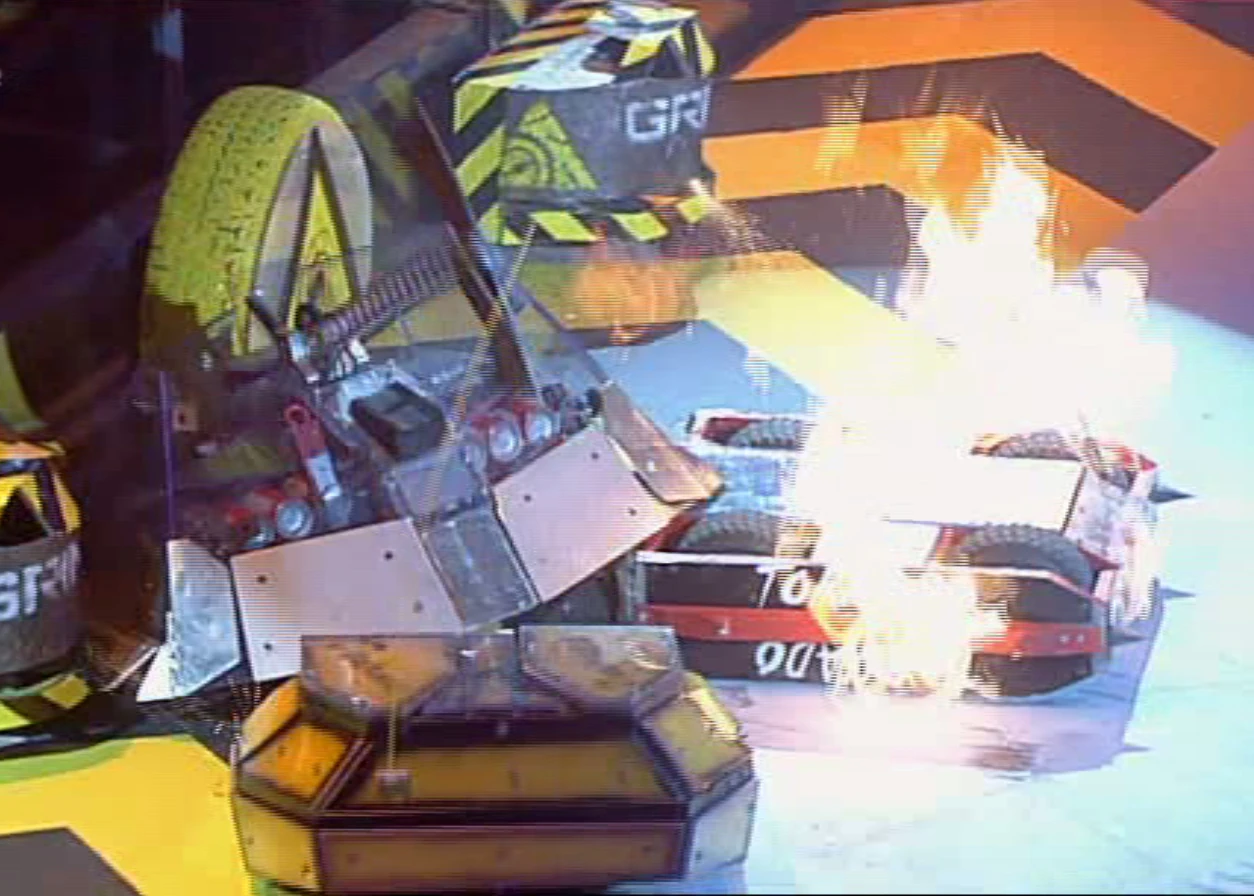
Sparks fly as Aftershock and Terrorhurtz make contact
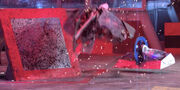
Terrorhurtz tried to get into Aftershock's face straight away, and took the first hit from its opponent well on its front wedge. However, Terrorhurtz turned around and left its rear exposed once again, which allowed Aftershock to come in to burst Terrorhurtz's back right panel. Aftershock then found itself in Shunt's CPZ after another collision sent both machines rocking backwards. Terrorhurtz kept Aftershock in the CPZ, where Shunt came in and helped Terrorhurtz pin Aftershock up against the arena wall. Terrorhurtz remained at close-quarters with Aftershock as it tried to move away, but Will Thomas' machine held its own in a pushing match and kept Terrorhurtz over the floor flipper. Suddenly, the arena hazard activated, sending Terrorhurtz upwards, with follow through contact from Aftershock's spinning weapon catapulting Terrorhurtz airborne before it crashed back down onto the arena floor.
- "And up goes Terrorhurtz!"
- — Jonathan Pearce

Terrorhurtz is sent airborne
Terrorhurtz quickly regained its composure as it sped away after landing, but its axe was now drooped in a downwards position. Aftershock was next to be caught out by an arena hazard, as it was flicked over by the arena spikes, but its weapon swiftly knocked it back onto its wheels. Both machines engaged head on once more, where sparks flew off Terrorhurtz's front wedge, while Terrorhurtz's axe snapped down to the side of Aftershock's flywheel. Finally, Terrorhurtz was able to retract its axe, but a barrage of Aftershock attacks which ended in Terrorhurtz being flung onto its back snuffed out any chance of a Terrorhurtz fightback.
Terrorhurtz lies battered & beaten
- "Is that the end? Is that the end? It's surely the end."
- — Jonathan Pearce as Terrorhurtz lies on its back
With its axe only managing to produce nervous spasms, Terrorhurtz was left unable to self-right, and as a result was counted out. This loss saw Terrorhurtz complete its Head-to-Head campaign with a total of 3 points.
Despite the result, Terrorhurtz still had a chance of progressing to the Heat Final, with its future hinging on the last Head-to-Head battle between Jellyfish and Sabretooth, with Terrorhurtz needing a Jellyfish knockout victory for it to join Aftershock in the Heat Final. Unfortunately for Terrorhurtz, Jellyfish could only manage to win the battle in a judges' decision, and although this meant that both Terrorhurtz and Sabretooth ended with three points apiece, Sabretooth was the machine that went through due to the fact that it had beaten Terrorhurtz in the battle between the two machines earlier in the heat. This saw Terrorhurtz finish third in the league table, where, just like in Series 8, it was eliminated due to the tiebreaker ruling.
Series 10[]
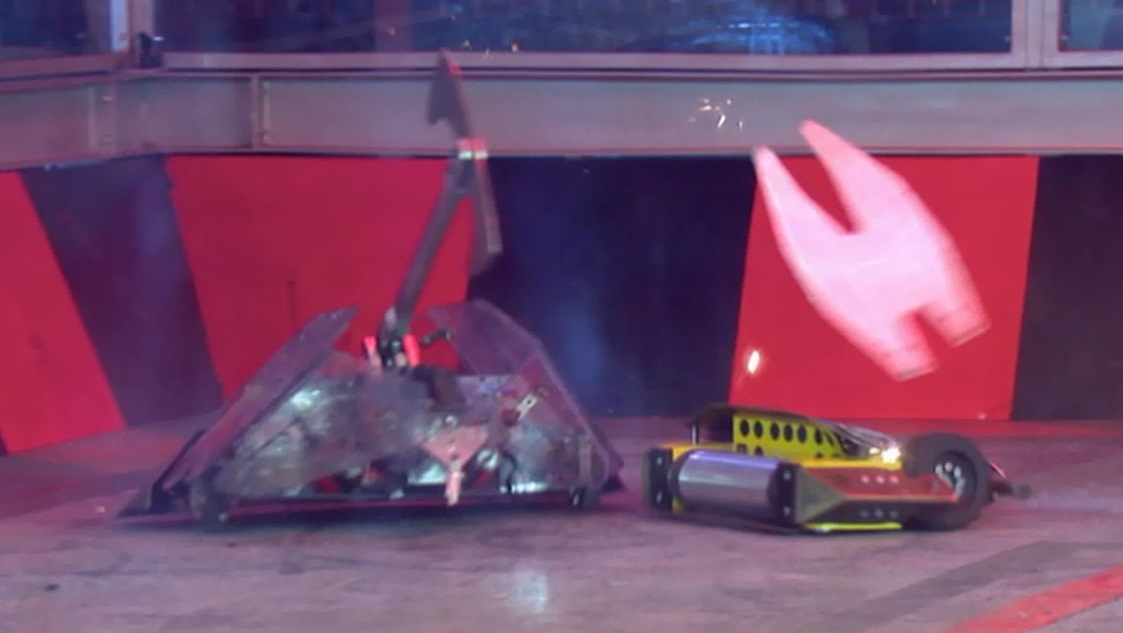
Terrorhurtz continued its run of Revival Series appearances by featuring in Heat C of Series 10. Its Group Battle saw it drawn up against bar spinner Apex and newcomer Vulture, whose team idolised Terrorhurtz and John Reid through watching their prior runs in the Classic Series.
- Angela Scanlon: "John, you and Terrorhurtz: the le grand fromage of the Robot Wars world. And up against two young pups: Apex and Vulture - the new guard. Does that scare you a little bit or are you excited?"
- John Reid: "Apex is pretty scary!"
- — The experienced Team Hurtz go into their latest Robot Wars adventure
Terrorhurtz knocks Apex into the wall, in an untelevised attack
Outside of the televised broadcast, Terrorhurtz asserted early dominance on Apex, driving it into the arena wall, which ripped away a piece of the wall[5]. For health and safety reasons, the battle was immediately halted, and as the interruption took place so early into the match, the battle was formally restarted with no reference to the original battle made.

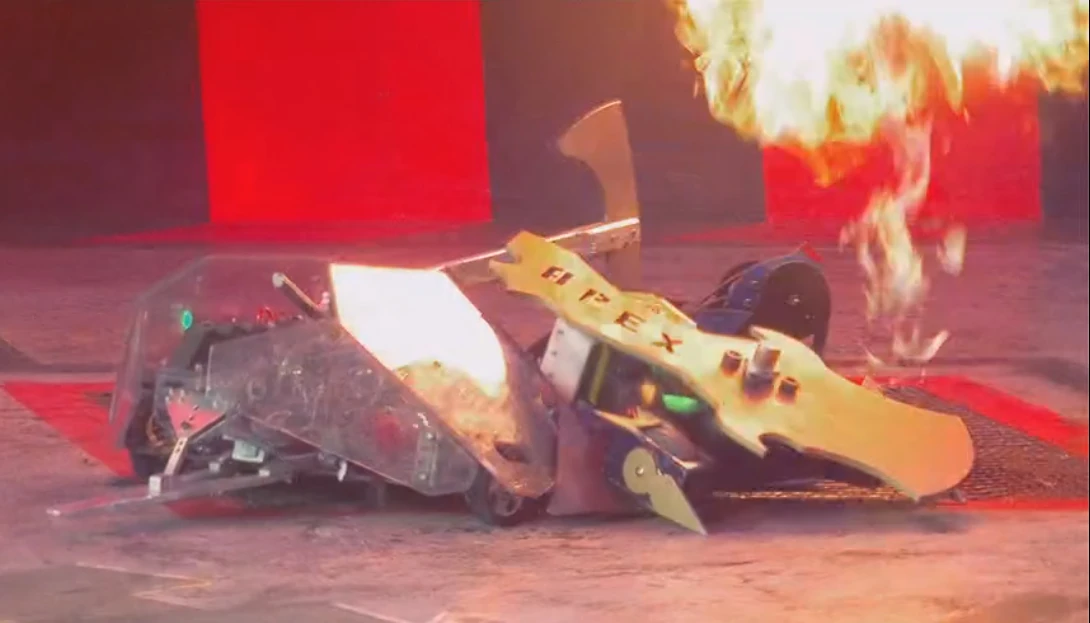
Terrorhurtz takes Apex head-on, ceasing its bar spinner
In the restarted fight, Terrorhurtz started the strongest out of the three machines, bringing Apex's already weakened spinner to an immediate halt with a head-on drive, before landing two quick axe blows onto the stopped weapon.
- "Terrorhurtz is on form!"
- — Angela Scanlon
Terrorhurtz slams its axe down on Vulture
After a short-lived chase of Apex, Terrorhurtz tussled with Vulture, with the latter's weapon sending minor sparks off of Terrorhurtz's front wedge, before Terrorhurtz swung with its axe. Terrorhurtz continued to nudge Vulture around during the Fog of War period which Apex triggered, and then landed a blow onto Vulture after vision was restored. The second of Terrorhurtz's next two attacks resulted in its axe being lodged into the top of Vulture, a result of Vulture's armour cutting into the axehead of Terrorhurtz, although Vulture's weapon also lost power over this period. A tug-of-war between the two ensued, with Terrorhurtz managing to swing Vulture onto the Flame Pit, before Apex parked itself in between the pair. After Shunt came in to separate the three competing machines, Vulture lost drive on one side and was counted out, which allowed Terrorhurtz to rain down more blows on Apex's ceased bar.
- "Terrorhurtz: the only machine out there, for me, really, creating terror."
- — Jonathan Pearce

The three competing machines, in at close quarters
Terrorhurtz chased the retreating Apex around the arena, but put itself into danger, as a misfired swing of the axe carried Terrorhurtz over and into Shunt's CPZ. Despite this, Terrorhurtz composed itself quickly, and forced Apex towards the Arena Spikes. Terrorhurtz was temporarily impaled after one of the spikes shot up behind one of Terrorhurtz's polycarbonate panels, but after it was freed, it had become clear that Apex was immobile. Terrorhurtz spun around and swung its axe in a victory dance, and its route through to the Heat Semi-Finals was confirmed.
- John Reid: "Nick done good! You got plenty of good hits - that was excellent, excellent stuff!"
- Nick Lynch: "Thanks. I know you mean that."
- — A happy Team Hurtz after Terrorhurtz's successful Group Battle
Terrorhurtz's Heat Semi-Final was a rematch with Vulture after Team Immersion and their robot eliminated Bucky the Robot in the Robot Redemption round. Team Immersion attempted to counteract the potency of Terrorhurtz's axe by adding additional, improvised layers to their armour - which they called "pillows".
- "They've got nice, flat top panels, with the link block on there - so hopefully we can aim for that."
- — John Reid looks to line up a knockout blow on Vulture
Terrorhurtz smashes away Vulture's "pillows"
In the opening period of the battle, Terrorhurtz remained in close on its opponent, landing hits to one of its panels and its front wedge, while chasing it into an empty CPZ. With Vulture cornered, Terrorhurtz landed a rally of slams, removing Vulture's "pillows" and bringing Vulture's spinning weapon to a stop.
- "Off goes the pillow! Bits of white, there. No rest for the wicked!"
- — Jonathan Pearce as Terrorhurtz comes in with some early hits
Terrorhurtz lands a hit on the front of Vulture
After a couple of hits to the front of Vulture, Terrorhurtz hounded Vulture into a CPZ once more, where it rammed its axe into Vulture's left-wheel well, landed two more hits onto Vulture, before striking its opponent with such velocity that Vulture's armour once again cut through the blade of Terrorhurtz's axe and the two became stuck together. Matilda came over to pick apart the two machines, but after a final rally of largely inaccurate swings, Terrorhurtz's axe ran out of CO2, unbeknownst to its opponent.
- "That axe, in this series, is much more effective. It's been used with more control than we've seen before - more accuracy."
- — Jonathan Pearce

Terrorhurtz keeps Vulture on the Flame Pit after the Fog of War
With its weapon now out of action, Terrorhurtz danced around the arena, largely staying away from Vulture. Then, two consecutive pushes from Terrorhurtz into Vulture would twice activate the Fog of War in quick succession, with Vulture coming out next to Dead Metal and onto the Flame Pit when the arena was clear again. One final Terrorhurtz drive crashed Vulture into the arena wall, before cease was called. The battle went to the judges, but Team Hurtz were confident they'd done enough to secure a place in the Heat Final, as Terrorhurtz spun around near the centre of the arena.
Ultimately, Terrorhurtz was awarded the victory, and progressed to the Heat Final, where it would face a machine that was in its Group Battle in Series 9 - Rapid.
- "The new guard, against the new-tech upstarts. There can only be one winner!"
- — Dara Ó Briain before the Heat Final

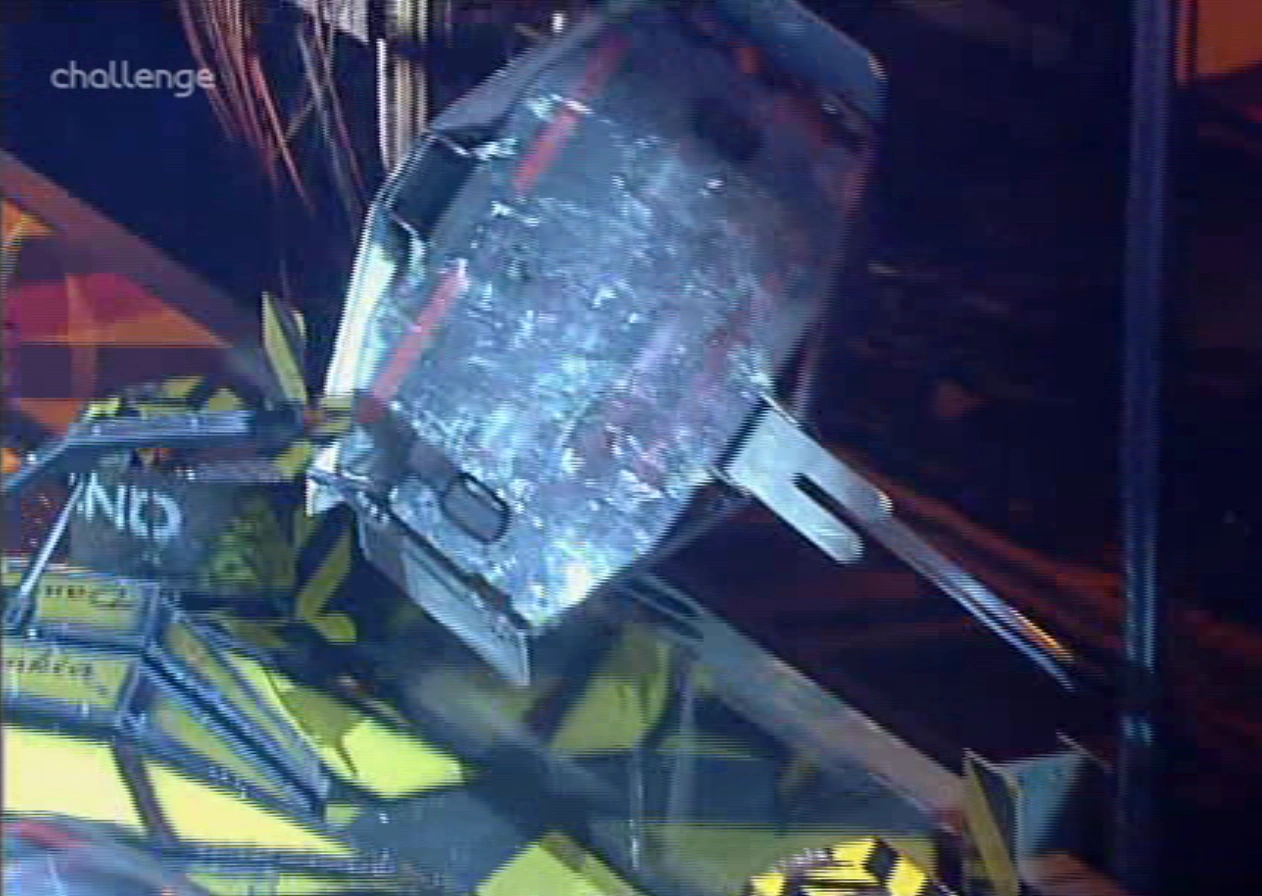
Terrorhurtz is turned over by the Floor Flipper
Terrorhurtz was immediately put onto the back foot in the opening moments, as Rapid wedged underneath it twice, before the Floor Flipper turned Terrorhurtz over. Terrorhurtz was able to quickly right itself, but with the machine still rocking, Rapid slipped underneath Terrorhurtz and placed it onto the Floor Flipper again, with Terrorhurtz thrown once more. A flailing Terrorhurtz was then bumped across the arena floor by Rapid, with Terrorhurtz then pressed up against the arena wall by the flipper robot after it righted itself.
- "Terrorhurtz: big, old, hefty thing - clinging onto life in this Heat Final."
- — Jonathan Pearce as Rapid starts the stronger

Terrorhurtz takes off Rapid's HDPE panel
After being driven into Dead Metal, Terrorhurtz escaped, but was once again hounded around the arena by Rapid. Terrorhurtz landed a clean axe blow to the front of Rapid which also removed Rapid's extra HDPE top panel, but it was then quickly driven into Dead Metal for a second time by Rapid. Terrorhurtz managed to wriggle free from the House Robot once more, but immediately found itself on the front of Rapid, and only narrowly avoided landing outside of the arena after Rapid activated its flipper.
- "Ooh, caught there in a horrible position - square on to that front flipper of Rapid, and it very nearly cost them this final!"
- — Jonathan Pearce as Terrorhurtz is nearly flipped out of the arena


Terrorhurtz puts Rapid under pressure
Terrorhurtz was finally able to pursue Rapid itself after Rapid's flipper had become jammed in a fired position. Terrorhurtz missed with an axe attack though, and it was then accelerated across the arena before being hurled into the arena wall after Rapid's flipper had settled back into place. After being chucked by the Floor Flipper again, Terrorhurtz was able to dent Rapid's top panel, as Team RPD found themselves in Dead Metal's pincers.
- "Now it's Terrorhurtz doing the chasing, and the bumping, and barging."
- — Jonathan Pearce

Terrorhurtz is thrown out of the arena
Suddenly though, Terrorhurtz's axe drooped down and was unable to retract. Rapid quickly took advantage of this by wedging in underneath Terrorhurtz again, before one final use of the flipper sent Terrorhurtz's flying out of the arena. Rapid was the heat winner, with Terrorhurtz's wait for a heat victory since Robot Wars's revival extending, but this would ultimately never happen.
- "They're very well driven. We just couldn't get round the side of them - they've got such a low front."
- — John Reid
Despite the disappointment of a Heat Final defeat, Terrorhurtz had qualified for the 10 Robot Rumble, where it faced Apollo, Big Nipper, Concussion, Eruption, Expulsion, Iron-Awe 6 (for the second time), Sabretooth (for the third time), Thor and Track-tion in an attempt to qualify for the Grand Final as the wildcard.

Terrorhurtz axes Track-tion
On activate, Terrorhurtz, along with Thor, decided to drive towards Sir Killalot, before backing away once it became clear that no one else followed suit. Terrorhurtz's first attack was on Track-tion, which had already lost one track after a hit from Concussion. Here, Terrorhurtz slammed its axe down on top of Track-tion's crusher a couple of times. Terrorhurtz then moved into the centre of the arena just as the Fog of War was released, before coming back to nudge Track-tion towards the pit. Thor took over from Terrorhurtz and pitted Track-tion, before Terrorhurtz bumped into Concussion. Terrorhurtz then circled near the passive Eruption and activated the Dial of Doom with Concussion, releasing the Fog of War again.
- "I've no idea what's happening!"
- — John Reid
Terrorhurtz takes damage from a combined attack by Sabretooth and Apollo
Terrorhurtz slowed down while the Fog of War was active, before dodging an attack from Sir Killalot. Terrorhurtz and Thor faced off, but didn't attack each other. Instead, Terrorhurtz turned into the back of Eruption, and axed the top of its flipper. Terrorhurtz then stayed out of the action for a while, hanging around the Pit while Rogue House Robot was activated. As a third Fog of War cleared, Terrorhurtz rammed between Eruption and an overturned Iron-Awe 6, separating the two machines whilst missing with the axe. Terrorhurtz then axed the bottom of Iron-Awe 6 and pushed it onto the lip of the pit, where Iron-Awe 6 was finished off by Concussion.

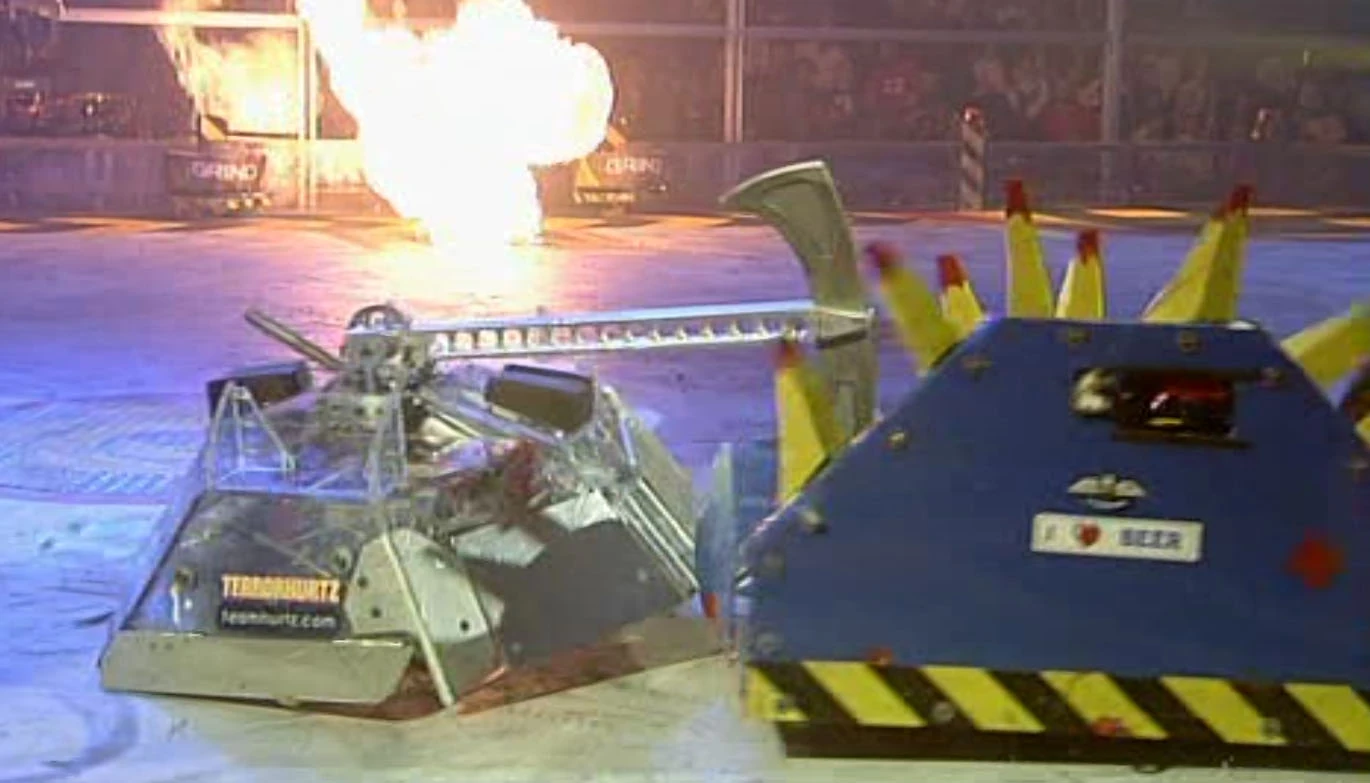
Terrorhurtz's axe hits Sabretooth's drum, causing sparks
Terrorhurtz then hopped through the air as it missed a hit on Concussion, before targeting Apollo briefly, attempting to get round the back of the former champion. Terrorhurtz was flipped over by Apollo and took some damage from Sabretooth as it came in for an attack, and was then pushed around by Thor.
- "A flip for Terrorhurtz, big machine to lift in the air. Terrorhurtz? Are they in trouble? They need to self-right!"
- — Jonathan Pearce

Terrorhurtz is pressured by Eruption
Terrorhurtz was eventually able to right itself, and chased after Sabretooth, slamming its axe down on the drum and bouncing over Sabretooth after taking a light hit under the front of its wedge. Terrorhurtz watched on in the centre of the arena as Apollo was attacked by Shunt and Sabretooth pitted itself. Eruption managed to get underneath Terrorhurtz, flipping it over, and into the path of Sir Killalot. As Thor activated Rogue House Robot, Terrorhurtz was picked up by Sir Killalot and carried towards an entry gate by the House Robot.

Terrorhurtz is almost dropped out of the arena by Sir Killalot
- John Reid: "Well, throw us, come on!"
- Jonathan Pearce: "Oh this is painful…"
- John Reid: "Oh, come on!"
- Jonathan Pearce: "…for John Reid!"
- John Reid: "No! No, no, no, no! No! That’s not right! That’s not right!"
- Jonathan Pearce: "It isn’t right, John Reid. It’s brutal, but them’s the rules, son! Get on with it! And, I think Sir Killalot’s been gentle!"
- John Reid: "Thank you!"
- Jonathan Pearce: "Oh my goodness me, I never thought I'd see the day! Sir Killalot's gone all mushy!"
- — As Terrorhurtz is carried towards and suspended over an entry gate by Sir Killalot
Terrorhurtz is flipped up by Eruption
Sir Killalot appeared to try and drop Terrorhurtz out of the arena, but couldn't lift Terrorhurtz's body over the side wall, and released it. However, Terrorhurtz's axe didn't retract after being released, and it kept away from the last two fighters, Eruption and Apollo, who were engaged in a flipping contest. While Eruption was distracted, Terrorhurtz pushed into the back of them, forcing Eruption to retreat. Terrorhurtz gave chase, but Eruption then turned round, dug under Terrorhurtz's front wedge and flipped it against the arena wall, wedging it between the wall and the Dial of Doom.
Terrorhurtz is left wedged on the arena wall, eliminating it
- "Terrorhurtz shoving Eruption around, but they're very close to the arena wall, and they get a big flip! And I think that is it for Terrorhurtz."
- — Jonathan Pearce
Terrorhurtz landed in such a position that it couldn't move away, and thus it was eliminated from the competition.
- "We almost made it!"
- — John Reid
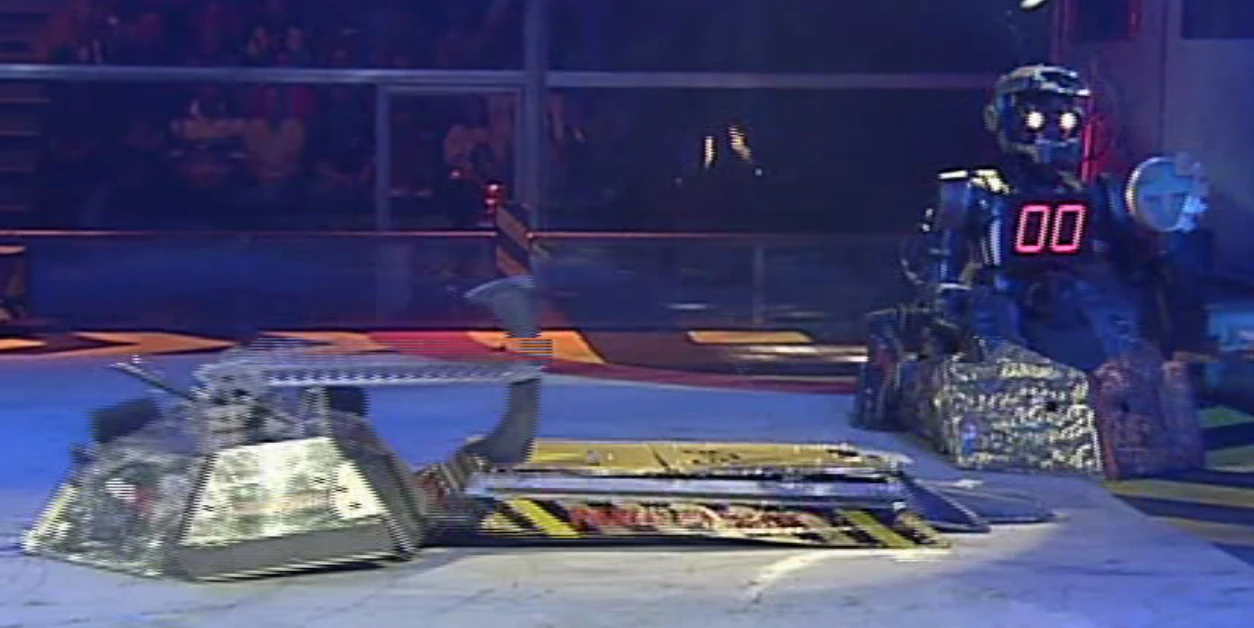
World Series[]
Terrorhurtz also represented the UK in Robot Wars: World Series, competing in the first episode. In the Tag Team round, it was paired with Sabretooth, with the two Team UK machines facing two loanerbots, Irish veteran and Rest of the World captain Diotoir and Portuguese newcomer Rabid M8. Before the battle, John Reid agreed to attack Diotoir first at the suggestion of Team UK captain Dave Young.
- "I think Terrorhurtz brings to the UK team the vicious overhead hits – not everyone is perfectly armoured on top."
- — John Reid during Terrorhurtz’s World Series introduction
Terrorhurtz immobilises Diotoir in the opening seconds
This strategy was maintained in the opening seconds, where Terrorhurtz drove head-on into Diotoir, sustaining blows from the latter’s flywheel. In response, Terrorhurtz axed Diotoir several times, hacking parts of its eyes and right eyebrow off before leaving it immobilised in the centre of the arena. With one half of the Rest of the World team eliminated, Terrorhurtz tagged Sabretooth and waited in its CPZ while the Team Legion machine pursued, hit and immobilised Rabid M8. With Team UK’s opposition vanquished, Terrorhurtz left its corner to press the Arena Tyre, triggering the Fog of War, before driving into Diotoir’s flywheel once again and axing its front armour. Terrorhurtz and Sabretooth’s performance ensured that Team UK scored three points for their commanding knockout victory.
- "I can imagine the International teams will be a bit disappointed with that. I’m sure they’ll be working furiously on their machines, getting them ready and sorting them out and taping the links in so they don’t pop out. So, I suspect the next fight might be a bit tougher."
- — John Reid anticipates improvements from the Rest of the World team
In the Head-to-Heads, Terrorhurtz faced Dutch machine TMHWK, a fellow axe-wielding robot which, according to John Reid, happened to use Terrorhurtz's old axe arm. Terrorhurtz's own axe arm was wrapped with part of Diotoir's fur, and its front wedge decorated with a Union Flag.
- "…so we’ve got to be pretty careful out there. We don’t want to be beaten by our own axe. It would be quite nice to break it, wouldn’t it?"
- — John Reid prior to the Head-to-Head against TMHWK
Terrorhurtz attacks TMHWK while Sir Killalot pins its opponent against the Arena Tyre mount
Terrorhurtz axes TMHWK
Terrorhurtz began the battle by driving around and into a spinning TMHWK, pushing the latter into Sir Killalot. Terrorhurtz continued pursuing and slamming into TMHWK as it drove away, accidentally driving head-on into Matilda’s flywheel as it attempted to line up an attack on the Dutch machine. It cornered TMHWK against the wall as the latter activated the pit, striking TMHWK’s top-left panel as Sir Killalot pushed it against the mount for the Arena Tyre. Terrorhurtz charged into TMHWK again as it escaped a second time, before axing it again and hitting the floor as the two competitors lingered in an empty CPZ. Taking part of TMHWK’s entanglement devices with it, Terrorhurtz reversed and spun round, proceeding to hit TMHWK’s axe arm and top armour with a few more axe blows. These attacks bent TMHWK’s arm, resulting in the arm fracturing and snapping in half once Terrorhurtz pushed TMHWK into a CPZ and allowed Matilda to flip it over. Terrorhurtz landed two more axe blows on the front of TMHWK as it steered and pushed it over the edge of the pit.
- John Reid: "One last hit?"
- Dave Young: "One last hit – go on!"
- John Reid: "One good hit. Wait, wait, wait, wait! Wait for a good hit!"
- — John Reid and Dave Young just before Terrorhurtz pits TMHWK

A final axe blow from Terrorhurtz knocks TMHWK into the pit
With TMHWK stranded, it gingerly approached the Dutch machine, before causing it to fall in with one last hit from the axe. Terrorhurtz earned Team UK one more knockout victory and three more points; after the battle, John Reid shook hands with Annita van der Meer of the Dutch Robot Girls, who handed him back the broken axe arm formerly used by his machine.
- "They are a very nice team, so it’s a bit of a shame. But they’re new, you know, so it’s good experience, all good experience. Though I’m sure they’ll come back better and stronger."
- — John Reid praises the Dutch Robot Girls following his World Series battle against them
Needless to say, the points scored by Terrorhurtz in both stages were enough for Team UK to emerge victorious in the first episode of Robot Wars: World Series.
Results[]
| TERRORHURTZ - RESULTS | ||
| Series 5 | ||
| The Fifth Wars - UK Championship Heat, Round 2 | ||
| Heat L, Eliminator | vs. Ming 3 | Won |
| Heat L, Semi-Final | vs. Fluffy | Lost |
| Series 6 | ||
| The Sixth Wars - UK Championship Fourth Place | ||
| Heat I, Round 1 | vs. A-Kill, Reptirron The Second, Sabretooth | Qualified |
| Heat I, Round 2 | vs. Kronic 2 | Won |
| Heat I, Final | vs. Panic Attack (8) | Won |
| Semi-Final 2, Round 1 | vs. Spawn Again (10) | Won |
| Semi-Final 2, Round 2 | vs. Bigger Brother (2) | Won |
| Grand Final, Eliminator | vs. Razer (1) | Lost |
| Grand Final, Playoff | vs. Firestorm 4 (3) | Lost |
| Extreme Series 2 | ||
| All-Stars Heat, Round 1 | ||
| Heat A, Round 1 | vs. Dantomkia, Tornado | Eliminated |
| Challenge Belt Finalist, Failed Challenge | ||
| Round 1 | vs. Barber-Ous 2, Iron-Awe 2, Vader | Qualified |
| Round 2 | vs. S.M.I.D.S.Y. | Won |
| Round 3 | vs. Dantomkia | Won |
| Challenge | vs. Tornado | Lost |
| Series 7 | ||
| The Seventh Wars - UK Championship 3rd Seed, Heat, Round 1 (Disqualified before first battle) | ||
| Heat B, Round 1 | vs. Gyrobot, Jackson Wallop, Killerkat | Disqualified |
| NOTE: Terrorhurtz arrived at the studio unfinished, and the producers disqualified it on a "robots must be complete upon arrival" clause. | ||
| Series 8 | ||
| Series 8 - UK Championship Round 2, Third Place | ||
| Heat A, Group Battle | vs. Kill-E-Crank-E, Nuts, Razer | Qualified |
| Heat A, Head-to-Heads | vs. Carbide | Won via KO (3 points) |
| Heat A, Head-to-Heads | vs. Behemoth | Lost (0 points) |
| Heat A, Head-to-Heads | vs. Nuts | Won via Judges' decision (2 points) |
| Series 9 | ||
| Series 9 - UK Championship Round 2, Third Place | ||
| Heat A, Group Battle | vs. Jellyfish, Nuts 2, Rapid | Qualified |
| Heat A, Head-to-Heads | vs. Sabretooth | Lost (0 points) |
| Heat A, Head-to-Heads | vs. Jellyfish | Won via KO (3 points) |
| Heat A, Head-to-Heads | vs. Aftershock | Lost (0 points) |
| Series 10 | ||
| Series 10 - UK Championship Heat Final | ||
| Heat C, Group Battle | vs. Apex, Vulture | Won |
| Heat C, Semi-Final | vs. Vulture | Won |
| Heat C, Final | vs. Rapid | Lost |
| 10 Robot Rumble | vs. Apollo, Big Nipper, Concussion, Eruption, Expulsion, Iron-Awe 6, Sabretooth, Thor, Track-tion | Lost |
| World Series, representing the UK Partnered with Sabretooth for Tag Team battle | ||
| Episode 1, Tag Team | vs. Diotoir & Rabid M8 | Won via KO (3 points) |
| Episode 1, Head-to-Head | vs. TMHWK | Won via KO (3 points) |
Wins/Losses[]
- Wins: 18
- Losses: 10
Terrorhurtz's disqualification from The Seventh Wars is not counted as a loss.
Series Record[]
| Main Series | Terrorhurtz Series Record |
|---|---|
| The First Wars | Did not enter |
| The Second Wars | Entered with Killerhurtz |
| The Third Wars | Entered with Killerhurtz |
| The Fourth Wars | Entered with Killerhurtz |
| The Fifth Wars | Heat, Round 2 |
| The Sixth Wars | Grand Final, Fourth Place |
| The Seventh Wars | Disqualified before Heat, Round 1 |
| Series 8 | Heat Round 2, Third Place |
| Series 9 | Heat Round 2, Third Place |
| Series 10 | Heat Final |
| Robot Wars Extreme | Appearances |
| Series 1 | Did not enter |
| Series 2 | Entered |
- NOTE 1: John Reid also competed in Battle of the Stars as mentor for Dee.
- NOTE 2: Basher, a robot which John Reid competed with in BattleBots, was entered into the untelevised Series 8 Pilot by its co-builder Grant Cooper.
Gallery[]
")
")
")
")
")
")
")
")
")
")
")
")
")
")
")
")
")
Outside Robot Wars[]
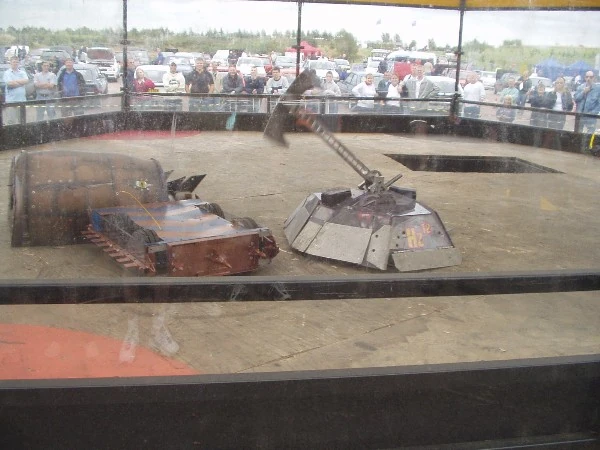

Terrorhurtz at a live event during the original run of Robot Wars
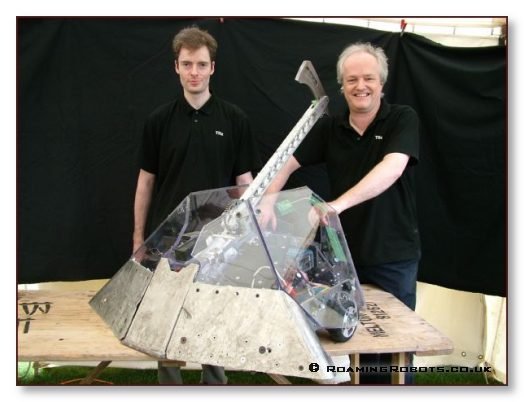
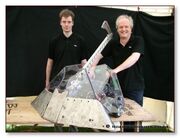
Terrorhurtz at the 2006 UK Championship
Since its initial completion in 2001, Terrorhurtz spent many years competing on the live events circuit, and achieved considerable success while undergoing evolutionary changes to its chassis, armour, internals and axe weapon. Between 2009 and 2013, the robot also exchanged its double-headed axe in favour of one with a single bladed head[6][7], although the double-headed axe would return as part of Terrorhurtz's 2016 redesign.
Terrorhurtz's most significant achievement came in 2004, where it won the Roaming Robots Winter Tour, which doubled as the official FRA UK Championship. It repeated this feat in the 2009 FRA UK Championship, becoming the second robot to win two UK Championship titles after Robot Wars Series 3-4 champion Chaos 2. Terrorhurtz also finished runner-up in the 2005 and 2007 UK Championships - to Kronic and Big Nipper respectively - and won its heat against Hard and Velocirippa in the 2006 UK Championship, before losing to Storm 2.[8][9][1][10]
Terrorhurtz has been relatively inactive in live events since winning the 2009 UK Championships, coming out occasionally for bigger events such as Robot Rumble 2010, the 2011 UK Championships, and the 2013 European Championships. Its most recent combat appearance came in April 2018, where it fought at the Robots Live! event in Burgess Hill. Terrorhurtz fought in numerous battles throughout the event, notably causing substantial damage to Eruption, Tango and Weird mAlice in its first-round battle during the main competition. However, despite also pitting Eruption in the later stages of the battle, it lost after getting flipped by Weird mAlice while its axe had run out of CO2.
In September 2018, Terrorhurtz was one of several former competitors which attended the first RoboNerd meet in Wolverhampton, appearing alongside Team Hurtz's BattleBots competitor Beta.
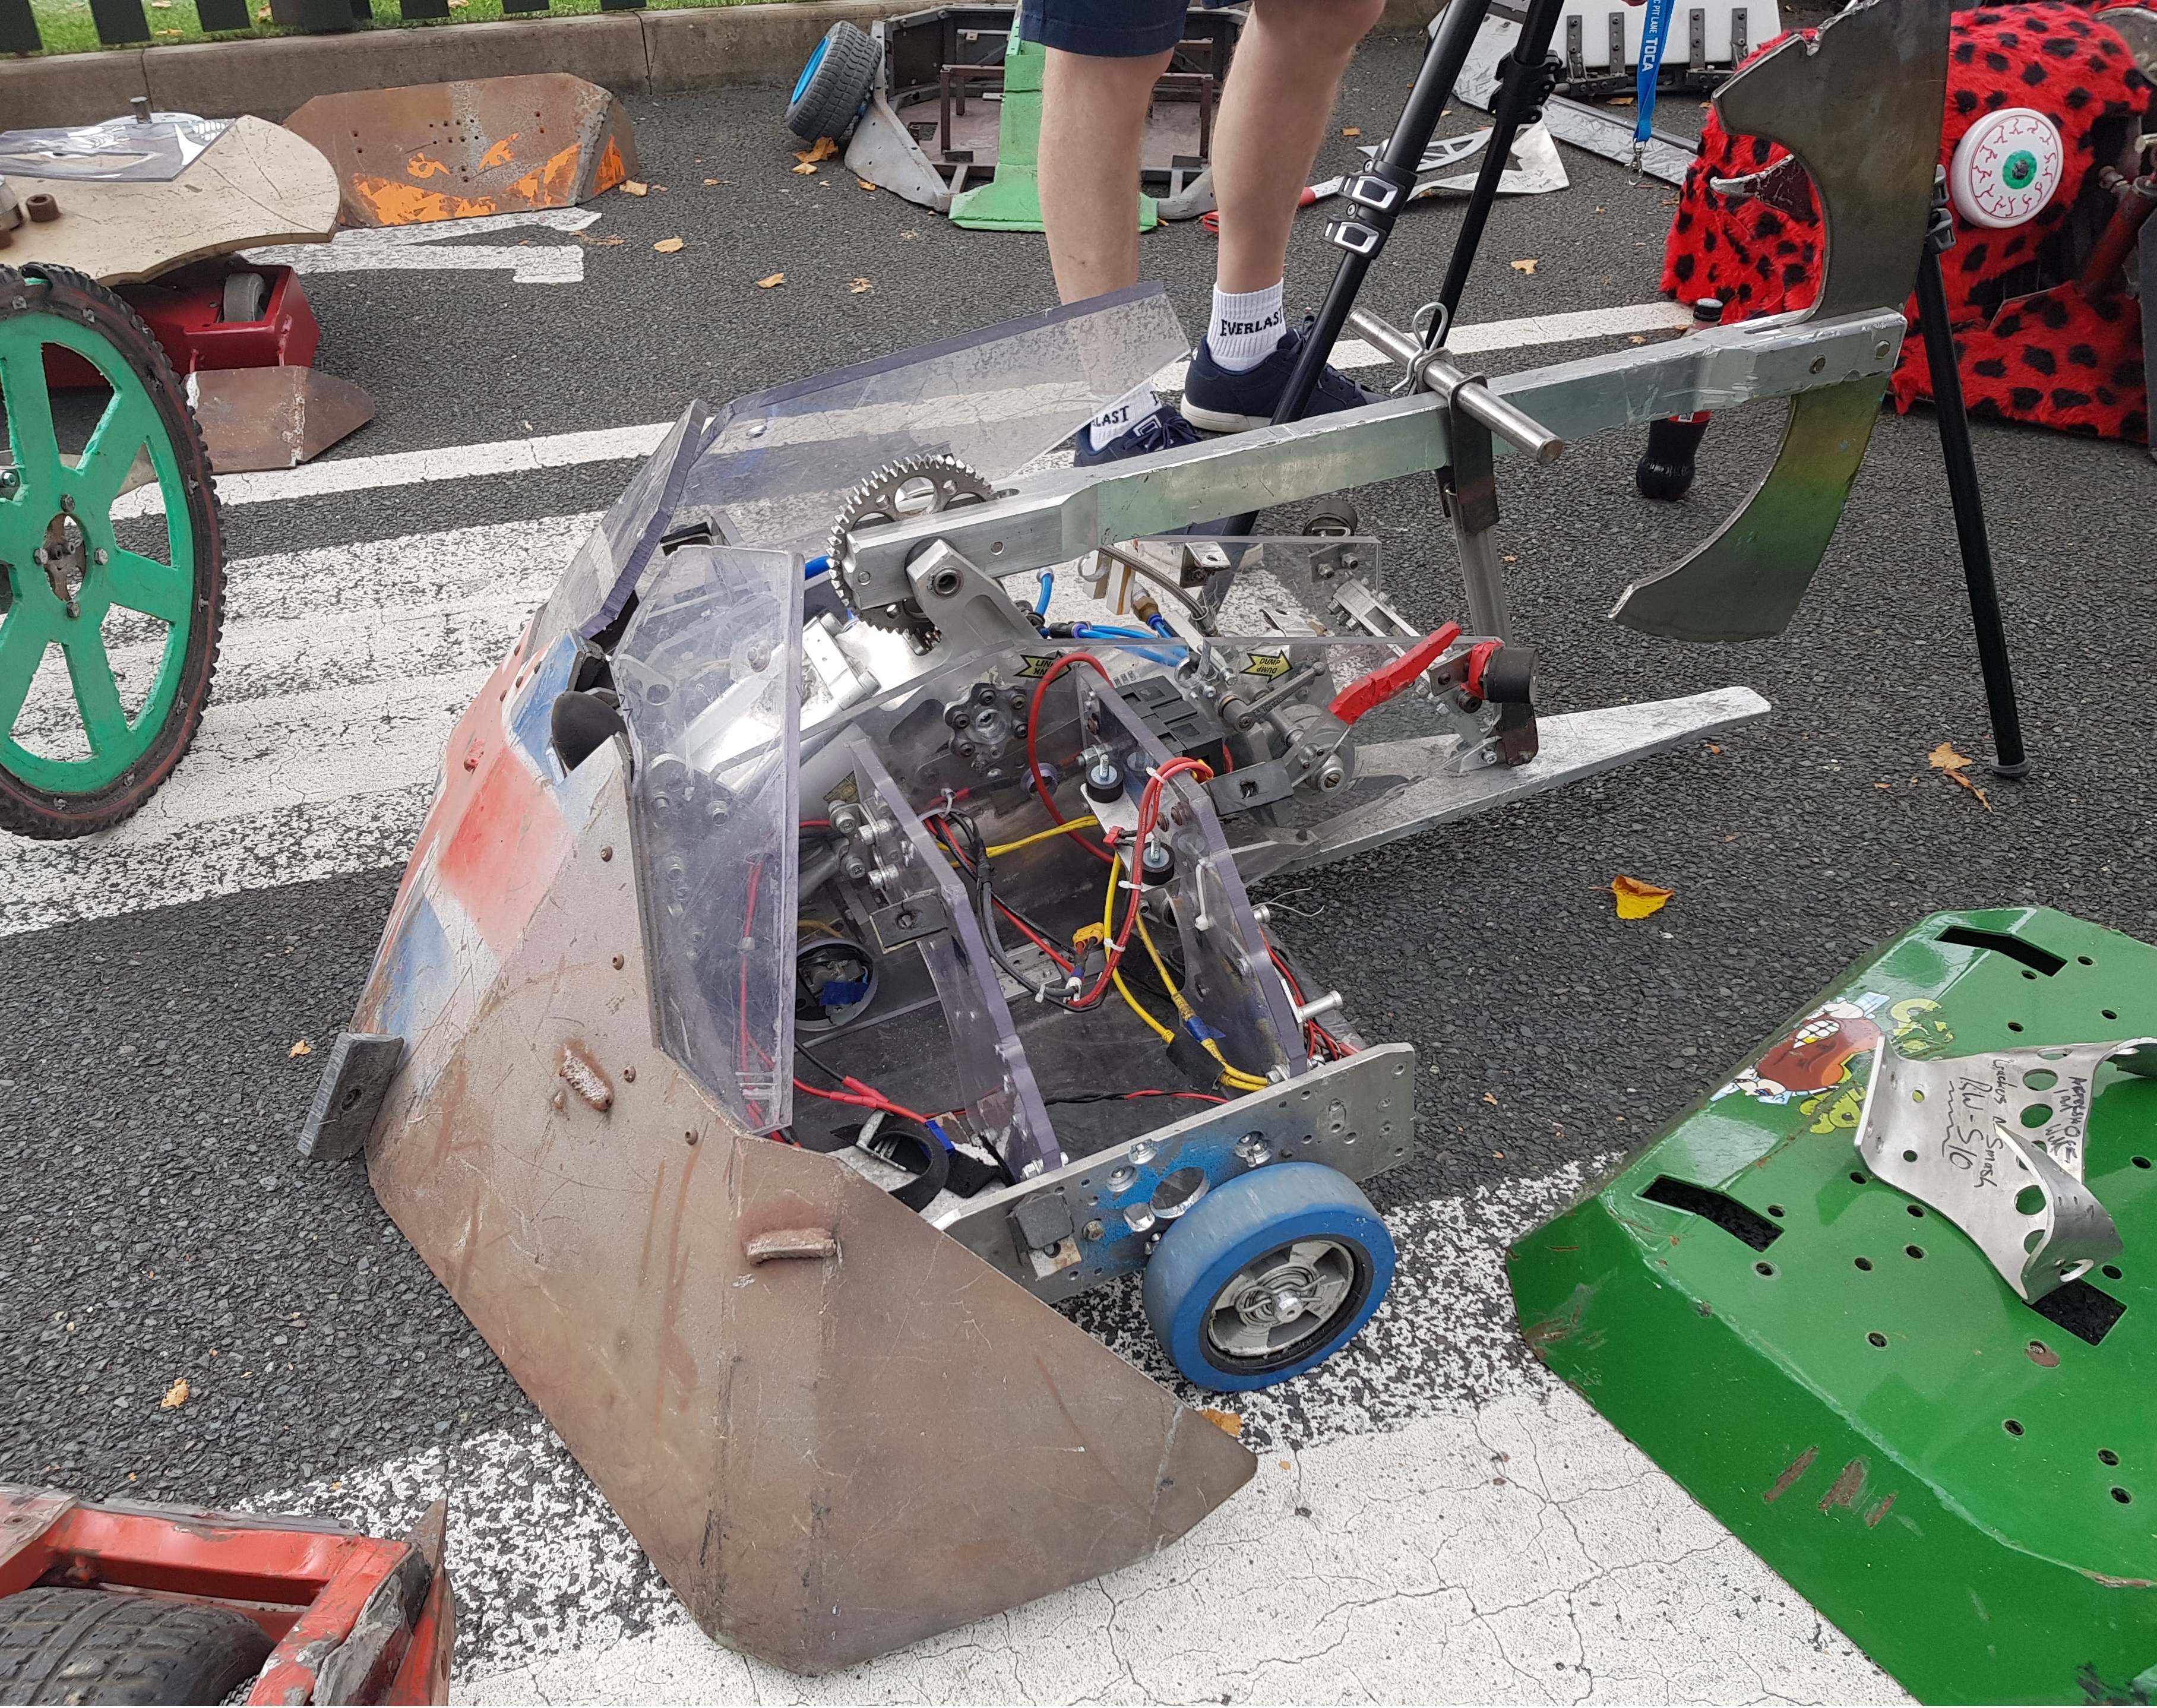
Terrorhurtz at RoboNerd in September 2021
During Beta's Reddit AMA session in 2016, John Reid revealed that he had applied for the 2015 season of the BattleBots reboot with Terrorhurtz. While Terrorhurtz itself did not get accepted into Season 1, Reid would still team up with Dave Moulds to enter Beta into the 2015 season. Unfortunately, despite making it to the event, Beta would later be forced to withdraw from the competition after American Airlines lost a 25kg bag of important parts — which contained Beta's custom weapon controller, wiring harness, armour mounting, wheel bearings, battery chargers and more — en route to San Francisco. The bag was ultimately found and retrieved approximately eight weeks later.[11]
In 2021, John Reid brought Terrorhurtz to RoboNerd once more, with the robot also making a brief return to combat at the inaugural Robots Live! event in Ridayh, Saudi Arabia the same year. In both appearances, it still sported the Union Jack paintwork from the World Series specials.[12]
On 15 October 2023, Terrorhurtz made a surprise return to UK combat at Robots Live! Grantham, its first public appearance in two years.[13] During the event, it was involved in an all-axe melee against Implosion, Apocalypse and Switch, though it suffered mobility and pneumatic issues at various moments throughout.[14] A follow-up appearance at Stoke-on-Trent saw Terrorhurtz participate in the main competition, though a damaged ram prevented its axe from being able to retract properly in its first-round battle. This ultimately prevented the robot from self-righting after getting pushed into the 'Thunder Drum' hazard by Leviathan and flipped over; the melee was ultimately won by fellow axe bot Thunderbolt.[15]
Appearances in Merchandise[]
The design of Terrorhurtz's axe was seemingly used by the HEXBUG remote controlled toy Royal Pain, also sold individually as the Havoc Hammer Accessory Pack as part of the Robot Wars line of merchandise. This is enforced by the drum spinner of Magnetar being exactly replicated for the Deadly Drum Accessory Pack.
")
")
")
Trivia[]
- Rather than on television, Terrorhurtz made its debut in the video game Robot Wars: Arenas of Destruction, despite the fact the game was based on Series 4 of Robot Wars, and was released before the airing of Heat L of Series 5. The reason for this is because Team Hurtz's entry in The Fourth Wars, Killerhurtz, was originally intended to be in the game, but the rights to the name and likeness of were owned by BattleBots.
- This makes Terrorhurtz the only competitor robot to make its first appearance in a video game.
- Terrorhurtz utilised a wall of polycarbonate panels to combat Razer in Series 6.
- Killerhurtz had a wall of polycarbonate panels that was to be used if it fought Razer in the First World Championship but it was never seen.
- Team Sabretooth once confused Terrorhurtz with its predecessor, Killerhurtz, while describing the damage it caused to their robot following their Series 6 first-round battle. However, the team immediately corrected their mistake later on in their post-battle interview with Philippa Forrester.
- In the same Series 6 heat, A-Kill's captain, Chris Delph notably confused Terrorhurtz with Mega Hurts while being interviewed by Craig Charles after A-Kill's loss to Panic Attack.
- In Series 6, Terrorhurtz's image on its statistics board appears to be a cropped version of the pre-battle shot of it under the arena spotlight in its first battle of the series, instead of a studio shot like almost all other competitors' statistics boards. This was also made in the Extreme Series 2 All-Stars.
- Despite this, a studio shot of Terrorhurtz was done and used by Robot Wars Magazine in issues 5 and 6, though in issue 4's report on Heat I an image of Terror-Bull was used by mistake.

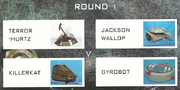
Terrorhurtz on a Series 7 wallchart, using an Extreme 2 photograph
- Due to Terrorhurtz not being completed in time for its Series 7 battle, it did not receive an official photo with a blue background. Instead, official media such as a Seventh Wars wallchart was required to use a similar photo from the second series of Extreme.
- Terrorhurtz has the unique distinction of both automatically qualifying for and being disqualified from the same series, though Pussycat has also had both of these occur in separate series.
- According to John Reid, Terrorhurtz is easier to drive than Beta due to not having to deal with the weight of the latter's hammer, despite preferring Beta's big hits and looks.
- Terrorhurtz was the only robot to fall in the second round on a tiebreaker, having done so in both Series 8 and 9.
- Excluding any robots which had to withdraw during the reboot, Terrorhurtz was one of four robots to win their last Head-to-Head battle before being eliminated from that stage in a series which used the round-robin format. The others were Eruption, TR2 and Jellyfish.
- Terrorhurtz and TR2 are the only robots to battle Carbide, and never lose to it. In addition, Terrorhurtz is the only robot to defeat Carbide by complete knockout.
- Terrorhurtz played a prominent role in the online video series, How to Build a Robot, where James Cooper explained various safety measures concerning combat robots, using Terrorhurtz as a physical example.
- In both episodes of Extreme 2 that Terrorhurtz appeared in, it was in the same episode as Dantomkia and Tornado, fighting them both in those episodes.
- Terrorhurtz was the final robot to be thrown out of the arena in Robot Wars, after being flipped out of the arena by Rapid in Series 10.
- Out of the nine robots which were beaten in the 10 Robot Rumble, Terrorhurtz was the only one that was not eventually placed in the pit.
- The only house robot not to share the arena with Terrorhurtz was Cassius Chrome, although if Terrorhurtz had competed in its Series 7 melee, it would have shared the arena with him.
- Terrorhurtz is one of only five robots to win the UK Championship twice in Robot Wars and FRA competitions, winning in 2004 and 2009, becoming the second robot to achieve this feat. Terrorhurtz also finished as runner-up to Kronic in 2005 and Big Nipper in 2007.
- Terrorhurtz is also one of only four FRA UK Heavyweight Champions to have won a heat and reached a Robot Wars Grand Final, the others being Eruption, TR2 and Team Shock. Like Team Shock, it is also one of two to have done so before becoming an FRA UK Champion.
- Due to damage caused by Terrorhurtz, both Mighty Mouse and the original Ripper were retired, and replaced with Meggamouse and Ripper Evo, respectively.
- Tornado was also pushed into retirement as a consequence of receiving damage, but later returned to robot combat with only minor known upgrades.
- Terrorhurtz's success over the years has inspired many more axe-wielding robots to be built, such as Team Toon's Tinyhurtz, which greatly resembles the current version of Terrorhurtz and was built using blueprints supplied by John Reid.
- In 2009, Terrorhurtz was inducted into The Combat Robot Hall of Fame, after initially being selected as an Honorable Mention in 2007. Its full induction was made in recognition of its success in Robot Wars and the 2004 UK Championships, as well as its design, engineering and powerful axe.[16]
Honours[]
Nominations
- Best Design Award - Robot Wars: The Fifth Wars
External Links[]
- Terrorhurtz official website (archived)
- Terrorhurtz - Robot Wars Facebook page
- Terrorhurtz (Series 8) on the Robot Wars website
- Terrorhurtz (Series 9) on the Robot Wars website
- Terrorhurtz (Series 10) on the Robot Wars website
References[]
- ↑ 1.0 1.1 https://www.fightingrobots.co.uk/content/226-terrorhurtz
- ↑ https://www.facebook.com/terrorhurtzrobot/posts/pfbid02nBm6EnaBLJhXcaXqvUcaYmbf6fJBJEixvi8tRLbFt317Muv9tF6NStmZ2tckoFDMl
- ↑ Correspondence with Wiki user SpaceManiac888
- ↑ Private correspondence between User:Toon Ganondorf and Team Hurtz Facebook page, 3 November 2016
- ↑ [1]
- ↑ https://www.youtube.com/watch?v=NdzqSuTlkgU
- ↑ https://www.youtube.com/watch?v=fHSphblO0jM
- ↑ https://www.fightingrobots.co.uk/content/302-fighting-robots-association-heavyweight-championships-2005
- ↑ https://www.fightingrobots.co.uk/content/304-fighting-robots-association-heavyweight-championships-2007
- ↑ https://www.fightingrobots.co.uk/content/303-fighting-robots-association-heavyweight-championships-2006>
- ↑ https://www.reddit.com/r/battlebots/comments/52anhy/ama_beta_team_robo_challenge/d7ioz8t/
- ↑ https://www.facebook.com/robotsliveshow/posts/pfbid02XNFSJ9wqu69G5tgGZLY8q8yjALjoG1sZp2RGx5dYkCWpovFk3iwy9HCE4Y9SuHW9l
- ↑ https://www.facebook.com/robotsliveshow/posts/pfbid02H9VdvNYm1iVY89hPw9tD1PSmC9Ar1Qr6D5fcW8wMnGegHFUMX8UMNKzWwg9SVgmdl
- ↑ Facebook video of Implosion vs Terrorhurtz vs Apocalypse vs Switch, Robots Live! Grantham, 15 October 2023, Eruption - Robot Wars
- ↑ 'Robots Live Stoke 2023: Terrorhurtz Vs Thunderbolt Vs Leviathan Vs Apocalypse ', TEAM IRONCLADS (YouTube), uploaded 29 October 2023
- ↑ The Combat Robot Hall of Fame ®, Team Run Amok website
[]
| ||||||||||||||||||||
| ||||||||||||||||||||||||||||||||
| ||||||||||||||||||||||||||||||||||||||||||||
| ||||||||||||||||||||||||||||||||||||||
| ||||||||||||||||||||||||||||||||
| |||||||||||||||||||||||||||||||||||
| ||||||||||||||||||||||||||||||||