- "Y'know, I can’t understand people who are obsessed with extreme sports. For a start, I don’t trust sky-diving, especially when they say, “Don’t open your parachute until you’re through the cloud level”. I mean, what if it’s foggy?! And they say nothing compares to the adrenaline rush of bungee jumping. Really? Next time, try it without the elastic. Besides, there’s only one extreme sport, and that’s Robot Wars. And you don’t need to have left your brain in a fridge to do it."
- — Craig Charles' introduction
Heat C of Robot Wars: The Fourth Wars was the third of sixteen heats which determined the semi-finalists of Robot Wars: The Fourth Wars. The episode featuring Heat C was originally broadcast on October 6, 2000 on BBC Two. The broadcast managed to attract 3.98 million viewers, an increase of 10,000 viewers when compared with the previous episode. According to BARB, this meant it ranked fourth in the top thirty highest rated BBC 2 broadcasts during 2-8 October.
Competing Robots
Newcomers
 | ||
|---|---|---|
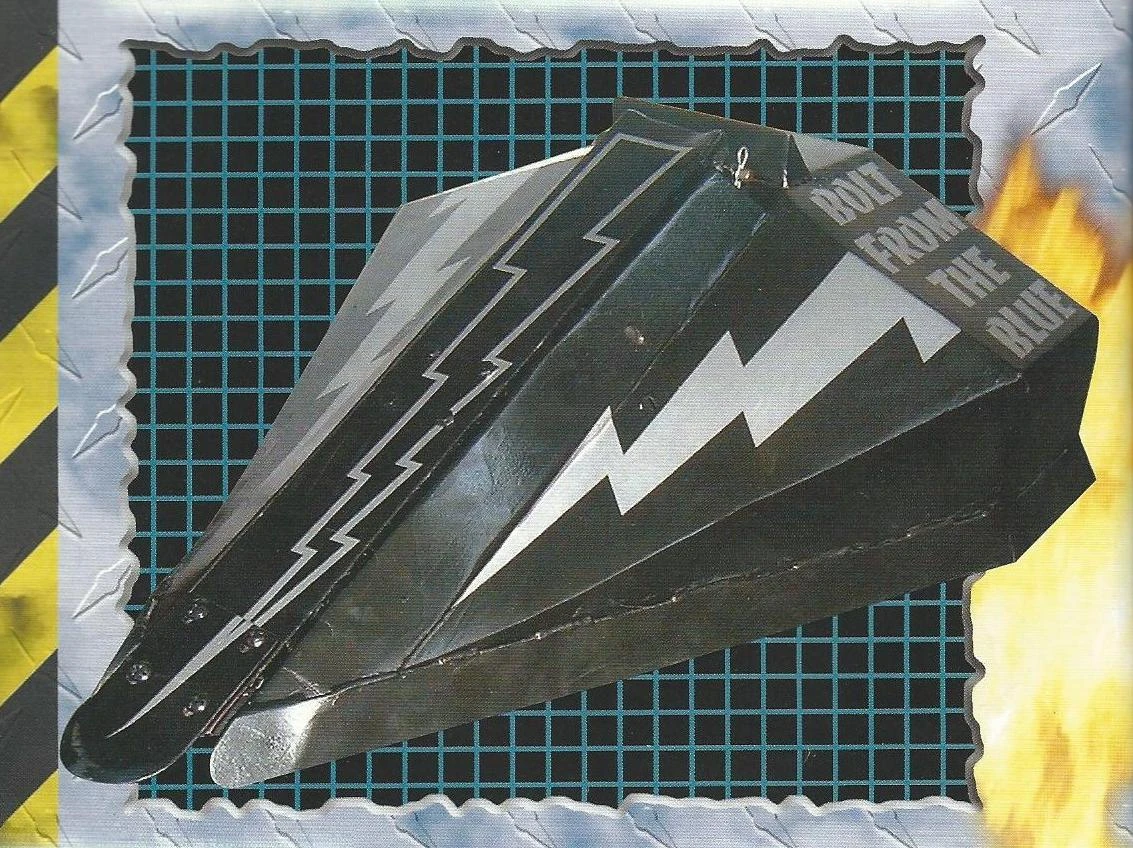
| Bolt from the Blue | ||
| Weight | 79.4kg | |
| Dimensions | 1.00 x 0.40 x 0.70m | |
| Clearance | 0.01m | |
| Power | Electric powered motors | |
| Weapons | Flipper arm | |
| Notes | Uses compressed air | |
| From: Kendal in the Lake District | ||
| Team Members: James Procter, Lucien Procter & Chris Elleray | ||
 | ||
|---|---|---|
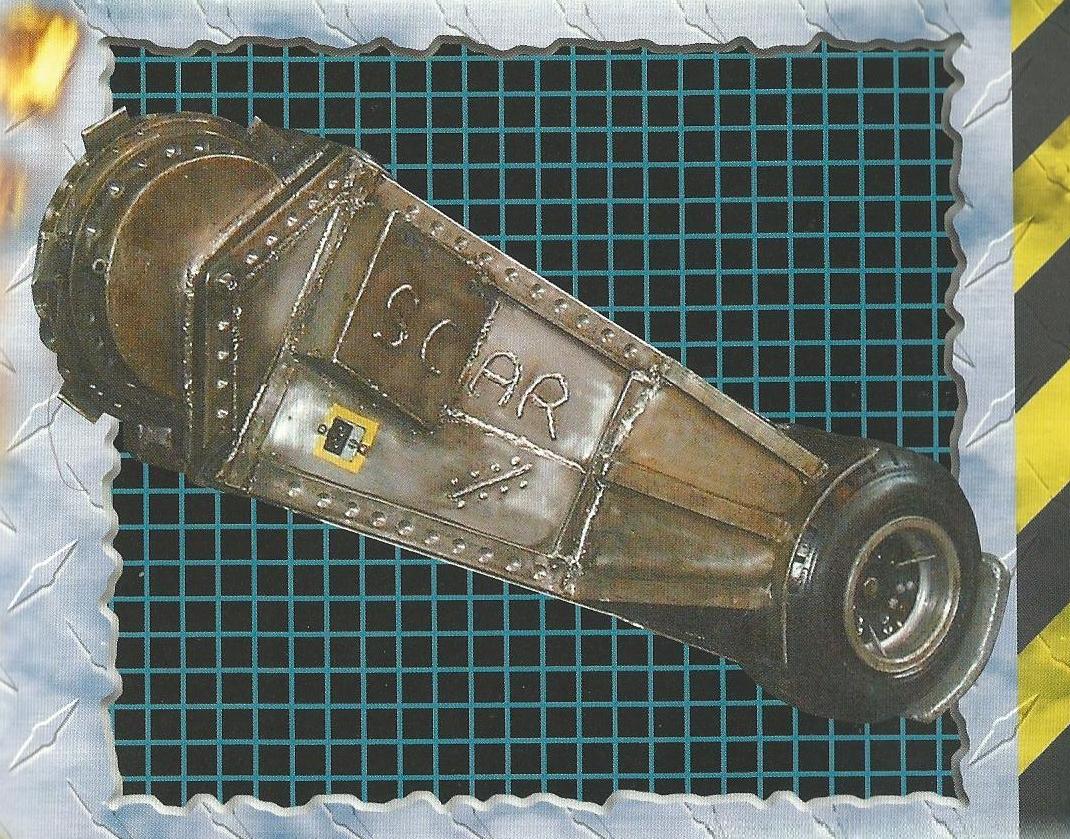
| Scar | ||
| Weight | 79.5kg | |
| Dimensions | 0.34 x 0.90 x 0.80m | |
| Clearance | 0.08m | |
| Power | 2 x Wheelchair motors | |
| Weapons | 3 hardened steel cutters | |
| Notes | Wants to smash up Hypno-Disc | |
| From: Leamington Spa | ||
| Team Members: Tony Adams & Chris Adams | ||
 | ||
|---|---|---|
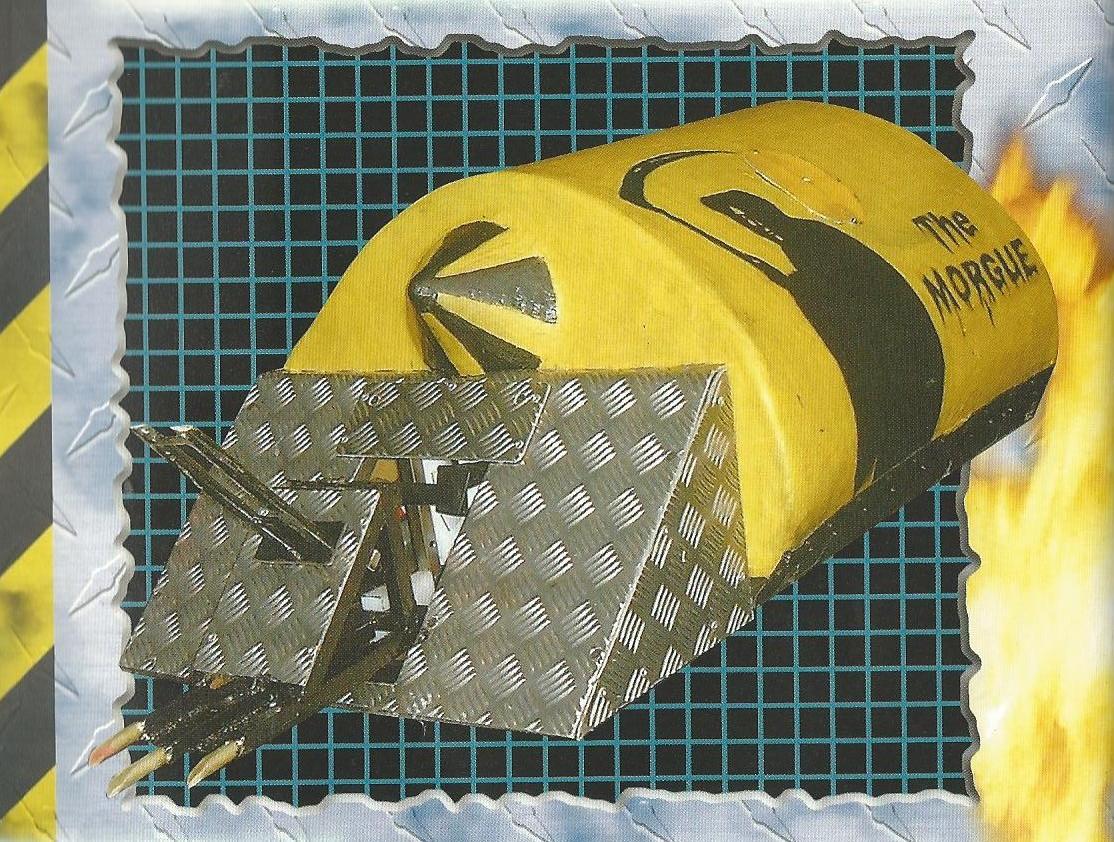
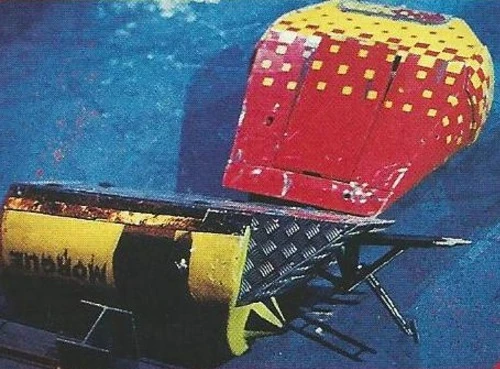
| The Morgue | ||
| Weight | 76.7kg | |
| Dimensions | 1.25 x 0.65 x 0.42m | |
| Clearance | 0.01m | |
| Power | Electric powered motors | |
| Weapons | Front lifting forks | |
| Notes | Low centre of gravity | |
| From: Swansea, Wales | ||
| Team Members: Dorian Caudy, Mark Hooper & Huw White | ||
Veterans
 | ||
|---|---|---|
| Diotoir (seeded 21st) | ||
| Weight | 80.0kg | |
| Dimensions | 0.80 x 0.80 x 0.40m | |
| Clearance | 0.02m | |
| Power | Electric powered motors | |
| Weapons | Spring loaded lifting arm | |
| Notes | Pressure 1200PSI | |
| From: Dublin, Ireland | ||
| Team Members: Peter Redmond & Cairon Byrne | ||
 | ||
|---|---|---|
| Firestorm 2 (seeded 5th) | ||
| Weight | 79.9kg | |
| Dimensions | 0.29 x 0.97 x 0.82m | |
| Clearance | 0.06m | |
| Power | Electric powered motors | |
| Weapons | Powerful flipping arm | |
| Notes | Took 3 months to build | |
| From: Durham | ||
| Team Members: Graham Bone & Alex Mordue | ||
 | ||
|---|---|---|
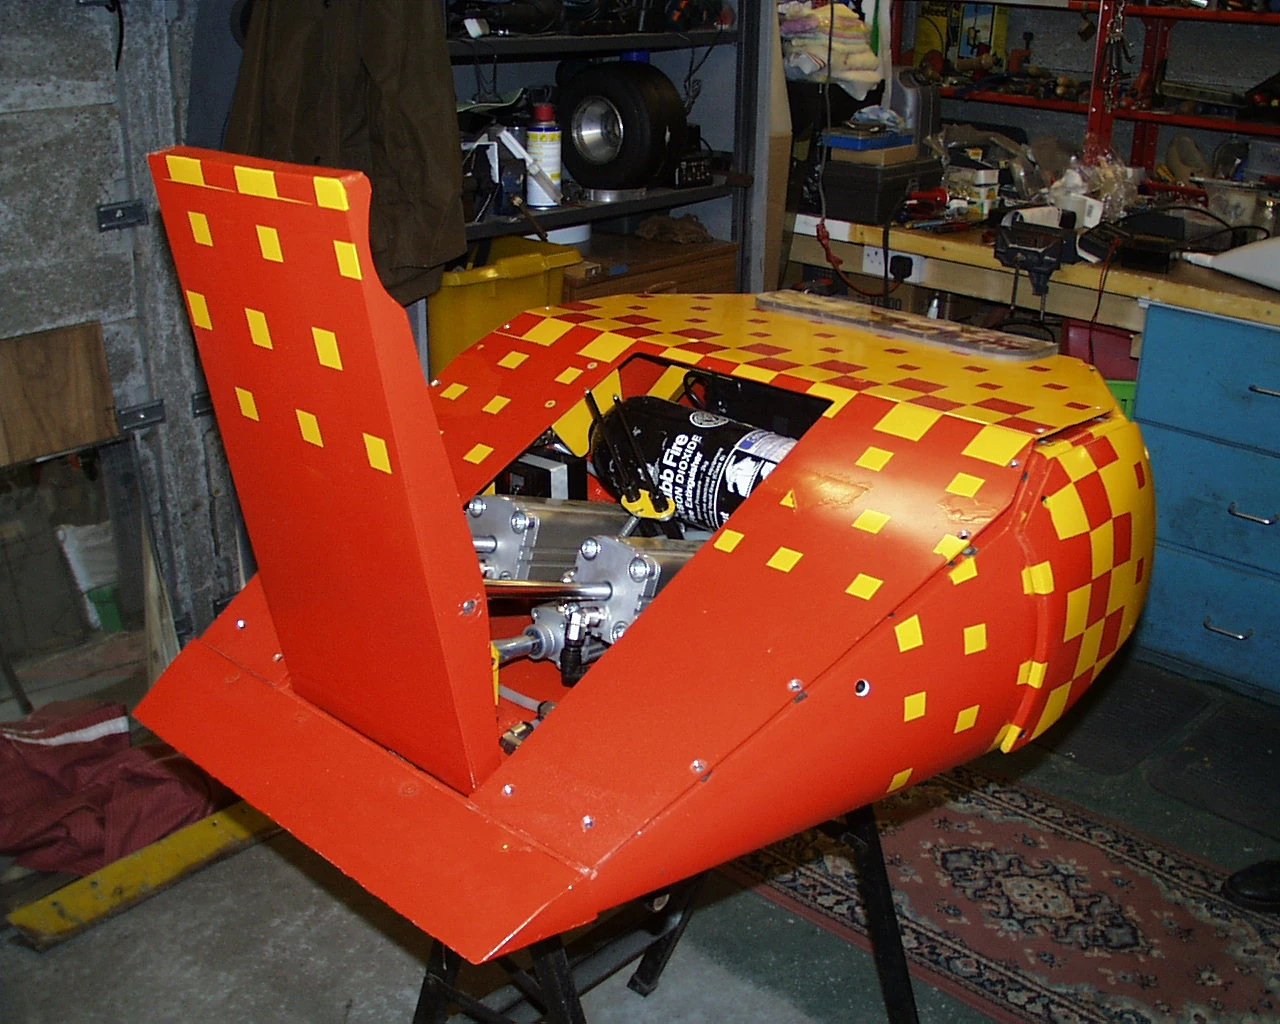
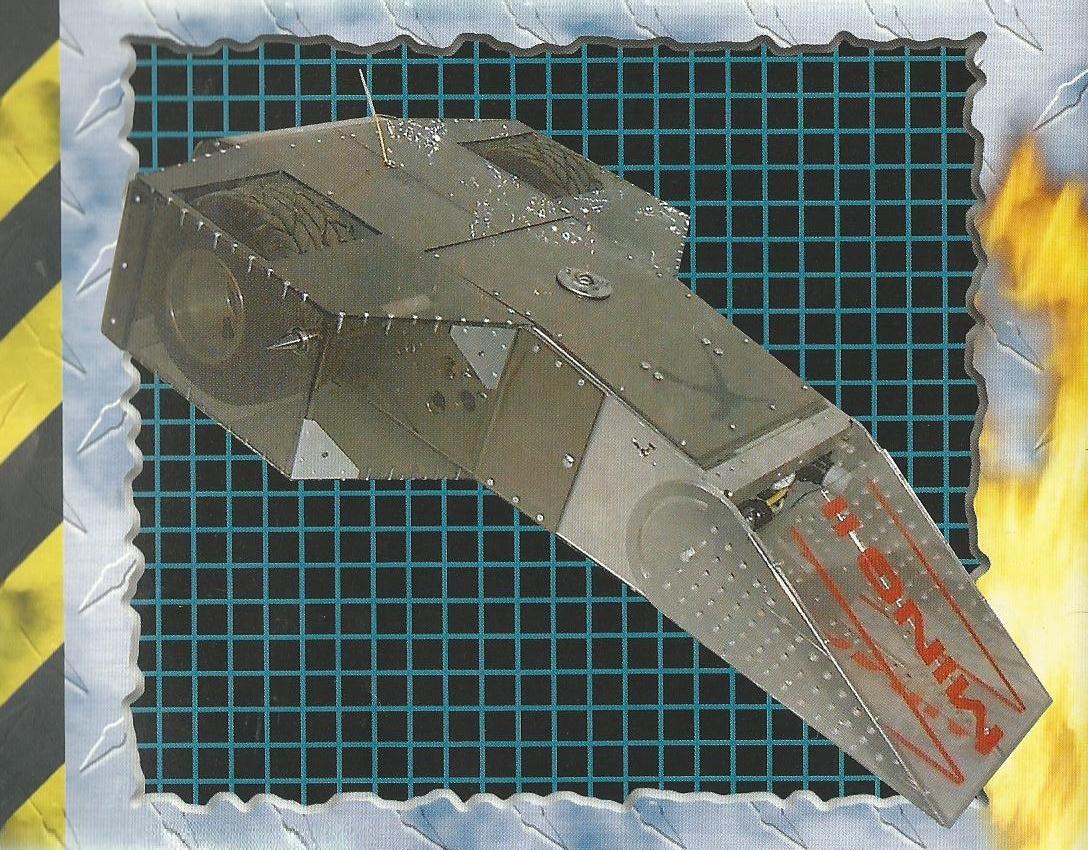
| Ming 2 | ||
| Weight | 80.0kg | |
| Dimensions | 1.03 x 0.28 x 0.78m | |
| Clearance | 0.02m | |
| Power | Electric powered motors | |
| Weapons | 2 x spikes and flippers | |
| Notes | Nose cone raises and lowers | |
| From: Bath | ||
| Team Members: Andrew Cotterell, Alexander Cotterell & Oliver Cotterell | ||
Eliminators
Firestorm 2 (5) vs Scar vs The Morgue


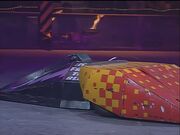
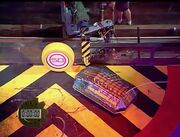
Firestorm 2 flips Scar.
Firestorm 2 immediately flipped Scar over, but it was invertible, so no harm was caused to the newcomers' machine. The Morgue drove at Firestorm 2, ramming it as it turned. Scar attacked The Morgue to little effect. Scar backed away, and Firestorm 2 drove underneath Scar and flipped it over again. Firestorm 2 then circled Scar before getting wedged between both Scar and The Morgue. The Morgue pushed Firestorm 2 around before breaking free and flipping Scar again. Firestorm 2 then got underneath The Morgue and flipped it against the side wall.
- "You can see no future for The Morgue. A grave position for them."
- — Jonathan Pearce

Firestorm 2 flips The Morgue onto the wall.
Firestorm 2 attacked Scar, but couldn't properly get it on the wedge, so just pushed it around. Sir Killalot then closed in on The Morgue and held them over the flames.
- "Ah, the cremation of The Morgue."
- — Jonathan Pearce
Firestorm 2 flipped Scar against the side wall as Sir Killalot righted The Morgue who attacked Firestorm 2, pushing the Durham machine back a bit before cease was called. Firestorm 2 and Scar went through as The Morgue had been immobile long enough to be eliminated.
Qualified: Scar and Firestorm 2
Diotoir (21) vs Bolt from the Blue vs Ming 2

Diotoir is immediately disposed of.
Diotoir had problems before the battle began and the team had to remove their top armour to fit in the weight restrictions. Their flipper wasn't working properly either and then finally broke down completely before the battle after the chain that powered it snapped. However, a last minute re-adjustment had the weapon positioned horizontally as an alternative ramming spear.
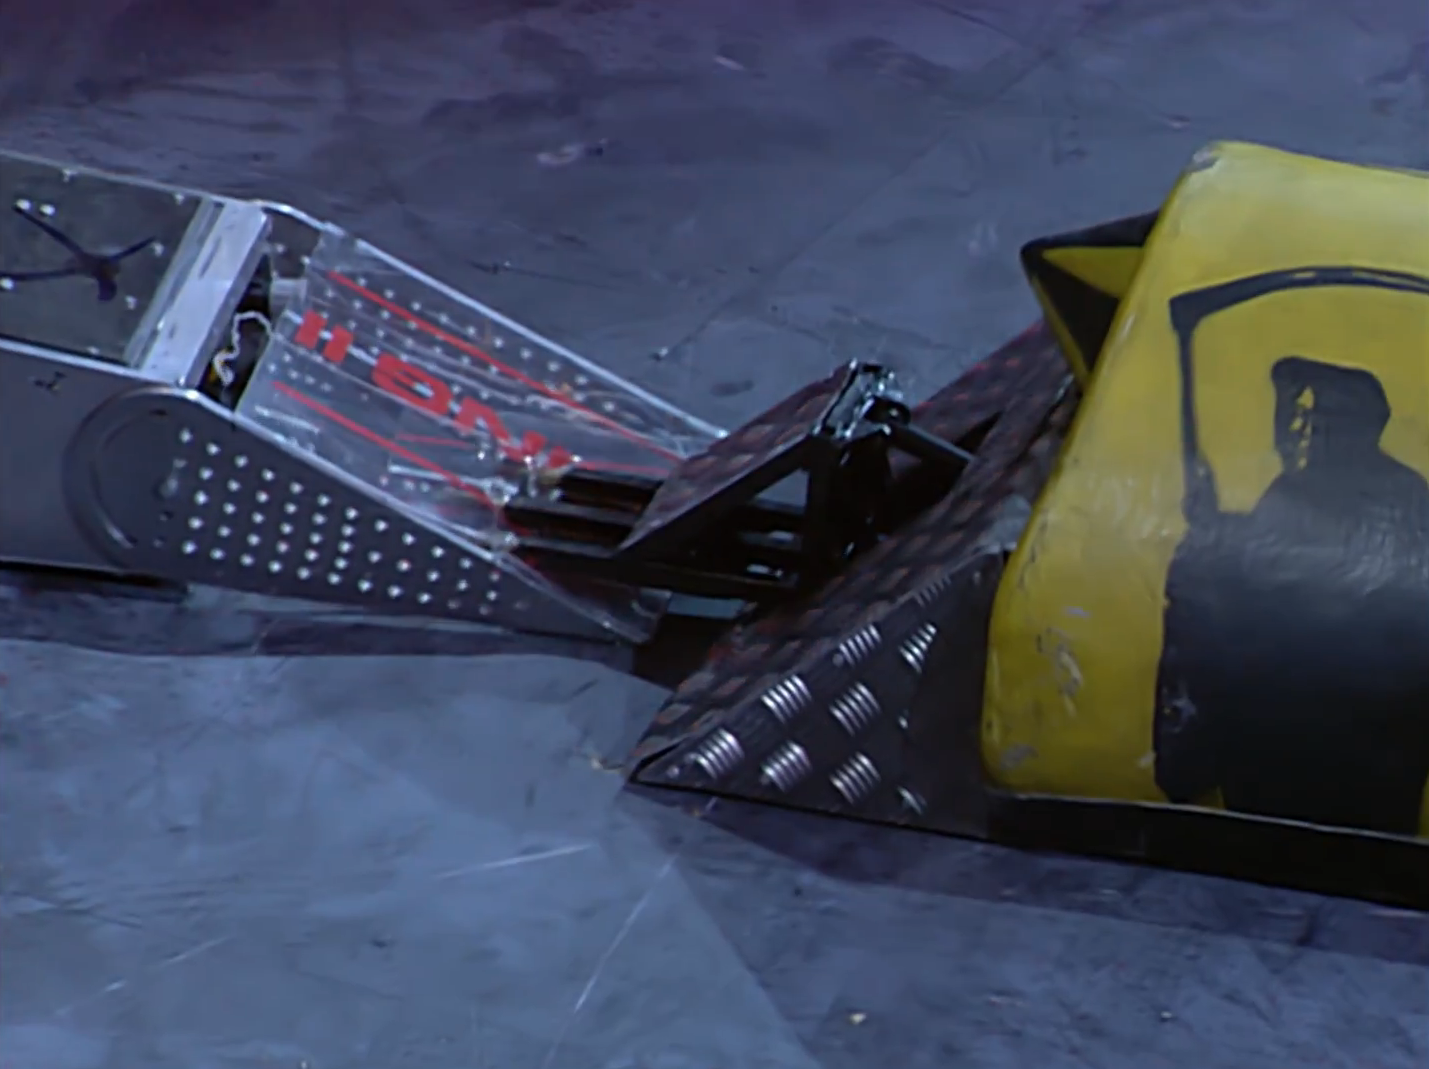
In the battle, Ming 2 immediately charged and slipped beneath the defenceless Diotoir and flipped the seeded machine over. Bolt from the Blue then attempted to flick the overturned robot using its lifting arm, but with no success. Instead it pushed Diotoir onto the flame pit. At the same time Ming 2 rammed into Bolt from the Blue from behind with the latter pressed against the arena side wall, and wedged up briefly before the pair separated.
- "Well you can see they're not right, are they?"
- — Jonathan Pearce as Diotoir is instantly toppled over
The disabled weapon meant that Diotoir couldn't self right, but the armourless top meant that it was spinning in tight circles. With Diotoir immobilised, Bolt from the Blue and Ming 2 moved away. Both robots then charged at each other, but only made a glancing bump. Strangely, Diotoir did not catch fire until Sergeant Bash came in with his flamethrower.
- "And they are on fire now! That's the end surely for Diotoir."
- — Jonathan Pearce
Cease was called soon after, and the 21st Seed was eliminated.
Qualified: Bolt From The Blue and Ming 2
Semi-Finals
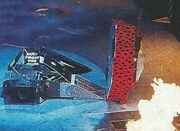
Firestorm 2 (5) vs Bolt From The Blue

One of the few real attacks of the battle.

Bolt from the Blue pushes Firestorm 2.
Firestorm 2 started off circling Bolt from the Blue making a few attacks at the side, but not getting underneath it due to its low ground clearance. Firestorm 2 then rammed Bolt from the Blue, with the latter firing its flipper at thin air. Bolt from the Blue managed to get underneath Firestorm 2, but Firestorm 2 escaped before it could be flipped. Bolt from the Blue managed to get underneath again and lifted its foe up, but didn't manage to tip it over.
- "Firestorm 2, surely not another seed to go out here?"
- — Jonathan Pearce
It got underneath a few more times, but never lifted Firestorm 2 up. Bolt from the Blue then tried pushing Firestorm 2 towards the pit, but struggled to get traction and Firestorm 2 escaped. Bolt from the Blue got underneath Firestorm 2 once more before cease was called.
- "That's too close for me to call. It goes to the judges - difficult one for them."
- — Jonathan Pearce
The judges gave Firestorm 2 the victory on aggression, although the crowd disagreed.
Winner: Firestorm 2
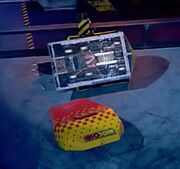
The Morgue vs Ming 2

The Morgue penetrate the armour of Ming 2 and begins to lift
Scar had to pull out of the second round due to a technical problem, so The Morgue was reinstated. The battle started with Ming 2 positioning itself wide to line up an attack. Ming 2 drove at The Morgue, but didn't get underneath it, with The Morgue able to push Ming 2 backwards. The Morgue drove at Ming 2, skirting past its wedge and onto the flame pit. After a short period of jostling, Ming 2 got underneath The Morgue and flipped it over. It appeared that The Morgue was going to stay flipped, but it slowly rolled back onto its wheels.
- "Oh goodness me, The Morgue just roly-poly, poly, over, and okay."
- — Jonathan Pearce as The Morgue slowly falls back onto its wheels
Ming 2 continued to attack, as it got underneath the front of The Morgue and drove it towards Dead Metal, before tipping it up, but The Morgue came down the right way up. The Morgue charged forwards, away from the CPZ, before both robots drove at each other, with The Morgue's front prongs stabbing the front of Ming 2.
- "Look at this! That's a real power battle, there."
- — Jonathan Pearce as The Morgue spikes Ming 2

Sir Killalot finishes Ming 2 off
The Morgue lifted Ming 2 up, but Ming 2 fought back and pushed The Morgue into Matilda. Matilda moved in, but both robots escaped unscathed. As the pit descended, Ming 2 drove at the side of The Morgue again, but missed with its attempted flip. Ming 2 then forced The Morgue into the arena wall, before The Morgue pushed Ming 2 backwards, with it appearing to break down after this attack.
- "There's no drive in those wheels; Andrew Cotterell is in trouble here."
- — Jonathan Pearce
Shunt axed Ming 2 and then pushed it into Killalot, who lifted Ming 2 up and pitted it.
Winner: The Morgue
Final
Firestorm 2 (5) vs The Morgue

Firestorm 2 flips The Morgue.
Firestorm 2 chased The Morgue around before finally getting underneath it and tipping it up, but not flipping it over. Firestorm 2 was soon able to get underneath and tip up The Morgue, but again failing to flip it. The Morgue then drove its opponent towards Dead Metal, but Firestorm 2 turned away in time. Firestorm 2 continued to probe away at The Morgue's sides, and after one more incomplete flip, Firestorm 2 was able to flip The Morgue into Matilda's CPZ.
- "That was a power spurt, and The Morgue literally flew through the air and into the CPZ."
- — Jonathan Pearce
The Morgue rolled onto its wheels again and escaped, but after a head on collision between the two, Firestorm 2 got underneath again and flipped it over, but again it simply rolled onto its wheels. Firestorm 2 tipped it up again before pushing The Morgue into the arena wall and using the flipper again but just could not get it over. The Morgue escaped and pushed Firestorm 2 into the arena wall, but it moved away, and the action drifted towards the pit.
- "Oh, look, the pit starts to descend, and they're dangerously close now, The Morgue, and they went down! No, Firestorm's driven in! Were the wedged on? They think they've won it, The Morgue!"
- — Jonathan Pearce

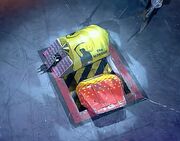
The controversial finish
The pit descended and Firestorm 2 pushed The Morgue towards it. The Morgue reversed onto the edge and appeared to get wedged on the top with its lifting forks, but Firestorm 2 turned round backwards and fell in underneath it. The Morgue team celebrated, thinking they had won, but the judges controversially ruled that The Morgue was stuck over the pit and therefore immobilised first and Firestorm 2 was declared the winner. Like Firestorm 2's previous decision, the crowd disagreed.
Heat Winner: Firestorm 2
- "You can stick your vegetarians and your old carnivores, 'cause we only eat metal, on Robot Wars!"
- — Craig Charles' sign-off
Trials

Spikasaurus comes within an inch of 50 points, but time runs out

Shunt was unable to push Destruct-A-Bubble properly

Scorpion is toppled off the ring
During the Fourth Wars, alongside the main competition, a Pinball Warrior Tournament and Sumo Basho Competition were also held. Unlike the similar competitions of the Third Wars, these trials featured successful qualifiers for Series 4. In between the first and second rounds of each heat, a Pinball run took place, and two sumo attempts took place in between Round 2 and the Heat Final in each of the first eight heats. For Heat C, the Pinball featured Spikasaurus and the Sumo featured Destruct-A-Bubble and Scorpion.
Pinball Warrior Tournament - Spikasaurus
Score: 40 points
Sumo Basho
- Destruct-A-Bubble - 11.91 seconds
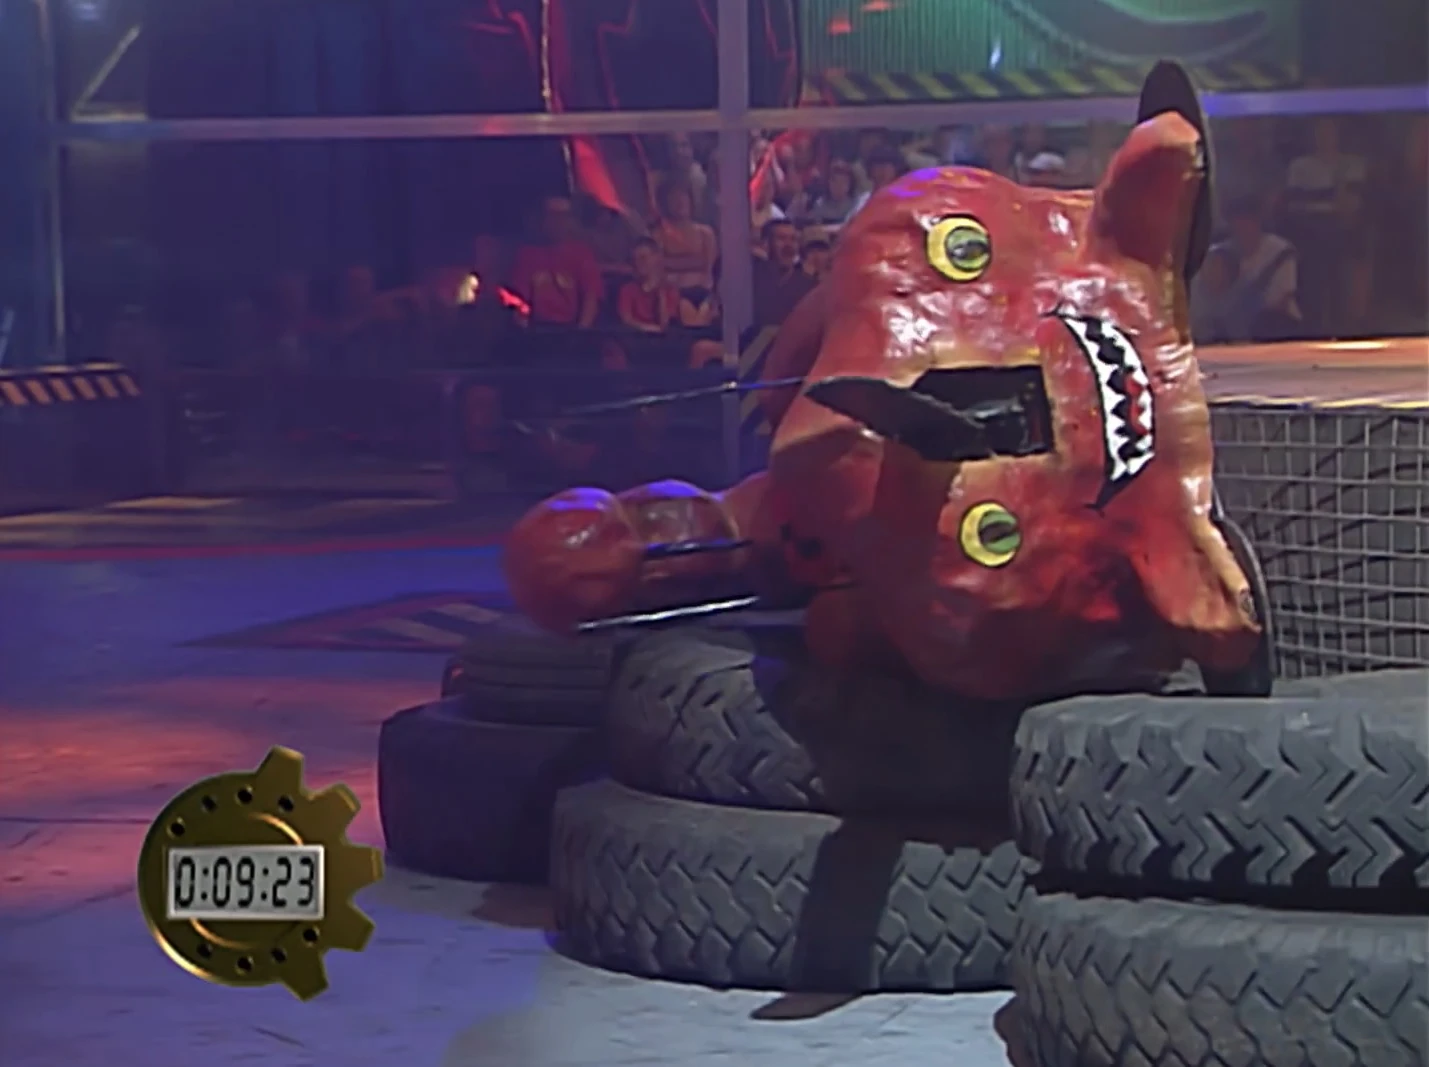
- Scorpion - 9.23 seconds
Trivia
- This was the first and only time that Team Nemesis fell in the first round of the main competition.
- Firestorm and Diotoir also both appeared in Robot Wars: The Third Wars/Heat O.
- The Morgue was the first robot in Robot Wars to be re-instated after elimination, after Scar had to retire.
- This makes The Morgue one of the few robots to lose twice in a heat in the classic series.
- No highlights from the two Heat Finalists' previous battles were shown before the Final.
| ||||||||||||||