- "The boys plan to pin opponents with Crackers and then smash them with the spinner of Smash!"
- — Jonathan Pearce introduces Crackers 'n' Smash
Crackers 'n' Smash, alternatively Crackers n' Smash or abbreviated to CnS, was a two-part clusterbot from Ripon, North Yorkshire which entered Series 9 of Robot Wars. In its series debut, it reached the Head-to-Head round, but was eliminated there after being unable to score enough points for a Heat Final place.
The robot initially qualified for Series 8, but withdrew before the competition started.
Design
- "A clusterbot is a machine that's made of two or more parts, which gives our opponent not just one problem to deal with, but multiple issues about how you fight something that's in two places at once."
- — Alex Botwright explains the reasoning behind Crackers 'n' Smash

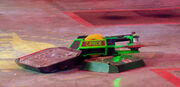
Crackers 'n' Smash on the turntable
Crackers 'n' Smash consisted of a pair of four-wheel drive box-shaped robots with front wedges and two different weapons. Both were built over the course of three months, at a total cost of £8,000.
Crackers (Kawasaki green) weighed 50kg and featured a compact front-hinged lifting arm which could double as a clamp. It was armoured in 5mm of HARDOX, and the lifter was powered by two 3.7Kw motors.
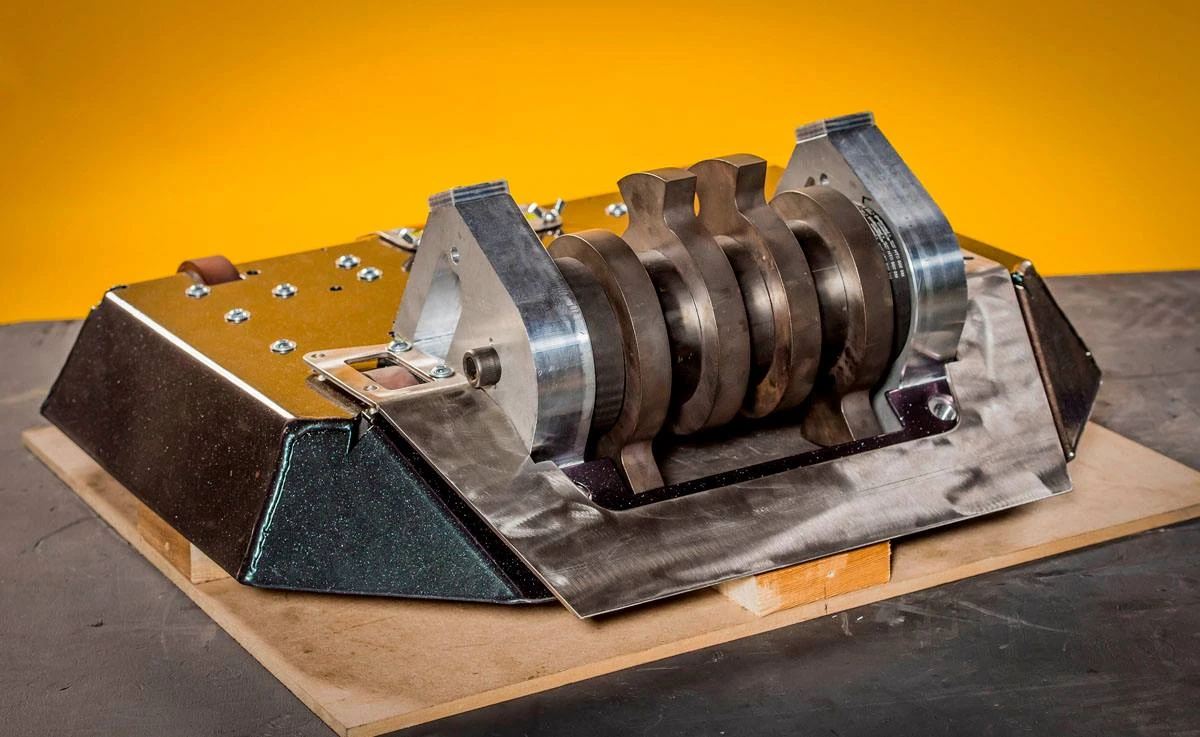
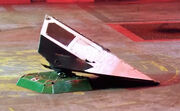
Official photo of Smash
Smash (pearlescent purple) weighs 60kg, and featured a custom-designed 12kg drum-like spinner with four interconnected steel discs, spinning at 8000rpm. Its armour consisted of 3.6mm hardened steel with a 5mm stainless steel front wedge. The robot was four-wheel driven, with all four wheels being exposed on top, despite those at the front being unable to reach the floor when the robot was inverted.

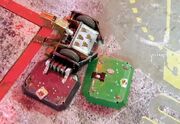
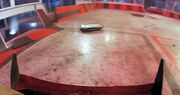
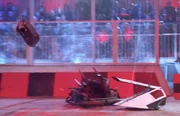
Crackers 'n' Smash are loaded into the arena
Both Crackers and Smash used custom VESC brushless speed controllers co-developed with Rory Mangles of Team Nuts. These are high-amperage versions of the VESC controllers designed by Benjamin Vedder, modified for use in robot combat. Modifications over Vedder's original design include changes to the current shunts, wider higher power tracks and improved mounting points for higher amperage and improved current handling over the standard VESCs.[2]
Due to rule changes implemented for Series 9, each half of Crackers 'n' Smash could still fight individually if the other was immobilised during battles. As a result, both halves had to be immobilised in order for the whole robot to be eliminated.
Robot History
Series 8


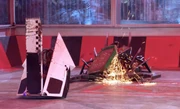
Conker 3 destroys a monitor in the team's VT
Before its televised debut, Crackers 'n' Smash initially qualified for Series 8. However, the robot was not completed in time for its first battle, and would not be finished for a further twelve hours. As such, Crackers 'n' Smash withdrew, but footage from the team's VT was still used in the opening sequence of the show, where the team's featherweight Conker 3 destroyed a monitor. David Weston also remained on-set to assist with the repairs of Chompalot.
Series 9
- "Entering Robot Wars was a childhood dream... and now I'm about to become your worst nightmare."
- — Alex Botwright
Crackers 'n' Smash made its combat debut in Episode 5, where it faced Series 8 runner-up Carbide alongside fellow newcomers Meggamouse and Trolley Rage in its Group Battle. Originally, it was intended to face Apollo, Coyote and Ms Nightshade[3], but the withdrawal of Point Blank caused Crackers 'n' Smash to be moved into its new group battle.
- "...and fascinating to see how the clusterbot Crackers 'n' Smash do here..."
- — Jonathan Pearce during Crackers 'n' Smash's first battle
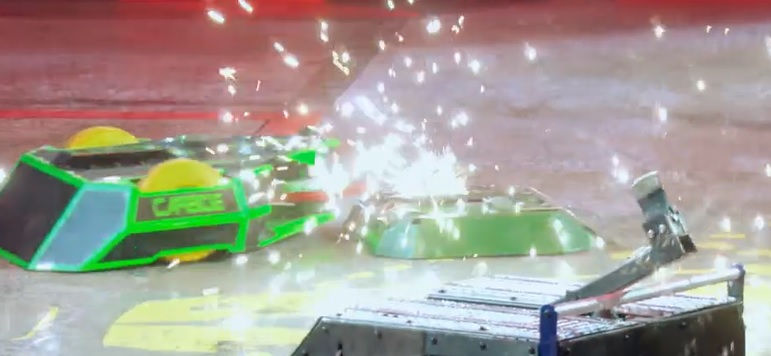
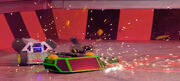
Sparks fly as Crackers sustains an attack from Carbide
At the start, Crackers immediately drove across the arena, where a bump from Meggamouse sent it careering onto the Flame Pit. Crackers remained stuck there as Smash darted over the closed pit and was hit from the front by Carbide's bar spinner. The impact warped Smash's front wedge, leaving it trailing as Smash reversed into Carbide again and pushed Meggamouse onto the arena spikes. Meanwhile, Crackers raised its lifter as Trolley Rage pushed it off the Flame Pit, and dodged Carbide as it hit Smash a few more times. Smash sped over the Flame Pit as it drove out of the empty CPZ, its wedge finally breaking off as it caught the edge of the hazard. Crackers sat in the middle of the arena close to the immobilised Trolley Rage and Meggamouse's minibot, Charles, where it and Meggamouse attempted to push Trolley Rage back.
- "Ahh, running away! Running away! Ahh!"
- — David Weston as Smash dodges Carbide
Crackers escapes as Carbide destroys Meggamouse's wheel
Smash continued driving around the arena and dodging Carbide in the background, before Crackers was attacked by Carbide. Sustained blows from Carbide caused sparks to fly and Crackers' lifter to be ripped off, but Crackers survived, and attempted to push Meggamouse while the pit descended. Smash withstood a few more blows from Carbide's spinner before being spun away, but escaped as Crackers lingered over the Floor Flipper and drove into Meggamouse again. At the same time, Carbide destroyed Meggamouse's wheel, before Smash was again chased by Carbide across the arena and pushed Charles into the pit just as 'cease' was called. As a result, Crackers 'n' Smash progressed to the Head-to-Head round along with Carbide, despite both robots requiring extensive repairs to their weapons; in addition to the warped wedge, Smash had also sustained several gashes to its weapon mount.
- David Weston: "This is fixable."
- Alex Botwright: "This is fixable."
- David Weston: "Right, let's get cracking!"
- — Team Conker assess the damage inflicted to Crackers 'n' Smash

Smash is grabbed and pushed by Coyote...


...before sustaining damage from Dead Metal
In its first Head-to-Head, Crackers 'n' Smash faced fellow newcomer Coyote. Smash immediately darted towards Coyote as Crackers turned towards the Flame Pit, but was grabbed by Coyote and pushed into the wall. Coyote dragged, spun and pushed Smash into Dead Metal, whose saw grazed Smash's weapon mount as Crackers attempted to free its other half. Both parts escaped as Dead Metal let go of Smash, before Smash slammed into Coyote and in turn pushed it into Dead Metal. However, it briefly got caught by the House Robot in doing so, but Crackers and Smash soon retreated to the middle of the arena, and gathered around Coyote after it pressed the Arena Tyre and activated 'Rogue House Robot' mode. Dead Metal charged into Smash once again, and pushed it onto the Flame Pit despite Crackers' attempt to push him away.
- "Very low machines, you can see the way they're slipping away at times, but [Dead Metal's] got [Smash] here now."
- — Jonathan Pearce observes Crackers 'n' Smash's low height as Dead Metal grabs Smash again

Crackers 'n' Smash attack Coyote


Crackers survives as Coyote lays immobile
Smash quickly drove away as Dead Metal released his grip, before accidentally driving over Crackers as the latter rammed into and under Coyote. Both Crackers and Coyote became stuck together as a result, so Smash pressed the Arena Tyre, and in spite of 'Rogue House Robot' having already once been enabled, Matilda came out of her CPZ to hit Coyote twice. The attack briefly rendered Coyote immobile on one side, but Crackers 'n' Smash persevered, with both halves ramming, bumping and pushing Coyote around. Smash eventually reversed Coyote into an empty CPZ, where it was left immobile, but drove itself onto the Flame Pit again seconds later, and remained stuck there as the countdown timer began. Since Crackers was still moving around the arena, half of Crackers 'n' Smash was still mobile, securing the clusterbot victory and three points as a result.
- Ian Botwright: "Hitting the tyre, not getting the pit – twice - getting a House Robot, get the House Robot coming out at you. It's... I'm sorry..."
- Alex Botwright: "It's terrifying."
- Ian Botwright: "It’s terrifying."
- Alex Botwright: ""Oh dear, there goes my robot!""
- Ian Botwright: "Yeah."
- — Team Conker's verdict on 'Rogue House Robot'
This enabled Crackers 'n' Smash to share joint-first on the leaderboard with its next opponent, Carbide. Before the battle, Team Conker removed both Crackers and Smash's weapons to prevent them being damaged by Carbide's spinner, as well as to make them low enough to prevent the latter from causing significant damage elsewhere.
- "We're going in without the weapons. We know they're going to get torn off, so it's a pure three-minute survival match."
- — David Weston explains Team Conker's decision to remove Crackers 'n' Smash's weapons
However, this action contravened the active weapons rule, and not realising this until both robots were in the arena, Team Conker informed the production crew of their decision, and to withdraw Crackers 'n' Smash from the battle. Nevertheless, when asked by the production crew, Team Carbide requested that the battle should go ahead anyway.

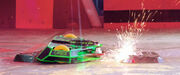
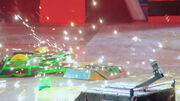
Sparks fly as Carbide's spinner hits Smash's wedge

Smash pushes Carbide off Crackers


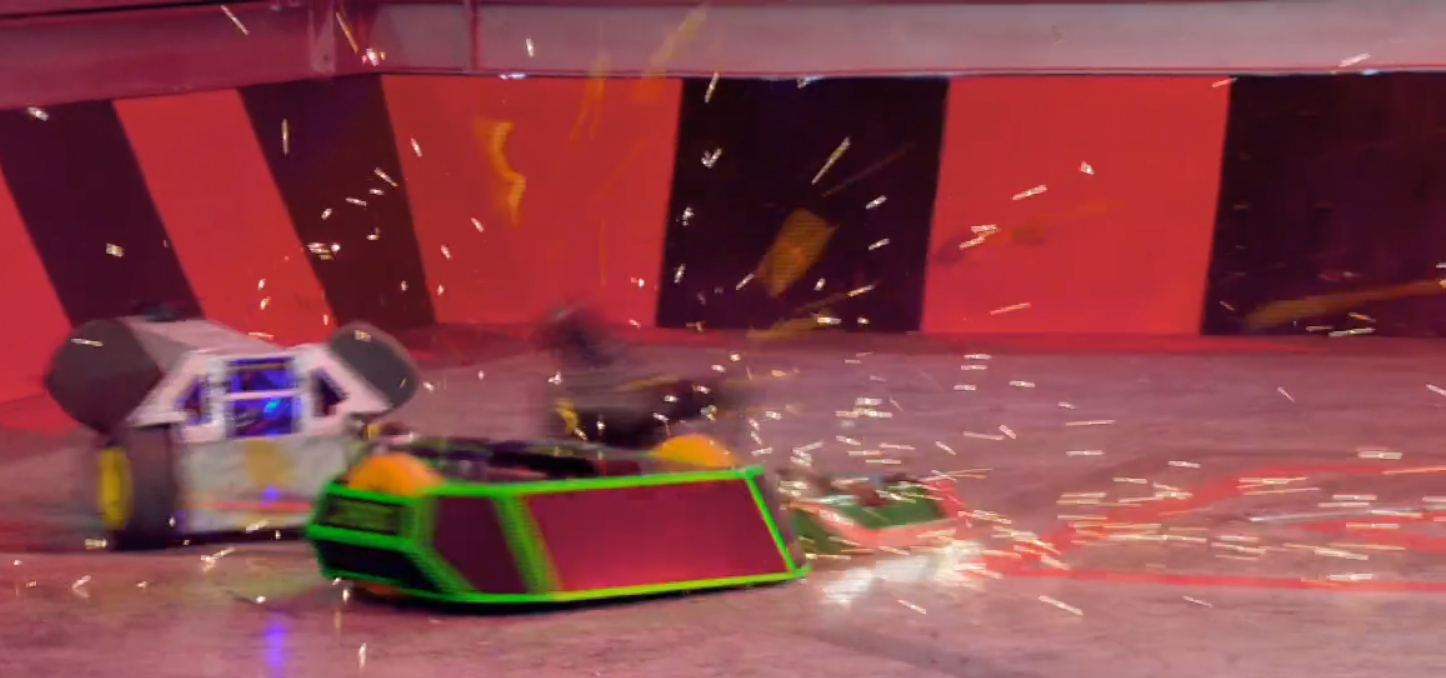
Carbide sends Smash hurtling into the wall
As the battle began, Smash immediately drove into Carbide, with both robots sustaining hits from Carbide's spinner as they attempted to surround it. In doing so, Crackers momentarily got underneath Carbide, but Carbide repeatedly hit Smash's replacement wedge, sending sparks and shrapnel flying as Smash turned Carbide around and drove itself onto the Floor Flipper. Smash was flipped over as a result, and used its inverted wedge to push Carbide off Crackers. Both halves survived more blows from Carbide's spinner as David Weston reported control problems, with Smash hitting the Arena Tyre and activating the pit as he did so. Crackers ‘n’ Smash withstood several more attacks from Carbide, before Smash was sent spinning violently into the wall by Carbide. Upon impact, Smash broke off a wall panel and flew up against the bulletproof panels, landing on Shunt's scoop just before Carbide hit Crackers again. Immediately, 'cease' was called, and the battle was stopped for safety reasons while repairs to the arena were carried out.
- "Stay out of trouble, Crackers 'n' Smash; you didn't manage it. And again – whoa! Wow, away goes Smash!"
- — Jonathan Pearce summarises Crackers 'n' Smash's performance as replays of Carbide's battle-stopping attack are shown

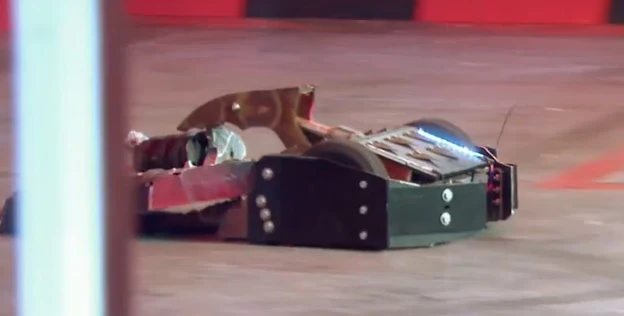
Smash after smashing the arena wall
While the repairs were completed, Team Conker declared that they would formally forfeit the battle to Carbide, in an effort to make sure that both halves of Crackers 'n' Smash did not sustain too much damage ahead of their next battle. In spite of Carbide's attacks on their bodyshells, however, both Crackers and Smash's chassis and drive trains remained intact throughout the battle.
- "One brick of a robot! The drive system’s fine. Mechanically, the entire robot’s fine, which also means... we can fight Apollo, and we can fight Apollo properly."
- — Alex Botwright assesses the integrity of Crackers 'n' Smash's chassis and internals
This was crucial in enabling Crackers 'n' Smash to be ready in time to fight defending champion Apollo in its third – and last – Head-to-Head. For this battle, Team Conker finally succeeded in getting both halves' weapons working since the Group Battles, and were optimistic about their chances of reaching the Heat Final.
- "So we're either in for the high jump or we could potentially bring about the biggest upset by knocking out the current champions."
- — David Weston before the Head-to-Head against Apollo

Crackers gets underneath Apollo...

...before Apollo throws it towards Dead Metal
This time, Crackers approached Apollo first, dodging Apollo's initial charge and momentarily getting underneath it. It pushed Apollo around the arena as the latter fired its flipper to free itself, before Smash drove up Apollo's wedge and was pushed back close to the wall. In response, Smash was pushed by Apollo towards Dead Metal, with Apollo reversing over Crackers while Smash pressed the Arena Tyre. The pit descended, with Crackers again attempting to push Apollo while Smash darted behind and was caught by Dead Metal. Crackers was eventually thrown into Dead Metal's saw by Apollo, and it was left unable to self-right as Dead Metal charged into it, sending more sparks flying as his saw made contact with Crackers' underside.
- "And Crackers, I think, is over and out."
- — Jonathan Pearce after Crackers is flipped by Apollo

Apollo sends Smash into orbit
Apollo proceeded to throw Smash around the arena several times, with Smash struggling to drive away on its back as Dead Metal grabbed and pushed it again. Crackers was briefly nudged by Apollo as it backed into the Arena Tyre and activated 'Rogue House Robot' mode, while Dead Metal sliced into the inverted Smash's side, sending sparks flying everywhere as he did so. However, Smash escaped, and survived to a Judges' decision as Apollo pushed and threw it against the wall twice more. The Judges declared Apollo as the winner, leaving Crackers 'n' Smash with no points as a result. This ensured that Crackers 'n' Smash finished third on the Head-to-Head leaderboard with three points, which was not enough to prevent it from being eliminated from Series 9.
- Ian Botwright: "Had a great fight there. Fantastic fun."
- Alex Botwright: "That was... surviving three minutes with Apollo was... frankly surprising. I'm quite glad in some ways 'cause I don’t have to fight Carbide again."
- — Ian and Alex Botwright of Team Conker on Crackers 'n' Smash's last battle of Series 9
Results
| CRACKERS 'N' SMASH - RESULTS | ||
| Series 9 | ||
| Series 9 - UK Championship Round 2, Third Place | ||
| Episode 5, Group Battle | vs. Carbide, Meggamouse, Trolley Rage | Qualified |
| Episode 5, Head-to-Heads | vs. Coyote | Won via KO (3 points) |
| Episode 5, Head-to-Heads | vs. Carbide | Forfeited (0 points) |
| Episode 5, Head-to-Heads | vs. Apollo | Lost (0 points) |
Wins/Losses
- Wins: 2
- Losses: 2
Series Record
| Series | Crackers 'n' Smash Series Record |
|---|---|
| Series 1-7 | Did not enter |
| Series 8 | Withdrew |
| Series 9 | Heat Round 2, Third Place |
| Series 10 | Did not enter |
Outside Robot Wars


During Robot Wars' 12-year hiatus, Alex Botwright and Ian Botwright began competing with featherweights on the live events circuit under the name Team Eventorizon. They have competed with three versions of Conker, all four-wheel drive robots with vertical spinning weapons; Conker and Conker 2 are armed with flywheels, while Conker 3 features an egg beater spinner. In 2016, Conker 3 won the Insomnia 58 featherweight event, beating Drumroll in the final after throwing it out of the arena. Team Eventorizon also competed with Binky (not to be confused with the Series 3 competitor of the same name) which is armed with a vertical flywheel, and Sam Price's featherweight Hatchet, armed with an axe.


Meanwhile, team member David Weston fights in the live event circuit too, primarily with featherweights and antweights, under the name Team Hell. His featherweights are Hells Angel, built in 2007 which is a black box-shaped featherweight armed with an axe and he also fights with Satanix, a two-wheel driven ramming robot with two front wedge prongs andrear-mounted ramming spikes, which was later upgraded to become Satanix 1.666. Team Hell also fight with the following antweights, Baby Hell which is an antweight version of Hells Angel which is armed with an axe, F.I.N. (which stands for Four Inch Nails) which is a full-body thwackbot which gets its name from the four inch nails that it uses as attachments to the robot and also Stewie, an antweight armed with a flipper which is named after Stewie Griffin, a main character from the American animated television series Family Guy. He also fights with a beetle weight called Headbanger which is armed with an electric axe.
In 2009, Weston was also involved in the build of a joint team project of Team Hell, Team Die Gracefully Robotics and Team Godzilla where they built Cabrakan, a two-wheel driven robot armed with a stabbing chisel which won the Best Promising Newcomer Award at the end of the year. At the start of 2010, David Weston managed to acquire Cabrakan and built a new version of it for the UK Championships, known as Cabrakan 2. This version had a front-mounted lifter, similar to that of the original Morgue, but this version suffered from build issues and did not enjoy much success.
References
- ↑ https://www.facebook.com/586161301592950/videos/vb.586161301592950/600238343518579/?type=3&theater Crackers n Smash - First Drive Test
- ↑ http://www.fightingrobots.co.uk/threads/13034-heavyweight-brushless-speed-controllers-vescs-for-sale-hi-amperage-version?highlight=VESC
- ↑ https://www.reddit.com/r/robotwars/comments/68aw0w/so_it_looks_like_tr2_were_only_a_reserve_in/
Photo credits: CnS - Team Conker Facebook page
External Links
| ||||||||||||||||||||||||||||||||
| |||||||||||||||||||||||||||||||||||